How to Patch Concrete Without Removing Old Concrete: When It Works and How to Do It
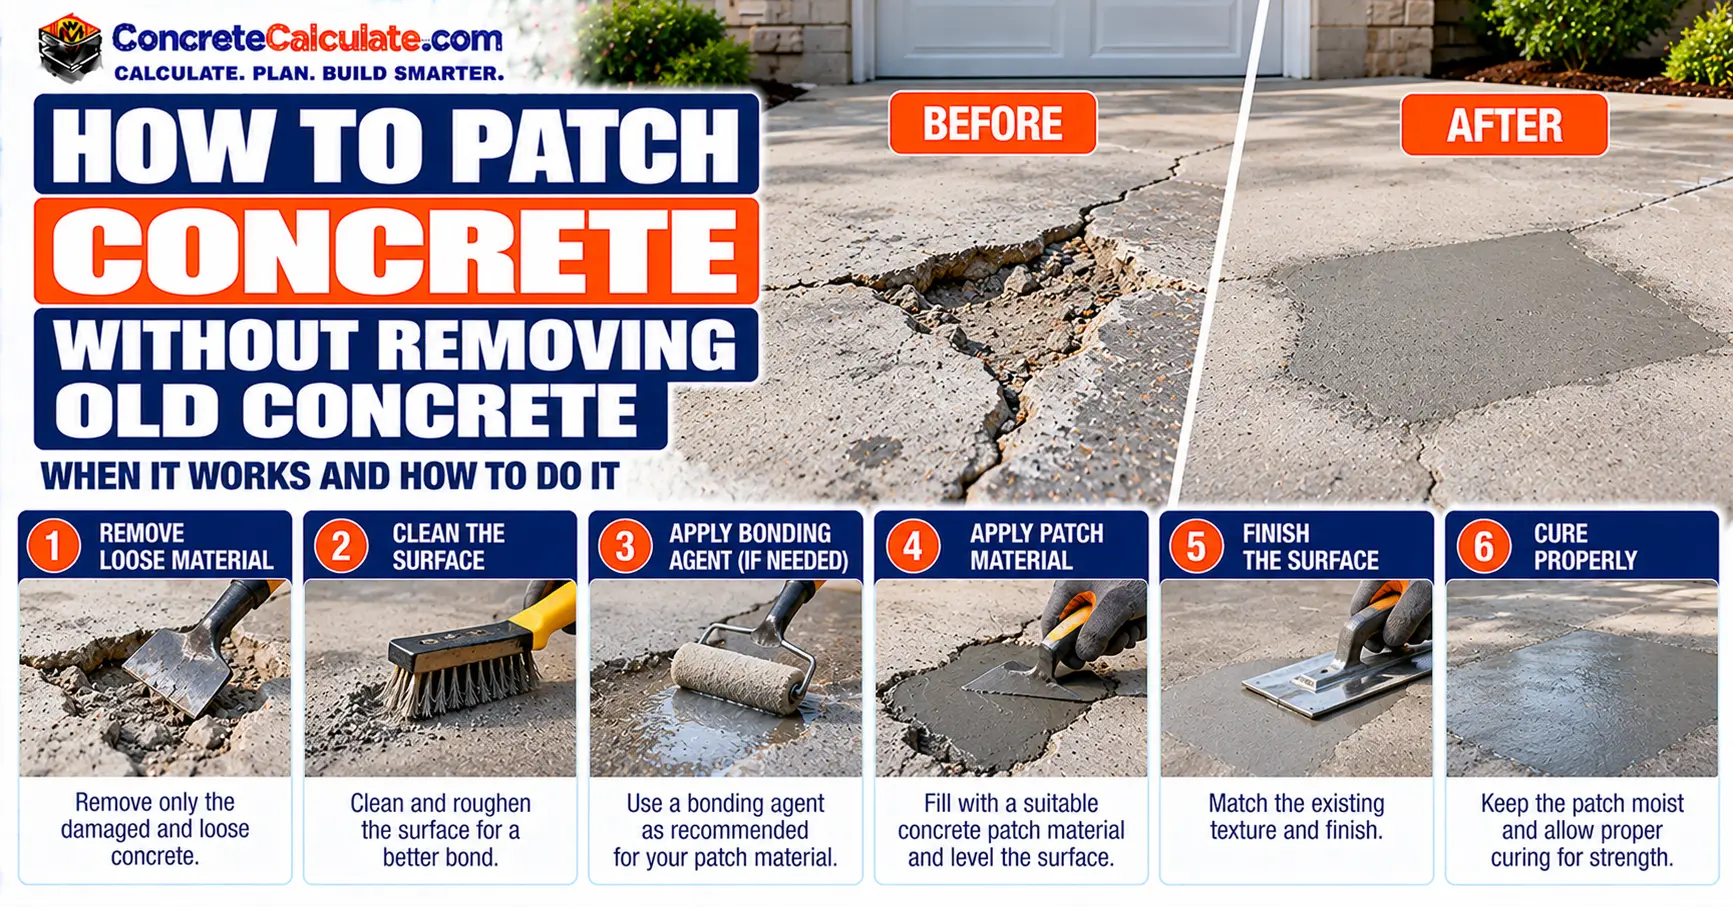
How to Patch Concrete Without Removing Old Concrete: When It Works and How to Do It
Learn when sound old concrete can stay in place, how to remove only the damaged material, prepare the surface, choose a patch material, and avoid common bond failures.
Can You Patch Concrete Without Removing the Old Concrete?
Yes, if the remaining old concrete is sound, stable, and clean. A localized patch usually does not require demolishing the whole slab.
Deteriorated material inside the repair area still has to come out. The idea is to remove the damage, not the whole slab.
Repair or Replace at a Glance
Patch: small, localized damage in an otherwise sound, stable slab.
Resurface: shallow, widespread surface wear on a sound slab.
Replace or investigate: movement, settlement, deep or structural damage.
What Does “Without Removing Old Concrete” Actually Mean?
The phrase is common search language, but it can be misleading. It does not mean spreading patch material over loose, cracked, hollow, or dirty concrete.
- Preserving the sound slab: keeping all the concrete that is stable and intact.
- Removing loose material locally: cutting out only what is unsound or contaminated.
- Resurfacing over intact concrete: a separate repair for broad, shallow wear.
- Covering damage without preparation: usually not a durable repair.
ACI PRC-546-23 treats repair as a sequence of condition assessment, concrete removal, surface preparation, material selection, and execution. The goal is to keep sound concrete and remove only what breaks the bond.
Preserving old concrete means keeping the sound portion of the slab, not covering unsound material.
When Is a Concrete Patch a Good Option?
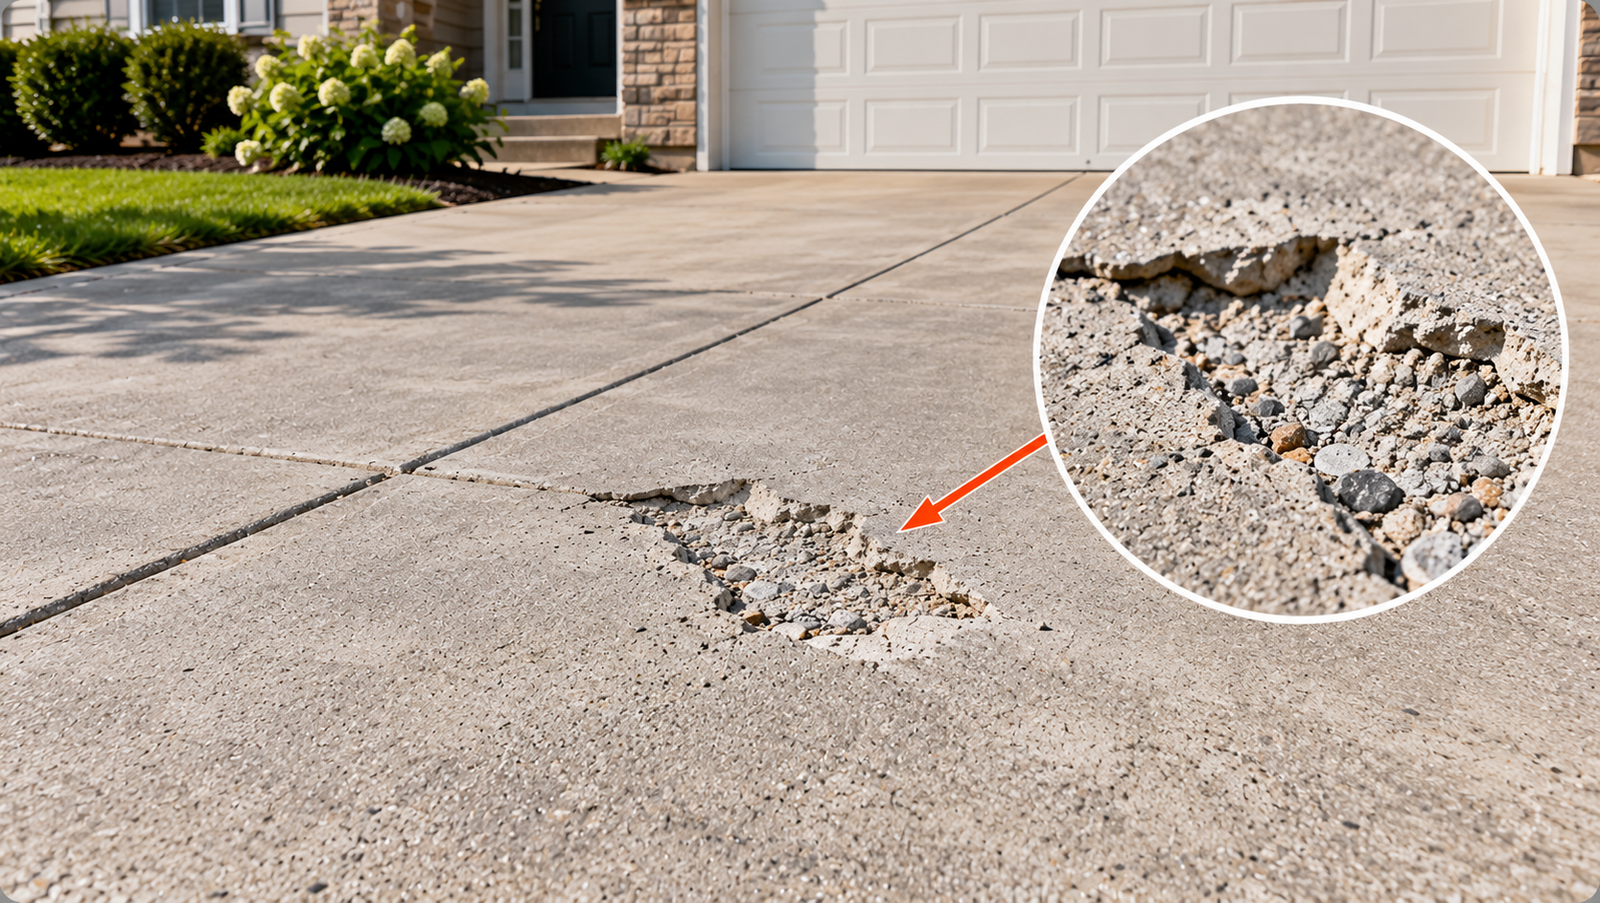
Patching suits small, localized damage in a slab that is otherwise sound. Typical cases include:
- A small localized spall.
- A chipped edge.
- Shallow surface loss.
- Minor scaling, once weak material is removed.
- A broken step corner.
- A small nonstructural cavity.
- Localized garage floor damage.
The key distinction is that the damaged surface must be repairable while the slab beneath stays sound and stable.
When Should You Not Patch Over Existing Concrete?
Some conditions call for something other than a patch. Covering them hides the symptom and leaves the cause in place.
- Active settlement or a rocking slab.
- Widespread delamination.
- Severe dusting.
- Deep deterioration.
- Structural cracks.
- Corrosion-related spalling.
- Frost heave.
- Severe oil contamination.
- Unstable joint edges.
If any of these apply, diagnose the cause first. A patch will not fix settlement, active movement, or inadequate support.
Patch vs. Resurface vs. Replace
The right choice depends on how much damage there is, how deep it goes, and whether the slab moves. Use the table, then the decision tree below it.
| Existing condition | Patch | Resurface | Replace / investigate |
|---|---|---|---|
| Small localized spall | Good candidate | Usually unnecessary | Rarely |
| Several shallow surface defects | Possible | Often better | If substrate is unsound |
| Broad scaling | Multiple patches inefficient | Often appropriate if slab is sound | If deep/widespread deterioration |
| Active settlement | Poor choice | Poor choice | Correct underlying problem |
| Widespread delamination | Poor choice | Poor choice until removed | More extensive repair |
| Severe structural crack | Poor choice | Poor choice | Professional evaluation |
| Local chipped step edge | Often suitable | Not needed | If step is unstable |
| Heavily contaminated surface | Not until cleaned | Not until cleaned | Depends on depth |
Choosing between patching, resurfacing and replacement depends on the extent and cause of the damage.
How to Tell Whether the Old Concrete Is Sound
Sound concrete is stable, hard, and free of obvious defects. These signs suggest the old concrete is ready to take a patch:
- No loose fragments.
- No hollow-sounding area around the damage.
- No powdery surface.
- No rocking or movement.
- No oily contamination.
- No cracks that open and close.
FHWA describes sounding with a steel rod, ball-peen hammer, or dragged chain. Sound concrete gives a clear ring and deteriorated concrete gives a dull response.
Sounding helps find weak areas, but visual inspection and tapping cannot certify structural adequacy.
What Types of Concrete Damage Can Be Patched?
Many localized defects can be repaired with the rest of the slab left in place. The table shows what usually works and what has to happen first.
| Damage type | Can sound old concrete remain? | Main condition |
|---|---|---|
| Local spall | Yes | Remove unsound cavity material |
| Small popout | Yes | Sound surrounding concrete |
| Chipped corner | Yes | Stable edge/substrate |
| Surface scaling | Often | Remove weak layer first |
| Delaminated patch | Yes locally | Remove full delaminated zone |
| Dusting surface | Sometimes | Surface must be strengthened or removed |
| Active crack | Not by rigid patch alone | Movement must be addressed |
| Structural deterioration | Depends | Engineering assessment |
Structural defects are not simple patches. Treat them as engineering questions.
Can You Patch Spalled Concrete Without Removing the Whole Slab?
Yes, when the deterioration is shallow and the surrounding concrete is sound. Localized spalls are classic partial-depth repair candidates. If you are unsure what you are looking at, read Concrete Spalling.
FHWA’s partial-depth repair concept for pavements is a useful model: remove the deteriorated concrete, clean the cavity, and fill it with a compatible material. FHWA limits those repairs to the top third of a pavement slab and sets minimum repair sizes.
Those pavement-specific limits are not rules for residential slabs. Use them as a concept, and follow your product instructions.
Can You Patch Over Scaling or Flaking Concrete?
Only after the loose surface material is removed. Patching over flaking concrete lets the flakes lift the patch with them. See Concrete Scaling for the cause.
If scaling is broad but shallow and the slab is sound, resurfacing is usually better than dozens of individual patches. The Concrete Resurfacing Guide explains how.
Can You Patch Hollow or Delaminated Concrete?
No durable patch can sit on a hollow, separated layer. FHWA notes that weakened planes can exist with no sign at the surface, so sound the area and mark everything that rings dull. See Concrete Delamination for detection.
Remove the whole delaminated zone back to sound concrete, then patch the cavity. A repair that stops partway leaves hollow concrete beside it that fails next.
Can You Patch Over Cracked Concrete?
It depends on what kind of crack you have. A rigid patch over a crack that moves will crack again or pop out.
- Stable shrinkage crack near a patch: usually repaired separately.
- Active moving crack: find and address the movement first.
- Joint: keep it working, not filled with patch material.
- Structural crack: needs professional assessment.
FHWA calls for a compressible insert where a repair meets a working joint or crack. Without it, expansion makes the adjacent concrete push on the patch and it can pop out. For crack methods, see How to Fix Cracked Concrete.
Can You Patch Oil-Stained or Painted Concrete?
Only after bond-breaking contamination is removed. Dirt, oil, grease, curing compounds, paint, sealers, and adhesives all prevent a patch from gripping. Start with How to Remove Oil Stains From Concrete.
FHWA directs that exposed faces be sandblasted free of loose particles, oil, dust, and other contaminants before patching. Coatings generally need to be removed or confirmed compatible by the patch manufacturer.
How Much Old Concrete Should You Remove?
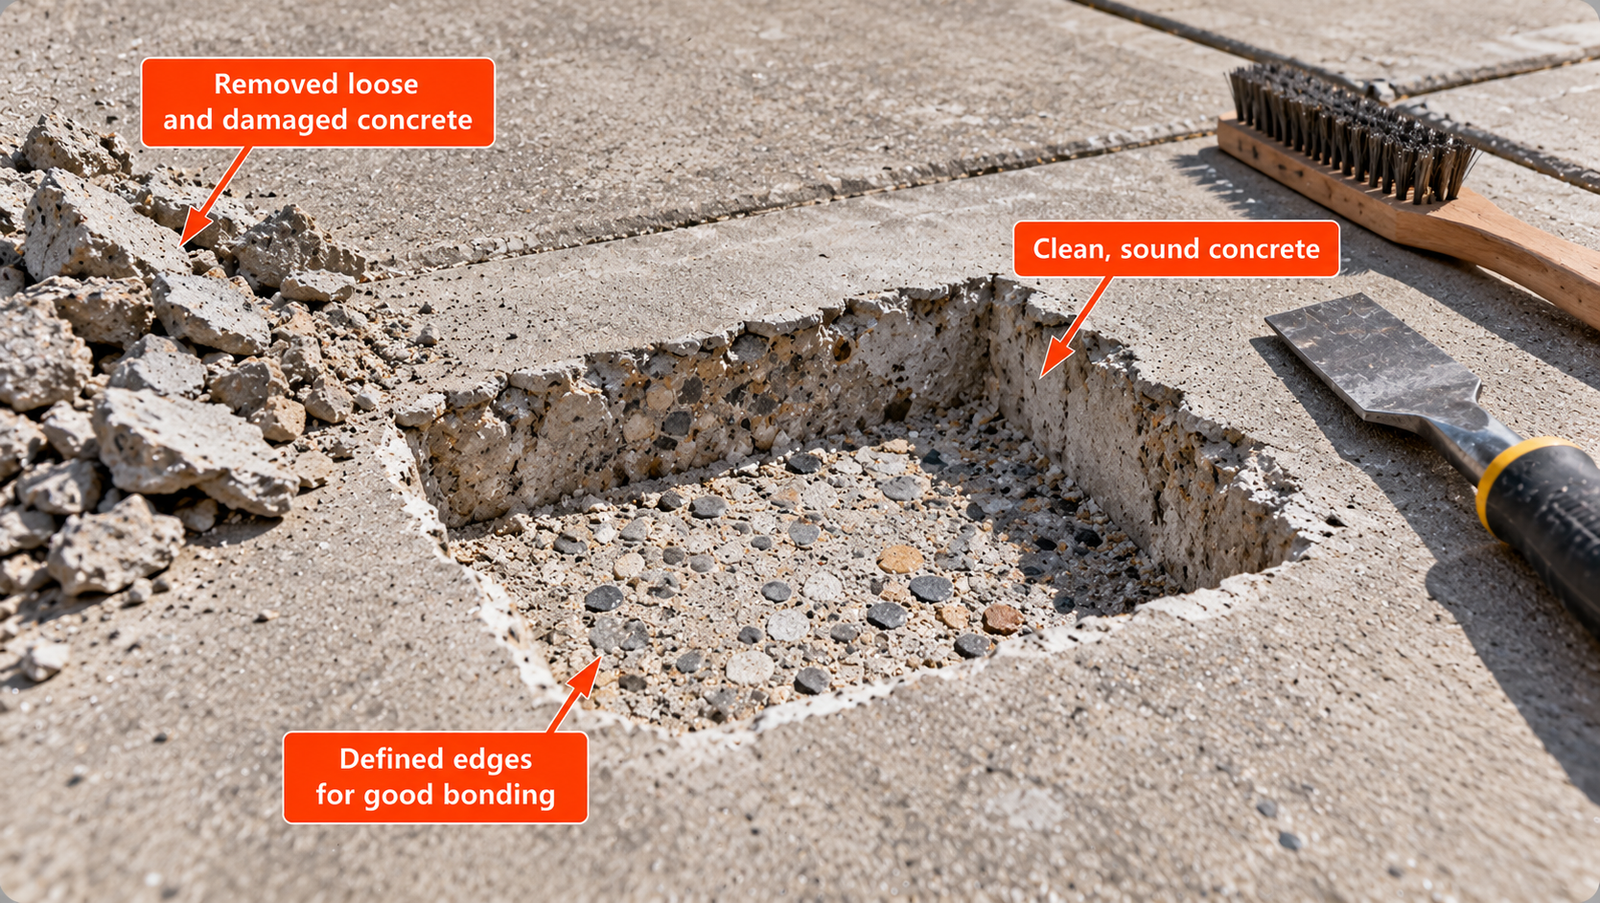
Remove only the unsound or contaminated concrete needed to expose a stable, sound base. Do not take out good concrete unnecessarily.
FHWA’s construction guidance says to chip until sound and clean concrete is exposed, then sound the bottom again to check for remaining weak spots. If more chipping keeps finding weak concrete, the deterioration may be too deep for a simple patch.
How to Mark the Patch Boundary
Clear, simple geometry makes a better repair. Mark the damaged area plus any hidden deterioration you found by sounding, and avoid irregular feathered edges.
- Outline the area with spray paint or chalk.
- Include all deterioration, not just the visible damage.
- Use straight, defined edges.
- Keep existing working joints open.
FHWA’s pavement guidance prefers square or rectangular boundaries that extend a few inches beyond the delamination marks. Those dimensions are pavement-specific and should not become universal residential repair rules.
How to Remove Loose Concrete Without Damaging the Rest
Use the least aggressive method that works. A hammer and chisel suit small areas, and a small rotary or demolition hammer can speed larger ones. Saw-cut edges where the repair system calls for a vertical perimeter.
Aggressive tools can fracture the sound concrete you want to keep. FHWA notes that even light pneumatic hammers with gouge bits can damage sound concrete, and it prefers lighter 15 pound hammers for better control.
Cutting and chipping concrete makes silica dust, so use dust control and respiratory protection suited to the work.
Why Feather-Edge Patches Often Fail
A feather edge is a patch that tapers to almost nothing at its border. Very thin edges are weak, dry out fast, and tend to peel or chip away.
FHWA research on partial-depth repairs notes that vertical boundaries reduce the spalling associated with thin or feathered concrete along the repair perimeter.
Some products do allow feathering. W.R. Meadows lists one polymer-modified mortar for use from 1 inch thick to a feather edge, while SikaQuick VOH lists a 1/8 inch minimum layer. Use the thickness your product states, not a general rule.
How Clean Does the Old Concrete Need to Be?
The repair surface must be clean enough that the patch touches real concrete, not dust. Remove all of these:
- Loose particles.
- Dust.
- Oil and grease.
- Dirt.
- Asphalt residue.
- Incompatible coatings.
FHWA warns that dust and dirt prevent the repair material from bonding to old concrete. It suggests wiping the area with a dark cotton glove to reveal dust, and blowing air through a clean cloth to check a compressor for oil or moisture.
How to Create a Bondable Surface Profile
Smooth old concrete often needs mechanical profiling so the patch can grip it. ACI PRC-546-23 treats surface preparation as its own step, separate from removing damaged concrete.
- Grinding: removes coatings and roughens the surface.
- Light chipping: works in small cavities.
- Abrasive blasting: cleans and profiles, with dust control.
- Scarification: suitable for thicker weak layers.
- Pressure washing: cleans, but does not always give enough profile.
The profile a product needs is set by its data sheet. The Concrete Resurfacing Guide explains Concrete Surface Profile (CSP) and why the manufacturer, not a general rule, sets the target.
A concrete patch needs clean, sound and properly profiled old concrete at the bond interface.
Do You Need a Concrete Bonding Agent?
Sometimes, and the product instructions decide. Some systems call for a cementitious bonding slurry, an epoxy bonding agent, or a polymer primer. Others are made for direct placement on properly prepared concrete.
FHWA describes both a cementitious grout bonding agent, applied in a thin even coat that must not dry before the patch goes in, and epoxy agents. It lists a contact time of about 90 minutes for cement grout.
Data sheets disagree. One QUIKRETE repair mortar says it bonds without bonding adhesives and calls for a damp surface, while a W.R. Meadows mortar calls for a slurry prime on a saturated-surface-dry substrate. Follow your product.
Concrete Bonding Agent vs. Repair Mortar
These are different materials doing different jobs. A bonding agent helps form the bond at the interface where a product specifies one. Repair mortar is the actual repair mass.
Do not use either as a substitute for the other, and do not expect a bonding agent to make up for poor surface preparation. It cannot make dirty, weak, or smooth concrete bond well.
What Is the Best Material for Patching Old Concrete?
There is no single best patch material. The right one depends on depth, location, traffic, exposure, and how soon you need the area back in service.
| Material | Typical use | Main advantage | Main limitation |
|---|---|---|---|
| Cementitious repair mortar | General localized patches | Compatible with concrete | Thickness limits are product-specific |
| Polymer-modified mortar | Thin/vertical/exterior repairs | Improved bond/workability | System-specific curing/application |
| Rapid-set repair mortar | Fast return to service | Early strength | Short working time |
| Repair concrete | Larger/deeper patches | Suitable for larger volume | Requires consolidation |
| Epoxy mortar | Selected high-bond repairs | Strong adhesion | Thermal/moisture compatibility matters |
| Resurfacer | Broad shallow surface repair | Covers larger areas | Requires sound substrate |
Thickness varies widely. One vertical and overhead mortar allows 1/8 to 3 inches vertically, while a general repair mortar lists 1/2 to 6 inches. FHWA also cautions that gypsum-based repair materials perform poorly when exposed to moisture or freezing weather.
Can You Use New Concrete Over Old Concrete?
Sometimes, but it is not a simple patch. A thin patch, a bonded topping, and a thick placement of new concrete are three different repairs with different rules.
Ordinary new concrete does not automatically bond strongly to cured old concrete. It needs preparation and an appropriate interface detail, and thin layers need a product made for them. For large areas, see the Concrete Resurfacing Guide.
Can You Use Mortar Mix to Patch Concrete?
Generic masonry mortar is not a good concrete patch. Repair mortars are made to bond, resist shrinkage, and survive outdoor weather, and masonry mortar mixes are not.
- Aggregate size: repair products are graded for the cavity depth.
- Shrinkage: unmodified mortar can shrink and pull away.
- Bond: it may not grip the old concrete reliably.
- Depth and traffic: it is not meant for deep or loaded repairs.
- Exterior durability: it can fail in freezing weather.
Do not use masonry mortar for structural or deep repairs.
How to Patch Concrete Without Removing the Whole Slab: Step by Step
This is a general sequence. The selected product’s technical data sheet overrides every detail.
Step 1: Diagnose the defect and confirm the old slab is stable
Identify the cause and rule out settlement, movement, and structural cracking before buying material.
Step 2: Mark the repair area
Sound the surface and outline the damaged zone, including hidden deterioration.
Step 3: Remove loose or unsound concrete only
Cut and chip back to sound, clean concrete, using the lightest tool that works.
Step 4: Clean and profile the substrate
Remove dust, oil, and loose particles, then create the profile the product requires.
Step 5: Condition or prime the old concrete as required
Bring the surface to the moisture condition on the data sheet, and apply a bonding agent only if the system calls for one.
Step 6: Mix the repair material correctly
Measure water and powder exactly as directed. Mix only what you can place within the working time.
Step 7: Place and compact the patch
Press the material firmly into the cavity so no voids remain at the interface, as FHWA stresses.
Step 8: Finish flush with surrounding concrete
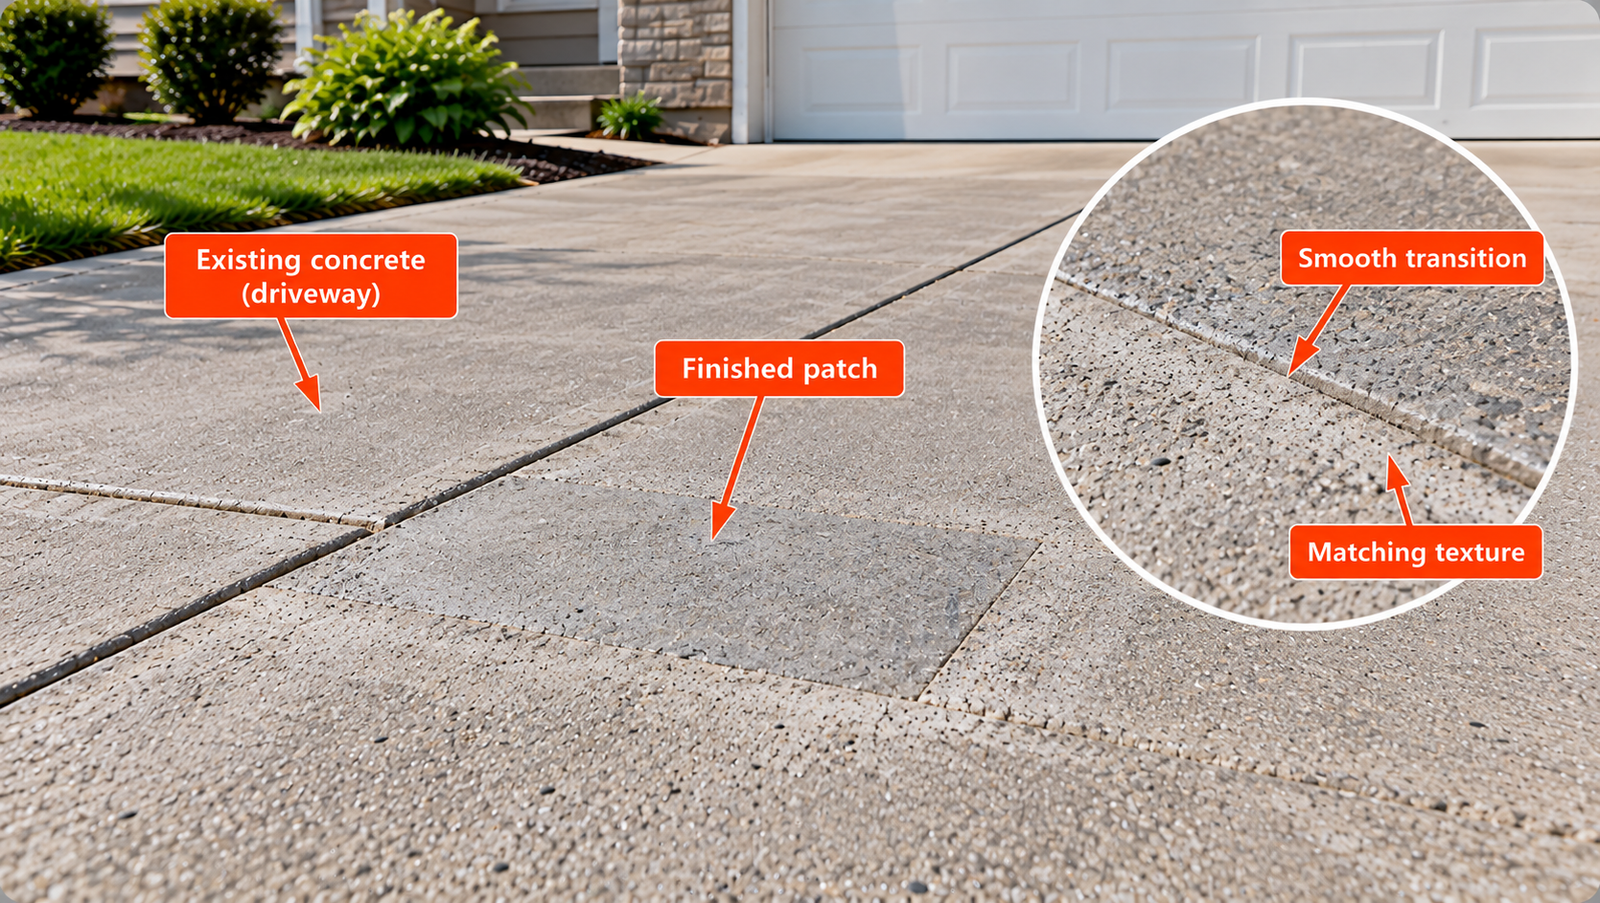
Trowel from the center toward the edges to push material against the walls, which FHWA says helps bond. Match the surrounding texture.
Step 9: Cure and protect
Start curing promptly and follow the product’s method.
Step 10: Return the area to service only after the specified cure
Wait for the foot and vehicle traffic times stated for your product and conditions.
How to Patch Driveways, Patios, Garage Floors and Steps
The basic method is the same everywhere, but each location has its own priorities. The table shows what to check.
| Location | Key concern | Repair-material requirement to check |
|---|---|---|
| Driveway | Vehicle traffic, freeze-thaw | Exterior/traffic rating |
| Garage floor | Oil, tires, coatings | Bond and contamination |
| Patio | Appearance and drainage | Finish/texture |
| Steps | Vertical/nosing edge | Vertical repair capability |
| Walkway | Trip hazard | Flush transition |
| Wall | Sagging | Vertical/non-sag product |
Garage floors need extra attention to oil, so clean thoroughly first. Steps and walls need a mortar made for vertical work so it does not sag.
How Long Should a Concrete Patch Cure?
Curing is not optional on a small repair. FHWA points out that a patch has a large surface area compared with its small volume, so moisture escapes quickly, and neglecting to cure leads to shrinkage and possible delamination.
Separate the times that matter: working time, setting time, foot traffic, vehicle traffic, and coating time. All of them are product-specific.
As an example only, one rapid-setting resurfacer lists foot traffic after about 2 to 3 hours and drive-on after 4 to 8 hours under its test conditions. Do not apply a universal 24-hour rule.
Temperature matters too. FHWA’s specification says not to place cement-based repairs below 40°F, and to expect a longer cure below 55°F.
How Much Patch Material Do You Need, and Why Do Repairs Fail?
Quantity starts with the prepared cavity, not the original visible damage. Removing unsound concrete usually makes the hole bigger.
Patch Volume Formula
V (ft³) = L (ft) × W (ft) × D (in) ÷ 12
Example: 3 ft × 2 ft × 0.75 in ÷ 12 = 0.375 ft³.
| Input | Example |
|---|---|
| Length | 3 ft |
| Width | 2 ft |
| Average prepared depth | 0.75 in |
| Theoretical volume | 0.375 ft³ |
| Product yield | Enter manufacturer value |
| Bags required | Round up |
| Waste/irregularity | Add appropriate allowance |
If a data sheet listed 0.5 ft³ per bag (a hypothetical figure), 0.375 ÷ 0.5 = 0.75, so you would round up to one bag plus an allowance.
Estimate Your Patch Material
Use the calculators once you know your repair dimensions and method.
Concrete Repair Calculator Concrete Patch Calculator Repair Cost CalculatorMost repair failures trace to the same short list of causes, shown below.
| Failure symptom | Likely cause | Better approach |
|---|---|---|
| Patch pops out | Poor bond/dirty substrate | Clean and profile sound concrete |
| Edge breaks | Feather-edge geometry | Use approved minimum thickness |
| Patch cracks | Shrinkage or movement | Select compatible material and address movement |
| Hollow patch | Poor consolidation | Pack/vibrate as appropriate |
| Patch stays soft | Wrong mix water or cure | Follow product instructions |
| Repair delaminates | Unsound concrete left beneath | Remove to sound substrate |
| Joint closes/crushes patch | Working joint bridged | Preserve joint movement |
| Patch stains/coating fails | Oil or moisture remains | Remove contamination first |
Patching Old Concrete FAQs
Can you patch concrete without removing the slab?
Yes, when the old concrete is sound and stable. You still have to remove the unsound concrete inside the repair area.
Can you put new concrete over old concrete?
Sometimes, but ordinary new concrete does not automatically bond. It needs preparation, a suitable interface, and a product made for the thickness.
Do you need a bonding agent?
It depends on the product. Some systems require one, while others are made for direct placement on properly prepared concrete. Follow the data sheet.
Can you patch over cracked concrete?
Stable cracks can be repaired separately. A rigid patch over an active crack will likely crack or pop out, so address the movement first.
Can you patch over painted concrete?
Only after the paint is removed or the manufacturer confirms compatibility. Paint can act as a bond breaker.
How thick should a concrete patch be?
It depends on the product. Published data sheets range from about 1/8 inch minimum to several inches, and some require reinforcement in deep patches.
Why does a concrete patch pop out?
Most often from a dirty or smooth substrate, unsound concrete left under the patch, a feather edge, or a working joint that was filled.
Can you patch a driveway?
Yes, if the damage is localized and the driveway is stable. Use an exterior, traffic-rated repair material.
How long before driving over a patch?
It varies by product and weather. Rapid-setting products may allow vehicles within hours, while others take longer, so check the data sheet.
When should old concrete be replaced instead?
When there is settlement, active movement, structural cracking, widespread delamination, or deterioration too deep to repair locally.