Concrete Resurfacing Guide: Methods, Preparation, Cost and When It Works
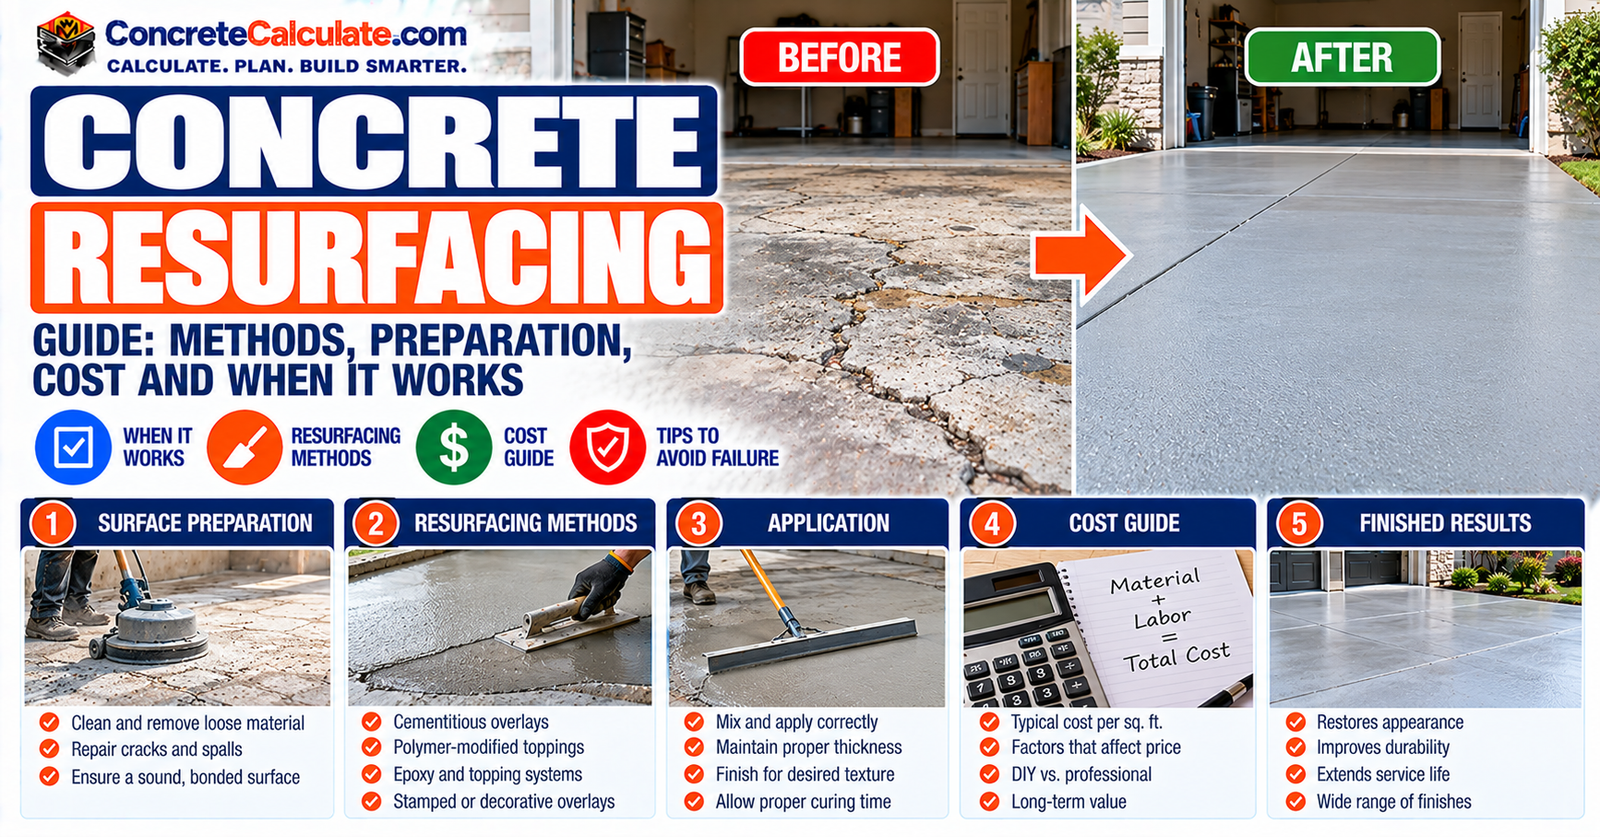
Concrete Resurfacing Guide
Decide whether your concrete is a good candidate, compare resurfacing methods, prepare the surface correctly, budget with local numbers, and recognize when resurfacing is the wrong repair.
What Is Concrete Resurfacing?
Concrete resurfacing means applying a bonded repair or overlay system over existing concrete to renew its surface. It works only when the slab underneath is sound and stable.
Done well, resurfacing can improve appearance, texture, the wear surface, and minor surface deterioration. It does not automatically fix unstable settlement, active structural movement, severe delamination, deep deterioration, or major support problems.
The American Concrete Institute makes the same point: decorative overlays depend heavily on surface inspection and preparation, and they generally add no structural benefit.
This guide helps you decide whether your slab is a candidate, compare methods, prepare the surface properly, understand costs, and recognize when resurfacing is the wrong repair.
Concrete Resurfacing vs. Overlay vs. Refinishing
These terms overlap in everyday conversation, but they are not perfect synonyms. Knowing the differences helps when you compare quotes.
- Resurfacing: the broad process of renewing an existing concrete surface.
- Cementitious overlay: a new bonded, cement-based layer placed over existing concrete.
- Skim coat: a very thin surface application, mostly cosmetic.
- Decorative overlay: resurfacing with a decorative finish such as color, texture, or a stamped pattern.
- Refinishing: staining, polishing, or sealing, often without adding a cementitious layer.
A contractor who says “resurfacing” may mean any of these, so ask exactly which product, thickness, and preparation they plan to use.
When Is Concrete a Good Candidate for Resurfacing?
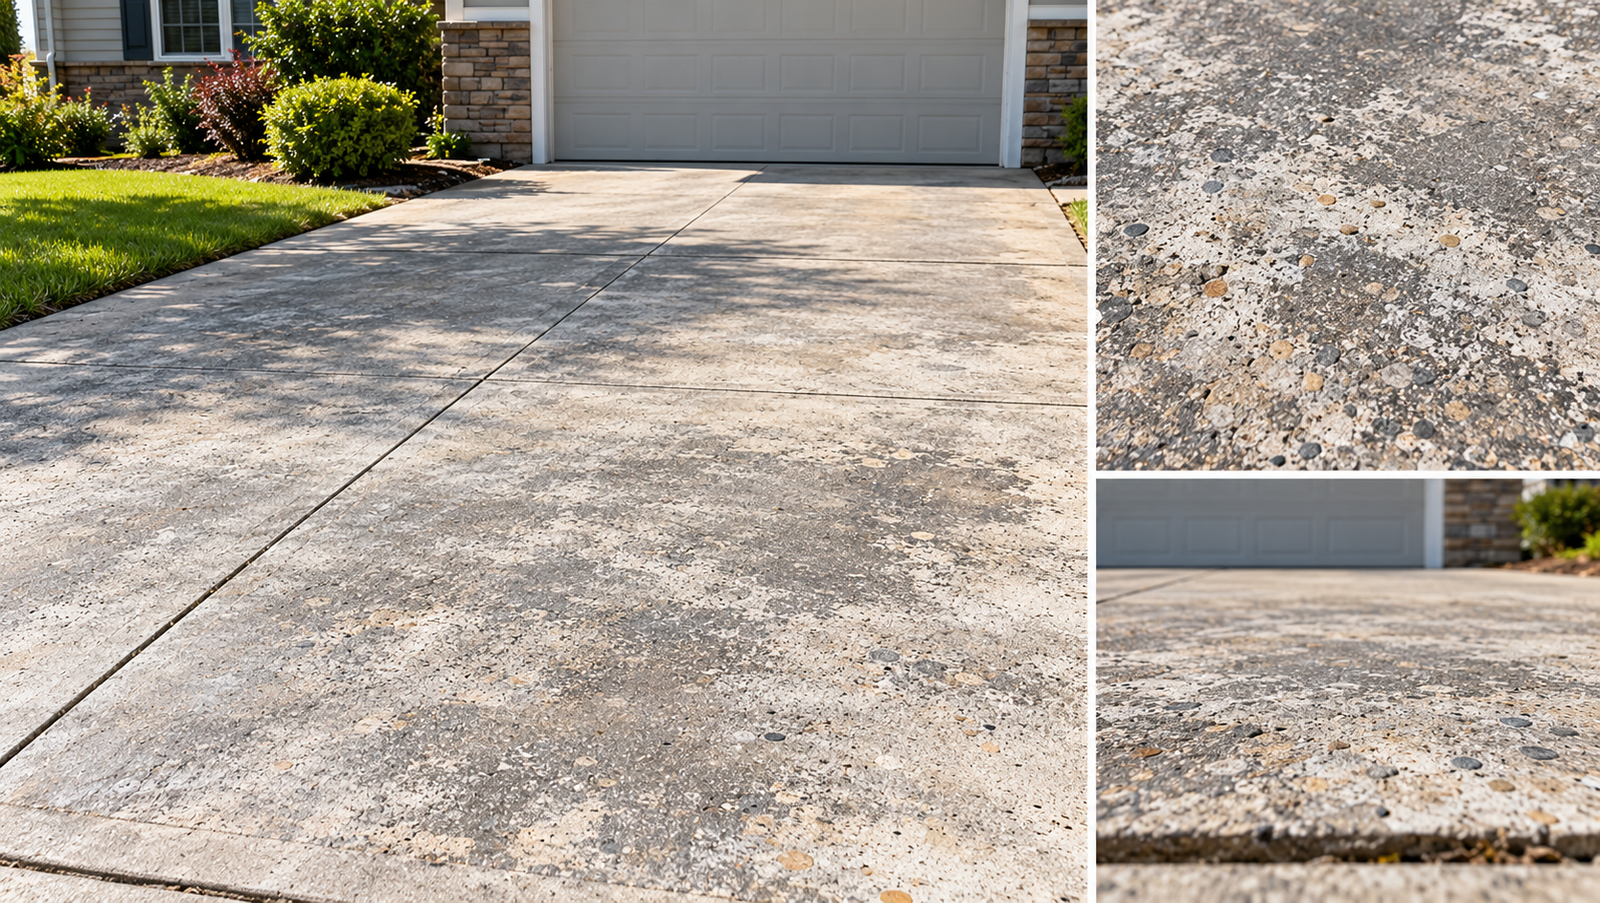
The best candidates are slabs that look tired but remain sound. Typical examples include:
- Worn surfaces on a stable, level slab.
- Minor scaling, after the weak concrete is removed.
- Cosmetic discoloration or staining.
- Localized defects that have been repaired properly.
- Surfaces that need new texture or traction.
- A decorative upgrade over concrete that is otherwise in good shape.
The key distinction is that the surface condition must be repairable while the slab beneath stays sufficiently sound and stable. Resurfacing renews the skin, not the skeleton.
When Should You NOT Resurface Concrete?
Resurfacing is the wrong repair more often than most articles admit. Covering certain problems hides the symptom without fixing the cause, and the overlay usually fails soon after.
Think twice about resurfacing if you see any of these:
- Significant slab movement or ongoing settlement. See sinking concrete repair for the underlying issue.
- Major structural cracking.
- Severe, widespread delamination.
- Frost heave.
- Extensive corrosion-related damage.
- An unstable substrate.
- Serious drainage problems, which are covered in the driveway drainage guide.
- Oil contamination that has not been removed.
- Moisture problems that a moisture-sensitive overlay system cannot tolerate.
Use the table below as a first screen, then follow the decision tree.
| Existing condition | Resurface? | Better first step |
|---|---|---|
| Worn but sound concrete | Often suitable | Prepare surface correctly |
| Minor surface scaling | Potentially suitable | Remove weak concrete first |
| Local spalls | Potentially suitable after repair | Patch unsound areas first |
| Stable repaired cracks | May be suitable | Confirm crack condition |
| Active structural movement | Usually unsuitable | Diagnose movement |
| Significant settlement | Usually unsuitable | Correct support/settlement problem |
| Widespread delamination | Usually unsuitable without major repair | Remove/repair unsound concrete |
| Severe oil contamination | Not until cleaned | Remove contamination |
| Failed coating/sealer | Not until removed or verified compatible | Strip/profile surface |
| Structurally deficient slab | No cosmetic overlay solution | Professional assessment |
Resurfacing is appropriate only when the underlying slab and repair conditions support a bonded overlay.
How to Inspect Existing Concrete Before Resurfacing
A careful inspection before you buy any material saves money. Walk the whole slab, ideally after rain or with a hose so you can see where water goes, and work through this checklist:
- Photograph defects so you can compare conditions over time and show contractors.
- Map the cracks on a simple sketch, noting length, width, and direction.
- Check elevation differences at joints, edges, and where the slab meets the house or garage.
- Inspect the joints for movement, spalling, or failed sealant.
- Look for spalling and scaling on the surface and along edges.
- Check for oil and grease, especially in parking areas.
- Identify any sealer or coating, since it can block bond.
- Assess drainage, noting low spots and ponding.
- Note moisture issues, such as damp spots or efflorescence.
Where the answer matters, bring in a professional. Sounding with a hammer or chain drag can locate hollow areas, and pull-off testing can measure how well a trial patch bonds.
How to Tell Whether the Concrete Surface Is Sound
Surface wear and unsound material look alike from a distance, but they call for different fixes. Wear is a thin skin that can be cleaned and profiled. Unsound material has to be removed.
These signs point to concrete that is not ready for an overlay:
- Loose pieces that lift or crumble.
- Delamination, where the surface layer has separated.
- Powdering that returns after cleaning.
- Hollow-sounding areas when tapped.
- Weak surface mortar that rubs away.
- Patches that detach easily.
Each of these has its own guide. Read about concrete dusting, concrete scaling, and concrete spalling to understand what you are looking at before you resurface.
Main Concrete Resurfacing Methods Compared
Products and systems differ in thickness, bond mechanism, and intended use. The table compares them without using universal thickness values, because those depend on the specific product.
| Method | Best use | Relative thickness | Main advantage | Main limitation |
|---|---|---|---|---|
| Thin cementitious resurfacer | Worn sound slabs | Thin, product-specific | Uniform renewal | Requires excellent preparation |
| Polymer-modified overlay | Bonded resurfacing | Product-specific | Strong bond/thin-section capability | Product-dependent |
| Microtopping | Cosmetic renewal | Very thin | Decorative finish | Reflects substrate imperfections |
| Decorative stamped overlay | Visual upgrade | Product/system-specific | New appearance | Higher labor/cost |
| Self-leveling overlay | Interior leveling | Product-specific | Corrects surface irregularity | Not all products are wear surfaces |
| Thicker bonded overlay | More substantial renewal | Design-specific | Can rebuild surface profile | Requires detailed preparation and design |
Always confirm the system against the manufacturer’s technical data sheet (TDS). Two products with similar names can have very different requirements.
Thin Cementitious Resurfacing
A thin cement-based resurfacer suits sound but worn concrete with shallow surface defects. It gives a uniform new surface that can be given a broom or simple texture.
Thin does not mean forgiving. A thin layer cannot bridge unsound concrete, and any contamination or poor profile shows up as a bond failure.
Published data sheets for rapid-setting driveway resurfacers describe them as polymer-modified, cement-based products meant for exterior concrete, with clean, sound substrates and a defined minimum surface profile.
Polymer-Modified Concrete Overlays
Polymer modification can improve bond, flexibility, workability, and thin-section performance. The exact benefits depend on the formulation.
Not all polymer-modified systems are interchangeable. Some are one-component powders mixed with water, while others use liquid polymer components, and each has its own substrate, thickness, and curing rules.
Treat the label as a starting point and the TDS as the authority.
Decorative Concrete Overlays
Decorative overlays include stamped, textured, colored, and stencil systems. They can transform a plain slab, but they magnify any weakness in the base.
ACI’s 2025 best-practices article on decorative overlays says the success and longevity of cement-based overlays depend significantly on proper surface preparation, and it outlines basic inspection and preparation steps.
Decorative work also involves more labor, more finishing skill, and often a sealer, so costs run higher than plain resurfacing.
Microtoppings and Skim Coats
Microtoppings and skim coats are thin, mostly cosmetic applications. They renew color and texture but do little to add durability.
Because they are so thin, they are especially sensitive to substrate movement, cracking, contamination, moisture, and preparation quality. Imperfections in the slab usually telegraph through.
Self-Leveling Overlays and Interior Floor Resurfacing
Self-leveling products come in two broad families. Self-leveling underlayments are made to receive a flooring such as tile or vinyl, while self-leveling wear surfaces are designed to stay exposed.
Do not assume that any self-leveling product can serve as a garage, driveway, or exterior wear surface. Check the TDS for the intended use, traffic type, and moisture conditions before buying.
Resurfacing Driveways, Patios, Pool Decks and Garage Floors
Each project type brings its own demands. Match the system to the conditions, not just the look.
- Driveway: vehicle traffic, freeze-thaw cycles, deicers, and traction.
- Patio: drainage, appearance, and furniture loads.
- Pool deck: slip resistance, wet exposure, and heat or comfort underfoot.
- Garage: oil, tire traffic, coatings, and moisture.
| Surface | Main concern | Resurfacing suitability question |
|---|---|---|
| Driveway | Vehicle loading, deicers, freeze-thaw | Is substrate sound and overlay traffic-rated? |
| Patio | Drainage and appearance | Will overlay preserve slope and joints? |
| Pool deck | Slip and wet exposure | Is finish suitable for barefoot/wet conditions? |
| Garage floor | Oil, tires, moisture | Is contamination removed and substrate bondable? |
| Walkway | Traction and edges | Can transitions remain safe? |
| Interior floor | Moisture and flooring compatibility | Does the system match intended floor finish? |
Pool decks and walkways deserve extra attention to traction, so choose a finish rated for the exposure. For sealing options afterward, see How to Seal Concrete.
Should Cracks Be Repaired Before Resurfacing?
Usually yes. A bonded overlay can reflect cracks that move beneath it, so the repair depends on what kind of crack you have.
- Stable shrinkage cracks: often cleaned and filled before the overlay, following the product maker’s method.
- Active moving cracks: a rigid overlay may crack again, so diagnose the movement first.
- Settlement cracks: fix the support problem, not just the crack.
- Structural cracks: need professional assessment before any cosmetic work.
Product requirements vary. One published resurfacer data sheet calls for grinding shrinkage cracks to a minimum of 1/4 by 1/2 inch and filling them with a flexible epoxy joint sealant. Another product may say something different.
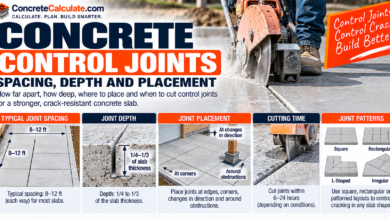
To diagnose cracks, start with Why Is My Concrete Cracking?, then read How to Fix Cracked Concrete. Joint layout also matters, as explained in Concrete Control Joints.
How to Handle Spalling, Scaling and Dusting Before Resurfacing
An overlay should never be asked to bridge over unsound concrete. Each of these conditions has to be dealt with first.
- Spalling: remove unsound spalled concrete and patch the area. See Concrete Spalling.
- Scaling: remove weak, scaled mortar down to sound concrete. See Concrete Scaling.
- Dusting: evaluate the weak surface and decide whether to harden it or remove it. See Concrete Dusting.
Complete these repairs before the final overlay. The patch material also has to be compatible with the resurfacer, otherwise it may show through later.
How Oil, Grease, Paint and Old Sealers Affect Bond
Contaminants and old coatings stop an overlay from gripping the concrete. The common culprits are motor oil, grease, curing compounds, paint, old acrylic or epoxy coatings, and sealers.
Oil is the hardest to see and the most damaging, because it can sit in the pores below a surface that looks clean. Manufacturers’ data sheets routinely require surfaces free of oil, grease, paint, sealers, and other bond breakers.
If you suspect oil, read How to Remove Oil Stains From Concrete before you profile the surface. Coatings generally need to be removed or confirmed compatible by the manufacturer.
Moisture Problems Before Concrete Resurfacing
Moisture matters differently depending on the system. An exterior slab gets wet from rain, while an interior slab may pass moisture vapor upward.
- Exterior wetting and drainage.
- Vapor transmission through the slab.
- Hydrostatic pressure from below.
- Interior slabs with limited drying.
- Moisture-sensitive coatings or flooring that will go on top.
Data sheets disagree on surface moisture at application. One rapid-setting resurfacer calls for a saturated surface dry (SSD) substrate with no standing water, while another calls for a dry surface. Follow your product’s requirements and any moisture test method the manufacturer names.
Why Surface Preparation Is the Most Important Step
A resurfacing layer lives or dies by its bond to the concrete beneath. If the bond fails, the overlay peels, lifts, or sounds hollow no matter how good the material is.
ACI states that the success and longevity of cementitious overlays depend significantly on proper surface preparation. ICRI Guideline 310.2R is devoted to selecting and specifying surface preparation for sealers, coatings, polymer overlays, and concrete repair.
A bonded concrete overlay depends on the condition and preparation of the existing substrate.
Preparation also protects the concrete itself. Some methods bruise the surface with microcracks, which weakens the layer the overlay bonds to.
Concrete Surface Profile (CSP): What It Means
A smooth-looking slab is not automatically ready for a bonded overlay. ICRI defines Concrete Surface Profile (CSP), a scale of ten reference profiles from CSP 1 (nearly flat) to CSP 10 (very rough).
Think of CSP as a comparative visual and tactile guide, from smoother to progressively rougher textures. ICRI sells physical profile chips for specification and verification, so the diagram below is an original conceptual illustration, not a replica.
Concrete resurfacing products require a clean, sound substrate with the specified surface profile.
There is no single correct CSP for all resurfacing products. The overlay manufacturer or project specification identifies the profile required.
Published data sheets show the range. One cementitious resurfacer calls for a minimum profile of CSP 2, while another calls for a minimum of CSP 3. Always use your own product’s number.
Grinding vs. Shot Blasting vs. Scarifying vs. Pressure Washing
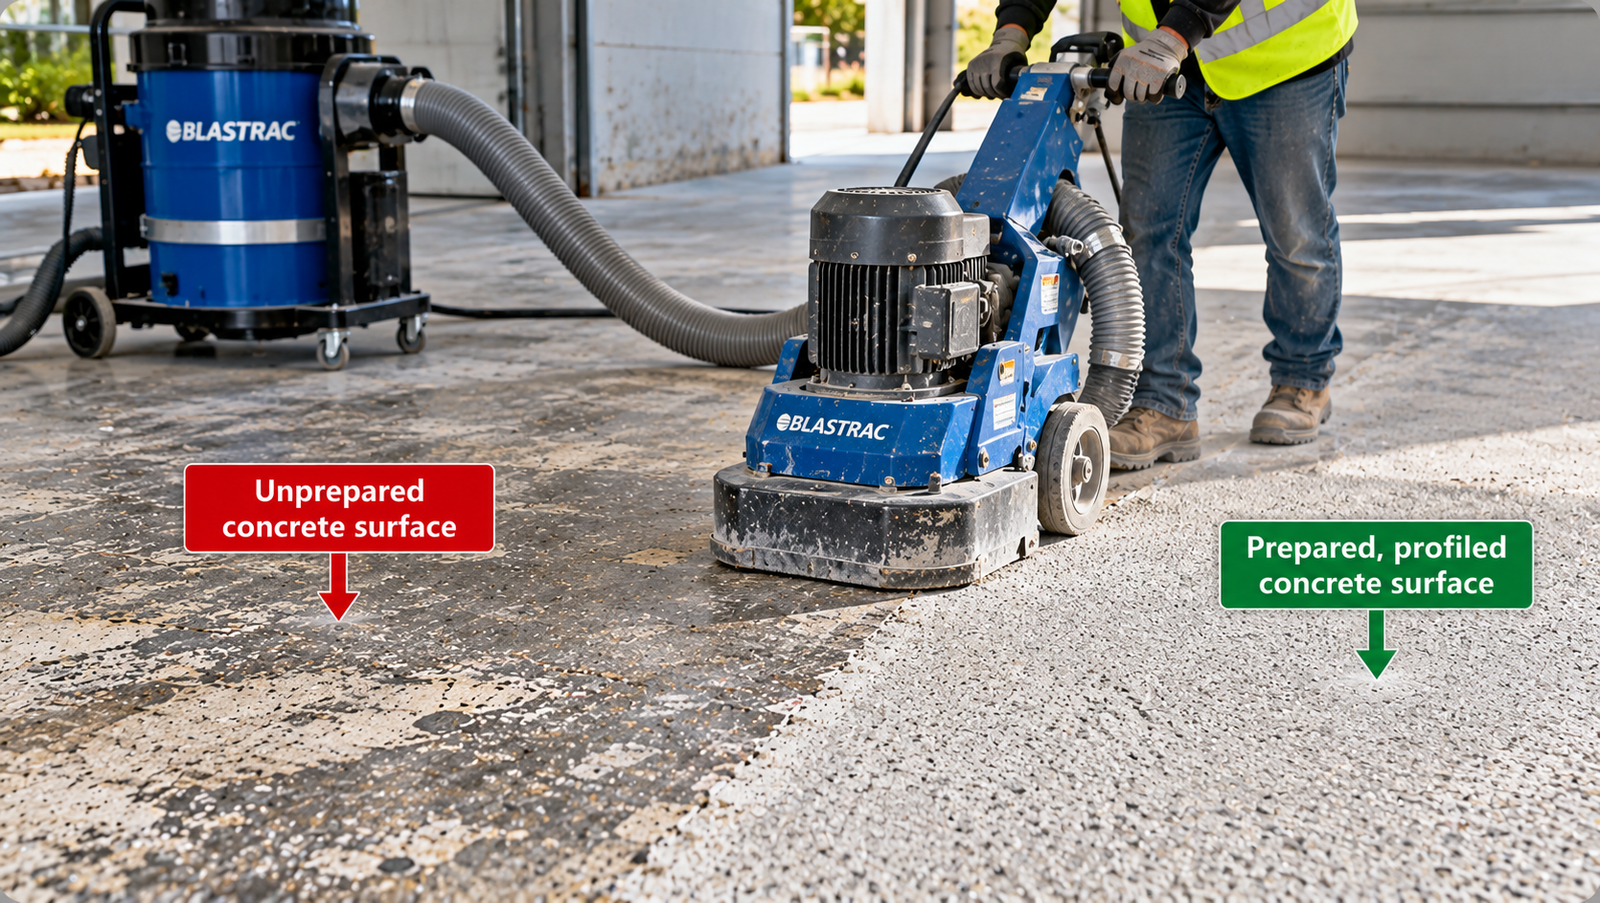
Preparation method determines both the profile and the amount of damage to the surface. Choose the method that gives the manufacturer’s required profile and leaves sound concrete behind.
| Preparation method | Typical role | Advantages | Main risk/limitation |
|---|---|---|---|
| Diamond grinding | Remove coatings and profile surface | Controlled and common | Dust control required |
| Shot blasting | Create uniform mechanical profile | Effective for many overlays | Equipment access and profile control |
| Scarifying | Aggressive removal | Removes thicker weak layers | Can be too aggressive |
| Abrasive blasting | Cleaning/profile creation | Effective in suitable areas | Dust and containment |
| Pressure washing | Cleaning selected contaminants | Useful cleaning aid | Does not necessarily create sufficient profile |
| Hand tools | Small localized repairs | Accessible | Slow and inconsistent for large areas |
Preparation method should be selected to achieve the overlay manufacturer’s required CSP and substrate condition. Industry summaries commonly associate grinding with lighter profiles, shot blasting with the middle of the range, and scarifying with coarser ones, but confirm with ICRI 310.2R.
Impact methods can bruise the substrate. An ACI technical note explains that bruising, or microcracking, hurts bond, and that shot blasting, water blasting, or hydrodemolition help avoid it. It also notes that a final shot or water blast can reduce damage left by more aggressive removal.
FHWA’s thin-overlay guidance likewise credits effective shotblasting for the strong bond needed in a successful overlay project. Silica dust from grinding and blasting also requires proper dust control and respiratory protection.
Is Acid Etching Enough for Concrete Resurfacing?
Not automatically. Many DIY pages treat a muriatic acid wash as a standard step, but acid etching is a weak substitute for mechanical preparation.
- It produces an uneven profile and typically only a light one.
- The surface must be neutralized and rinsed, and residue can interfere with bond.
- It cannot remove unsound concrete.
- Some manufacturers prohibit it. One published resurfacer data sheet says acid etching is not recommended and prefers mechanical methods such as shotblasting.
Industry summaries tie acid etching to CSP 1, which is nearly smooth. Use whatever your product’s TDS specifies, and do not choose acid simply because it is cheap.
How Clean Does Concrete Need to Be Before Resurfacing?
Cleaner than it looks. Data sheets for resurfacers list the conditions the surface must meet before application:
- No loose material.
- No oil or grease.
- No dust.
- No incompatible coating.
- No standing water.
- No bond-breaking contaminants.
FHWA’s bonded-overlay guidance stresses the same idea: the existing surface must be thoroughly cleaned and prepared to promote bonding. Vacuuming or blowing with oil-free air just before application is common practice.
Do You Need a Bonding Agent or Primer?
It depends on the system. Some resurfacers are designed to go directly onto a properly prepared surface, while others require a primer or bonding slurry.
Published data sheets illustrate the difference. One states that priming is not required, though it suggests an acrylic primer on porous substrates to reduce pinholes. Another requires an acrylic bonding agent diluted with water on every surface.
Do not treat a bonding agent as a universal resurfacing step. The TDS governs, and a bonding agent cannot compensate for a weak, smooth, or contaminated surface.
How to Resurface Concrete Step by Step
This is a general sequence. The selected product’s TDS overrides every detail, including mixing, thickness, and weather limits.
Inspect and repair the slab
Complete the inspection, then fix cracks, spalls, and other defects with compatible materials before moving on.
Remove unsound material and contaminants
Remove loose concrete, coatings, oil, and anything that could break the bond.
Create the specified surface profile
Use the preparation method that achieves the profile named in the TDS, with dust control in place.
Clean and condition the substrate
Remove all dust and debris. Bring the surface to the moisture condition the product requires, whether that is dry or saturated surface dry.
Mix the resurfacer correctly
Measure water and powder exactly as directed. Mix only the amount you can place within the working time.
Apply to the specified thickness
Spread the material evenly, working from one edge, and keep a wet edge. Respect the minimum and maximum thickness for the product.
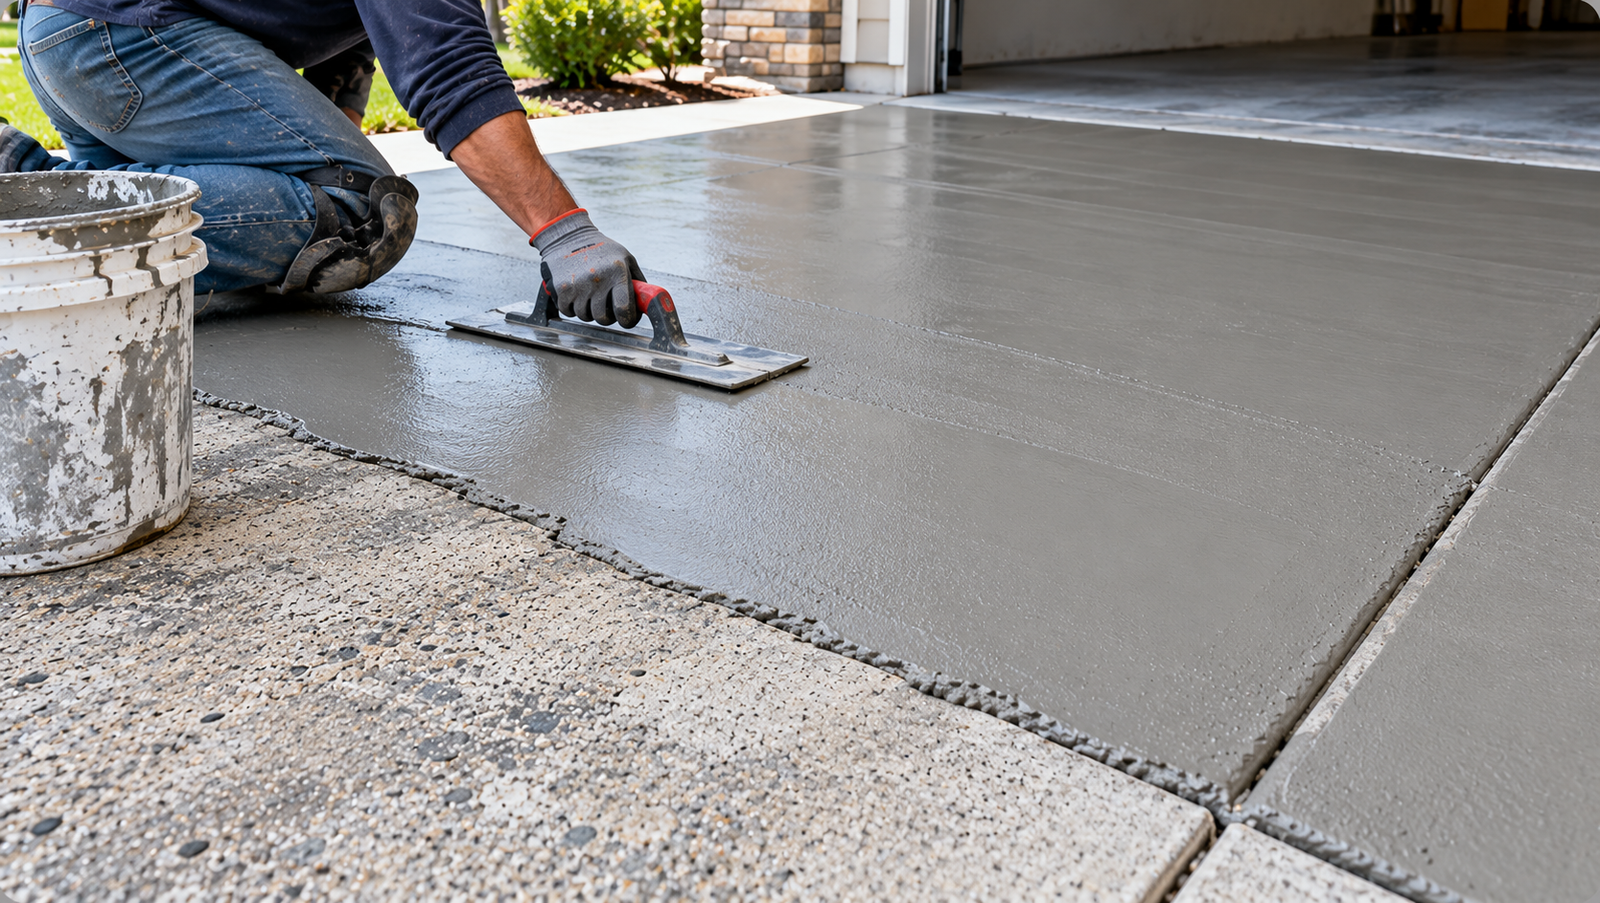
Texture and finish the surface
Broom or finish the surface for the desired texture. Keep joints in the new layer aligned with the joints below.
Cure and protect the resurfaced concrete
Follow the curing method and time in the TDS, and keep traffic off until the product allows it. Hot, dry, or windy weather may call for misting.
How Thick Should a Concrete Resurfacing Layer Be?
There is no universal resurfacing thickness. It depends on the material, the substrate condition, expected traffic, edge details, slope correction, the decorative system, and the manufacturer’s limits.
A thin skim and a thicker bonded repair overlay are different products with different rules. Choose the product first, read its minimum and maximum thickness, and then calculate quantities.
Once you have a product and thickness, use the Concrete Resurfacing Calculator or the Concrete Repair Calculator to estimate material.
How Long Does Resurfaced Concrete Take to Cure?
Cure time has several meanings, so separate them. Working time, finishing time, initial set, foot traffic, vehicle traffic, and sealing or coating time each have their own limits.
Values come from the product and the weather. As examples only, two rapid-setting resurfacer data sheets list foot traffic in about 2 to 3 hours, and one lists drive-on in 4 to 8 hours under moderate conditions. Other products take much longer.
Do not use a single universal 24-hour rule. Read the TDS, check the temperature, and keep a margin when in doubt. The Concrete Curing Time Chart offers general background on curing times.
Before closing out, review why overlays fail. The table connects common symptoms to likely causes.
| Failure symptom | Likely contributing issue | What to investigate |
|---|---|---|
| Peeling/delamination | Poor bond or contamination | Surface preparation and substrate |
| Cracks reflecting through overlay | Existing crack movement | Crack activity and joint layout |
| Local hollow areas | Bond failure | Preparation and application |
| Edge chipping | Thin/unsupported edge or traffic | Edge detail and thickness |
| Blistering | Moisture/coating incompatibility | Moisture and system requirements |
| Early surface wear | Wrong product or insufficient cure | Product suitability and curing |
| Patch showing through overlay | Differential texture/movement | Repair compatibility |
How Much Does Concrete Resurfacing Cost?
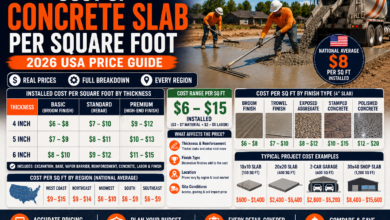
There is no single national price, and published estimates vary a lot. Consumer cost guides from 2025 and 2026 report roughly 3 to 10 dollars per square foot for common overlays, with elaborate decorative work costing more.
Those are averages from consumer sites, not verified benchmarks. Preparation, repairs, and finish choices can move a quote in either direction, so rely on local contractor quotes.
Break the budget into these pieces:
- Preparation and cleaning.
- Crack and spall repair.
- Overlay material.
- Decorative finish.
- Labor.
- Equipment.
- Sealing.
- Access and cleanup.
Here is a transparent worksheet for a 500 square foot slab. Fill in verified local numbers instead of assuming a national price.
| Cost item | Example input |
|---|---|
| Surface area | 500 ft² |
| Crack/spall repair | Enter local quote |
| Mechanical preparation | Enter contractor/equipment price |
| Overlay material | Manufacturer coverage × bag price |
| Decorative finish | Optional local price |
| Labor | Local installer quote |
| Sealer | Product-specific coverage and price |
| Disposal/cleanup | Enter local cost |
| Total | Sum verified local costs |
For material, use bags = area ÷ coverage per bag. As an illustration only, if a bag covered 50 ft² at your chosen thickness, 500 ÷ 50 = 10 bags. Use the real coverage from your TDS.
Estimate Your Resurfacing Budget
Use the cost calculator with your local numbers, and compare repair options.
Concrete Resurfacing Cost Calculator Repair Cost CalculatorYou can also try the Concrete Driveway Repair Cost Calculator if a driveway is the main concern.
Concrete Resurfacing FAQs
How long does concrete resurfacing last?
It varies widely with the product, preparation, traffic, and climate. No single lifespan applies to every system, and poor preparation shortens it the most.
Can cracked concrete be resurfaced?
Often, once cracks are stable and properly repaired. Active or structural cracks need diagnosis first, because a bonded overlay can reflect them.
Can spalling concrete be resurfaced?
Only after the unsound concrete is removed and the area is patched with a compatible material. An overlay should not bridge spalled areas.
Can you resurface a driveway?
Yes, if the slab is sound and stable and the system is rated for vehicle traffic and your climate. Check the product data sheet.
Does resurfacing add structural strength?
Generally no. Thin overlays renew the surface but do not repair settlement, structural cracking, or deep deterioration.
Can you resurface over painted concrete?
Only if the paint is removed or the manufacturer confirms compatibility. Paint can act as a bond breaker.
Can you resurface over sealed concrete?
Sealers usually need to be removed or verified compatible, since they can block bond.
How thick is a resurfacing layer?
It depends on the product and project. Read the data sheet for minimum and maximum thickness instead of relying on a general figure.
Is resurfacing cheaper than replacement?
Often, when the slab is sound. If the concrete is badly deteriorated, resurfacing may fail early, and replacement can be the better value. Get local quotes for both.
Why does a concrete overlay peel?
Most often from poor bond caused by contamination, a weak surface, an inadequate profile, moisture, or an incompatible coating. Poor curing or the wrong product can also contribute.