How to Fix Pitted Concrete Floors: Causes, Repair Methods and Resurfacing Options
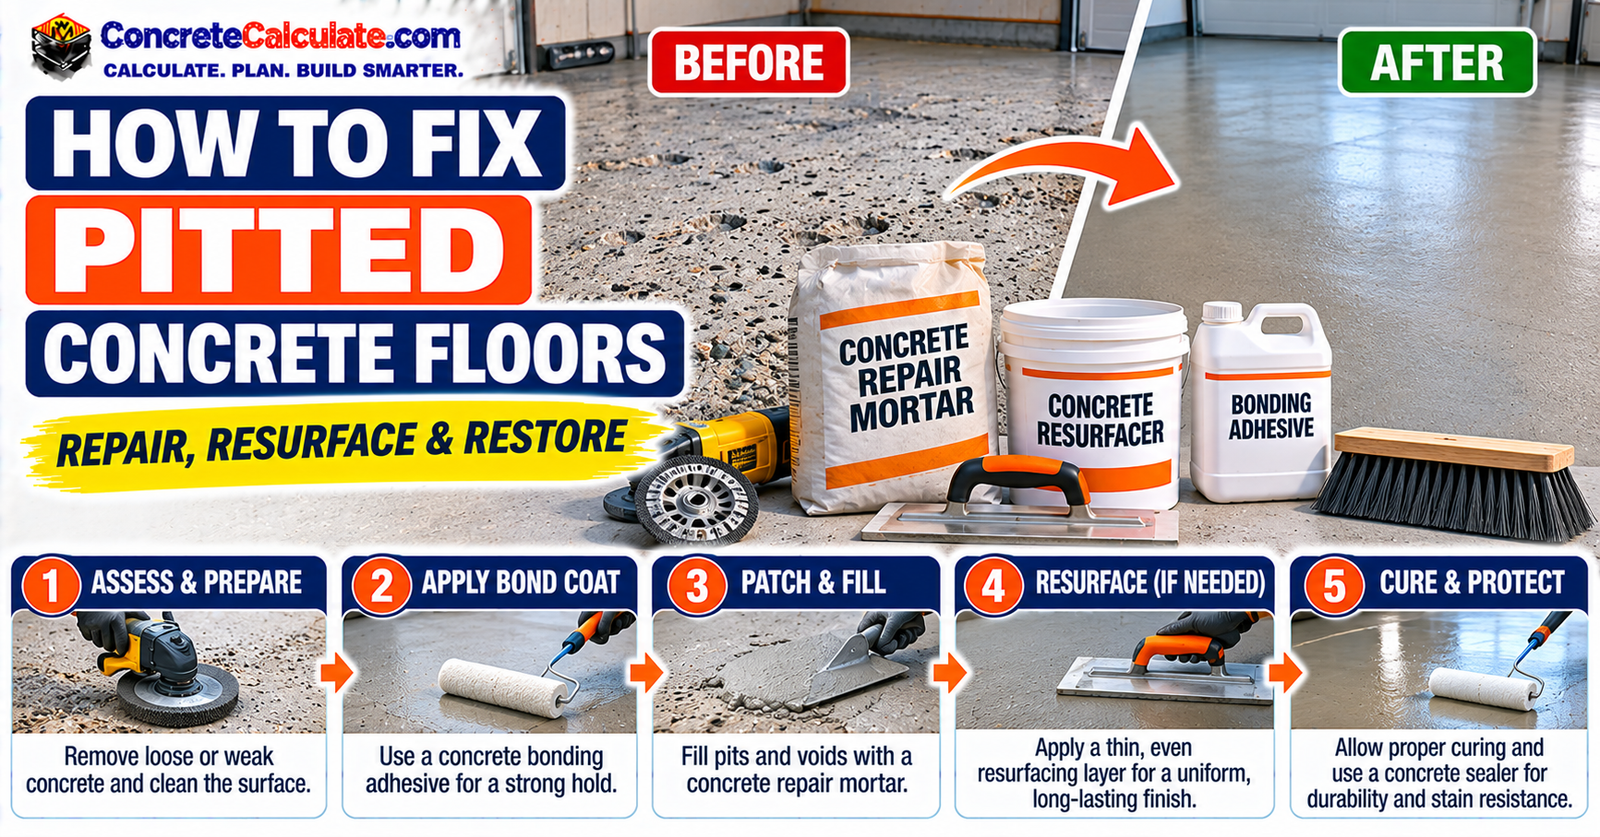
A practical guide to diagnosing pits, deciding between patching, resurfacing and replacement, and preparing the slab so the repair actually bonds.
Pitting describes how a floor looks, not what caused it. Before you buy any patch material, find out whether the pits are isolated defects over sound concrete or a sign of a weak surface.
ACI sets the repair order: evaluate the cause, remove deteriorated or defective concrete, prepare the surface, then select and install a suitable repair system.
- Identify the defect and check how deep and widespread it is.
- Test the surrounding concrete for powdering, scraping or hollow sounds.
- Few isolated pits on a sound slab: patch each one.
- Widespread shallow pitting on a sound slab: repair deep pits, then resurface.
- Weak, hollow or chemically damaged concrete: remove more material before any repair.
- Prepare the surface mechanically, clean it and follow the product’s moisture requirements.
- Cure and protect the repair.
A. Identify the defect
- What Is Pitted Concrete?
- What Do Pitted Concrete Floors Look Like?
- Pitting vs. Spalling vs. Scaling vs. Popouts
- How Deep and Widespread Is the Damage?
- How to Check Whether the Surrounding Concrete Is Sound
B. Find the cause
- What Causes Pitting in Concrete Floors?
- Freeze-Thaw and Deicing Salt Damage
- Poor Finishing and Weak Surface Paste
- Popouts From Aggregate
- Oil, Chemicals and Industrial Exposure
- Reinforcement Corrosion or Deeper Spalling
C. Patch, resurface or replace
- Can Pitted Concrete Floors Be Repaired?
- When Is Spot Patching the Best Choice?
- When Is Resurfacing Better Than Patching?
- When Should a Pitted Floor Be Replaced or More Extensively Repaired?
D. Prepare the floor
- What Tools and Materials Do You Need?
- How Much Damaged Concrete Should You Remove?
- How to Open and Prepare Individual Pits
- How to Prepare a Whole Pitted Floor for Resurfacing
- Remove Oil, Paint, Sealers and Contamination
- Should the Floor Be Dry, Damp or SSD?
E. Repair isolated pits
- What Repair Material Should You Use for Pitted Floors?
- Do You Need a Concrete Bonding Agent?
- How to Patch Pitted Concrete Floors Step by Step
F. Resurface widespread pitting
G. Quantity and failure prevention
What Is Pitted Concrete?
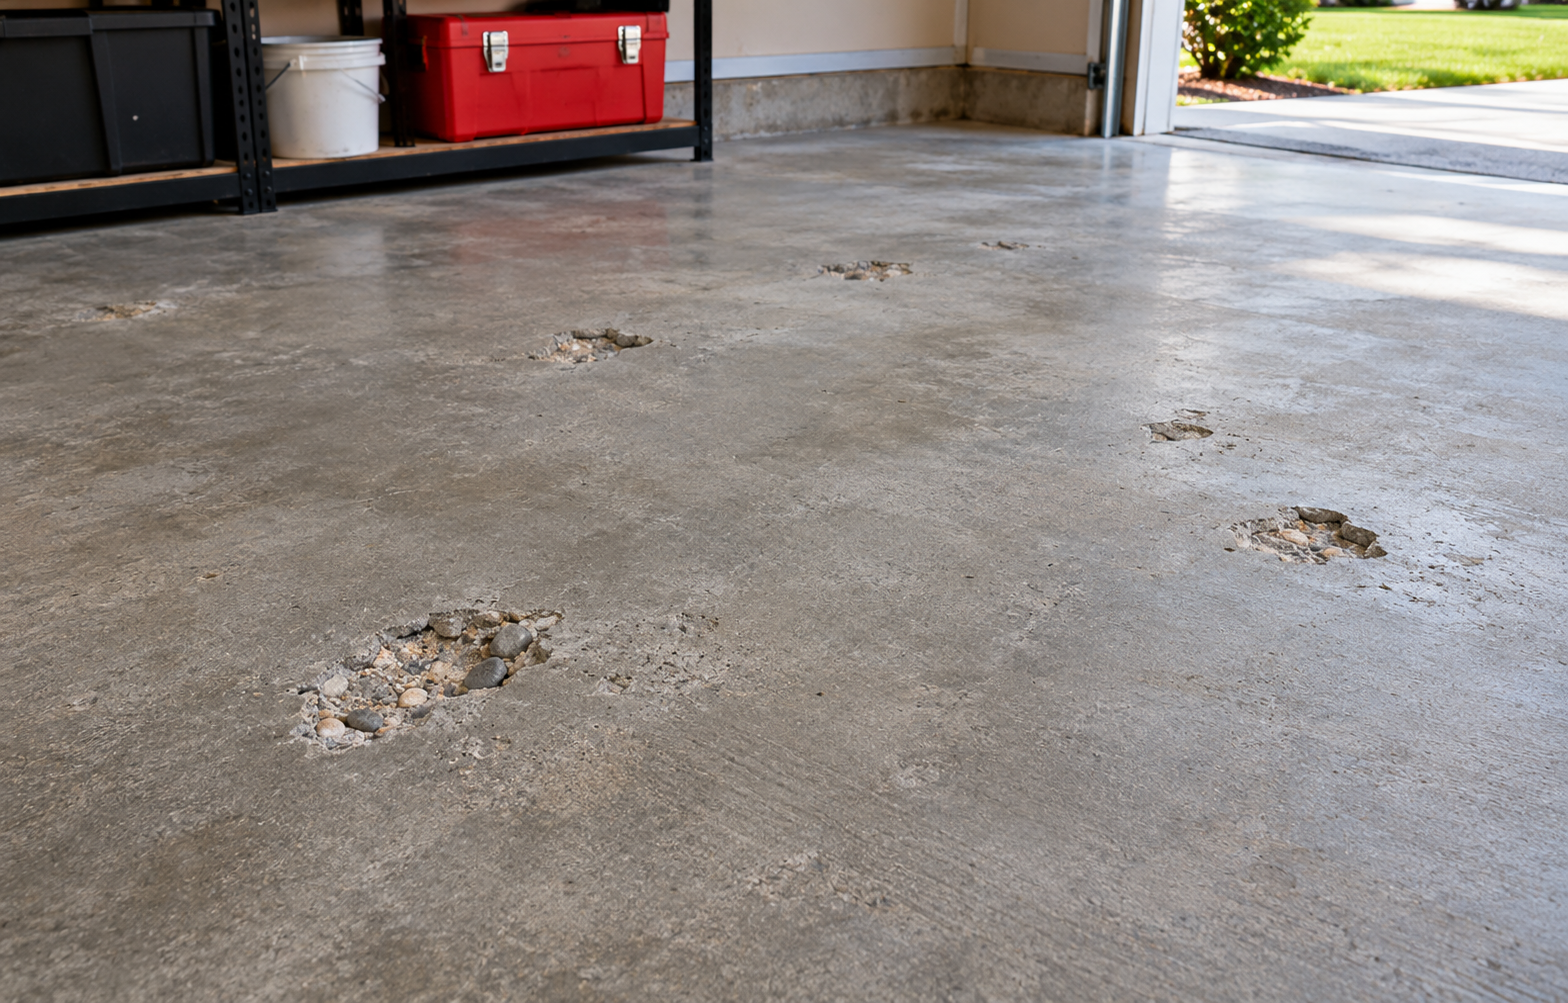
Pitted concrete has small, shallow cavities or depressions scattered across the surface. The word describes how the floor looks, not what went wrong with it.
A pitted floor can really be popouts, shallow spalls, scaling, chemical attack, freeze-thaw damage, impact damage, poor finishing, weak surface paste or a failed old coating. Each one calls for a different repair.
ACI makes the same point about surface imperfections, asking first whether an issue is just surficial or on closer look more severe (ACI University).
So the first rule is simple. Do not buy patch material until you know whether the pits are isolated defects or evidence of a weak surface.
What Do Pitted Concrete Floors Look Like?
- Small shallow craters
- Exposed aggregate at the bottom of some cavities
- Scattered popouts
- Rough divots
- Closely spaced surface cavities
Pitting is different from cracks, which are lines. It is also different from dusting, which is a powdery surface, and from scaling, spalling and delamination, which involve larger or layered loss.
Pitting vs. Spalling vs. Scaling vs. Popouts
These terms overlap in everyday talk, but they point to different causes. FHWA groups localized spalls, scaling and popouts as distress that can be corrected by removing the damaged concrete and replacing it with suitable repair material (FHWA partial-depth repair).
That principle carries over to floors, but the diagnosis comes first. Read more about concrete spalling, concrete scaling, concrete dusting and concrete delamination.
| Defect | Appearance | Typical mechanism | Likely repair direction |
|---|---|---|---|
| Pitting | Small localized cavities | Multiple possible causes | Diagnose first |
| Popout | Individual crater | Aggregate-related | Local patch |
| Scaling | Thin surface flakes | Freeze-thaw or weak surface | Remove weak layer or resurface |
| Spalling | Larger, deeper material loss | Corrosion, freeze-thaw, impact | Partial-depth repair |
| Dusting | Powdery surface | Weak wearing surface | Harden, remove or resurface |
| Delamination | Hollow, separated layer | Bond, corrosion or finishing issues | Remove the separated layer |
Pitted concrete can range from isolated surface cavities to broader deterioration, and the repair method depends on depth and substrate condition.
How Deep and Widespread Is the Damage?
Record what you see before choosing a repair. A simple log, with photos and a chalk grid, keeps the decision honest.
- Pit diameter
- Pit depth
- Spacing between pits
- The percentage of the floor affected
- Whether aggregate is exposed
- Whether damage continues under the surrounding surface
Do not rely on a universal severity threshold. A few deep pits and hundreds of shallow ones lead to different repairs, and the product you choose sets its own depth limits.
How to Check Whether the Surrounding Concrete Is Sound
ACI stresses surveying to determine the extent and severity of a defect before repair (ACI University). On a floor, that means testing the concrete between the pits, not just the pits.
- Hammer sounding: tap with a light hammer. A hollow sound suggests a separated layer. FHWA repair guidance uses a rod, hammer or similar device to find defective or delaminated areas.
- Scrape test: drag a screwdriver tip across the surface to see if it scrapes away easily.
- Powder check: rub a hand over the floor and look for loose powder.
- Visual inspection: look for flaking, rust stains and cracks around the pits.
If the surface powders easily, scrapes off, sounds hollow or flakes under light impact, filling individual pits may be wasted effort. See concrete dusting for the weak-surface diagnosis.
What Causes Pitting in Concrete Floors?
Several causes can produce pits, and clues on site help narrow them down. Table 2 pairs each cause with what to look for.
| Cause | Clues | What to investigate |
|---|---|---|
| Freeze-thaw | Garage or exterior exposure, worse after winter | Saturation and deicers |
| Popouts | Isolated round craters | Aggregate |
| Weak finishing layer | Broad shallow pitting or dusting | Finishing and curing |
| Oil or chemical attack | Localized around spills | Chemical history |
| Impact | Pits at a work area | Mechanical damage |
| Corrosion | Rust, cracking, spalls | Reinforcement |
| Old failed patch | Different texture or color | Previous repair quality |
Freeze-Thaw and Deicing Salt Damage
This is especially relevant for garage floors in cold climates. A saturated surface that goes through repeated freeze-thaw cycles can break down, and deicing salts carried in on vehicles make it worse.
ACI notes that trapped water and harmful solutions can lead to cracking and spalling when frozen (ACI technical FAQ).
The damage often starts as small patches that later merge, so early pits may be a warning. Keep the full discussion on the dedicated concrete scaling page.
Poor Finishing and Weak Surface Paste
A weak top layer can pit or flake years later. NRMCA links this to finishing while bleed water is present, adding water to the surface, over-finishing and inadequate curing (NRMCA CIP 14).
- Finishing while bleed water is still on the surface
- Sprinkling water on the slab to make it easier to work
- Excessive troweling
- Poor or missing curing
These steps leave a thin, weak paste that wears away as small pits. Repairing it means removing the weak layer, not filling holes in it.
Popouts From Aggregate
Some pits come from individual aggregate particles near the surface that swell or break and push out a small cone of mortar. The result is a round crater, often with the broken aggregate at the bottom.
Isolated popouts are different from widespread weak paste. A floor with a handful of popouts over sound concrete is usually a good candidate for local patching.
Oil, Chemicals and Industrial Exposure
Acids, salts, strong cleaners, battery acid in garages and aggressive industrial chemicals can attack the cement paste and leave a pitted surface. Oil does not usually dissolve concrete, but it ruins bond.
Stop the exposure and remove the contaminant before you repair anything. Start with how to remove oil stains from concrete if oil is involved.
Reinforcement Corrosion or Deeper Spalling
Pits near rust stains, cracks or exposed steel may be part of deeper corrosion-related deterioration. Rusting steel expands and pushes concrete off, so the surface damage is only the visible part.
Get a Professional Evaluation
If reinforcement is involved, have a qualified engineer or concrete repair professional evaluate the slab. Patching over active corrosion usually fails.
Can Pitted Concrete Floors Be Repaired?
Yes, if the remaining slab is sound and stable. The repair sequence matters as much as the material.
ACI describes the order clearly. Evaluate the condition and cause, remove deteriorated, damaged or defective concrete, then select and install the repair, with guidance in ACI 546R (ACI technical FAQ).
That is stronger than the common shortcut of vacuuming, filling holes and painting. Without evaluation and removal, the repair has nothing solid to bond to.
When Is Spot Patching the Best Choice?
- Few isolated pits
- Sound surrounding floor
- No broad delamination
- No active movement
In these cases, repairing each pit separately is faster and cheaper than covering the whole floor. The patching concrete without removing old concrete guide covers technique.
When Is Resurfacing Better Than Patching?
- Many shallow pits
- A large rough area
- A structurally sound floor
- A surface that can be mechanically prepared
Resurfacing is appropriate for widespread shallow pitting only after weak or unsound concrete has been removed. It is not suitable over active movement, significant settlement, widespread delamination or severe contamination. See the Concrete Resurfacing Guide.
Isolated pits usually favor spot repair, while widespread shallow pitting over sound concrete often favors resurfacing.
When Should a Pitted Floor Be Replaced or More Extensively Repaired?
- Widespread deep deterioration
- Unsound concrete throughout
- Serious settlement
- Structural cracking
- Deep chemical attack
- Corrosion
- Failed slab support
In these cases, hiding the problem under an overlay only delays failure. Remove more material or consider larger rehabilitation.
| Floor condition | Patch | Resurface | Replace or major repair |
|---|---|---|---|
| Few isolated pits | Best | Unnecessary | No |
| Many shallow pits, sound slab | Inefficient | Often best | Usually no |
| Deep scattered spalls | Yes, locally | After deep repairs | Maybe |
| Widespread weak paste | Limited | Only after removal | Possible |
| Active settlement | No | No | Correct the support |
| Serious corrosion | Professional | No | Depends on extent |
| Severe chemical deterioration | Limited | Often unsuitable | Often more extensive |
What Tools and Materials Do You Need?
- Personal protective equipment, including eye, hearing and respiratory protection
- A grinder with a dust shroud and a vacuum that suits fine dust
- A hammer and chisel, and a scraper
- Crack and repair tools, such as a margin trowel and a stiff brush
- Repair mortar or resurfacer
- A primer or bonding agent if the product requires one
- Mixing equipment, such as a bucket and mixing paddle
- A trowel and finishing tools
- Curing or protection products
Grinding and chipping concrete create fine dust that contains silica, which is harmful to breathe. Use dust control, wet methods where the product allows, and a suitable respirator.
How Much Damaged Concrete Should You Remove?
Remove weak, broken, disintegrated or delaminated concrete until sound substrate remains. That is the rule that decides whether the repair lasts.
FHWA’s partial-depth repair guidance uses the same principle, calling for removal of broken, damaged or disintegrated concrete until sound and clean concrete is exposed (FHWA).
Treat any pavement dimensions in that guidance as highway-specific. They are not requirements for a garage or basement floor, and your repair product sets its own limits.
How to Open and Prepare Individual Pits
- Remove loose edges and crumbling material.
- Do not leave undercut flakes that can break away later.
- Shape the cavity to the geometry the product requires.
- Vacuum out dust and debris.
Do not assume every product needs square-cut edges. Some repair mortars do, and others are designed for different edge conditions, so check the technical data sheet.
How to Prepare a Whole Pitted Floor for Resurfacing
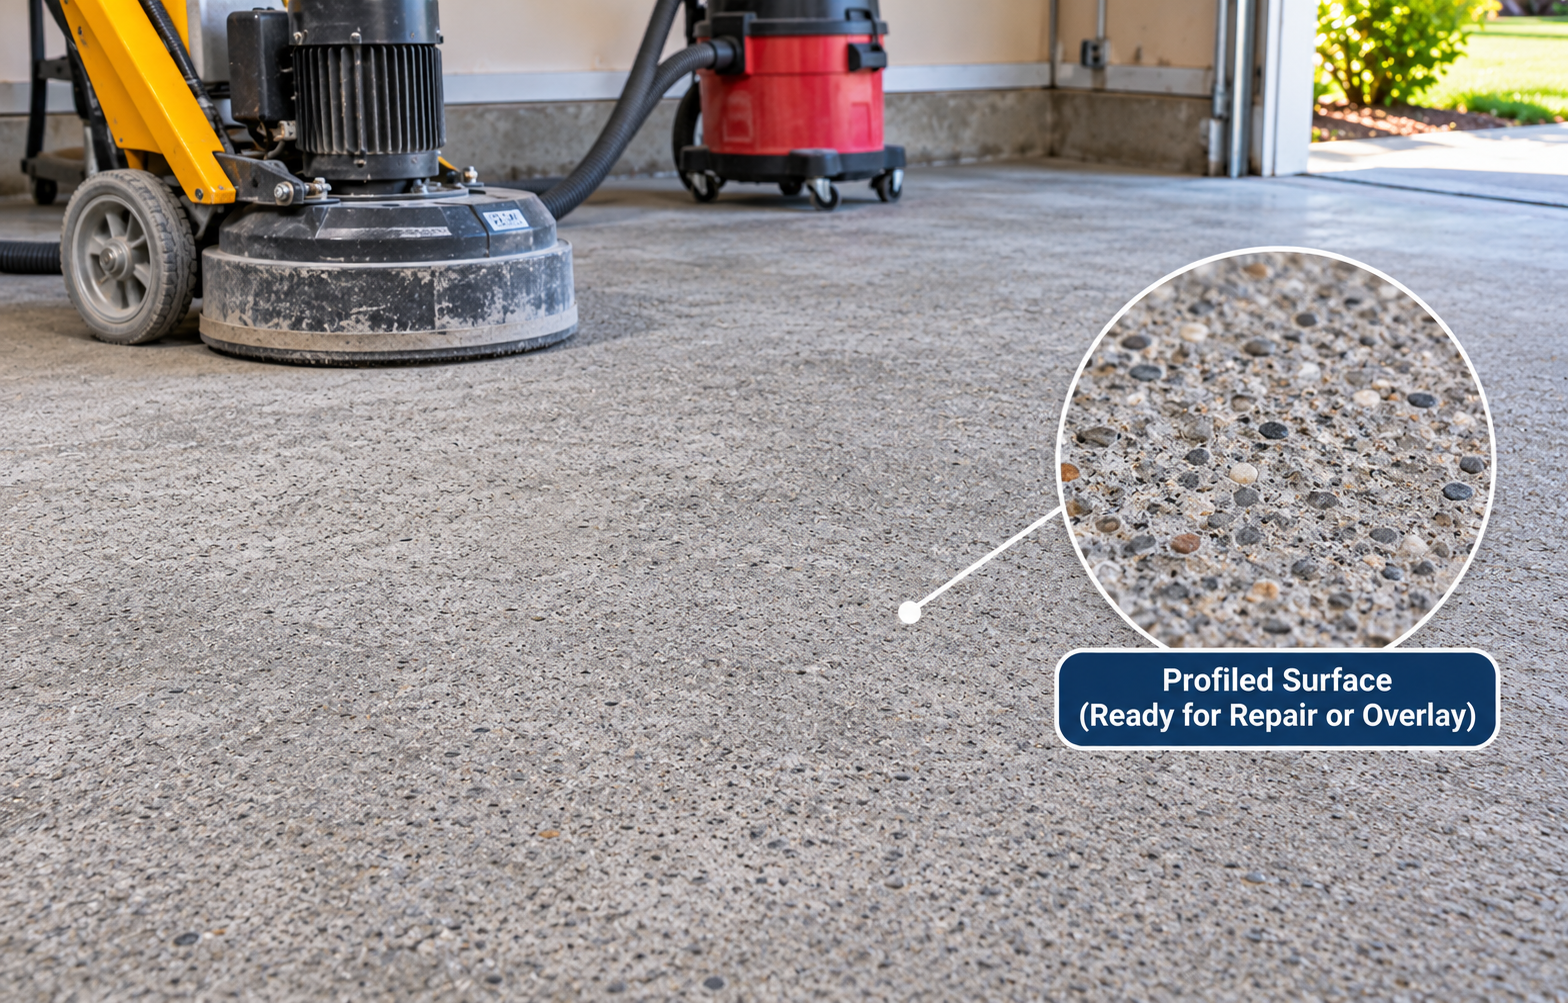
Whole-floor preparation is mechanical. Common methods include grinding, shot blasting and, where a more aggressive profile is needed, scarifying. Remove coatings and laitance as part of the process.
ICRI 310.2R is the main conceptual reference. It defines ten concrete surface profiles, from CSP 1 for minimal roughness to CSP 10 for a very rough surface, and specifications typically call for a range that matches the repair or coating.
Do not assume pressure washing alone is enough. Many bonded repairs and overlays need mechanical profiling, and the product data sheet states the profile it requires.
Remove Oil, Paint, Sealers and Contamination
Repair material has to bond to concrete, not to contamination. ICRI describes surface preparation as removing laitance, dirt, oil, films, paint, coatings and unsound concrete that would interfere with adhesion.
Oil that has soaked in needs real removal, so start with how to remove oil stains from concrete. For routine cleaning only, see how to clean concrete naturally, which does not replace preparation.
Should the Floor Be Dry, Damp or SSD?
There is no universal answer. Some cementitious repairs call for a saturated surface-dry (SSD) substrate, meaning damp with no standing water. Others need a dry substrate, and epoxies often have strict moisture limits.
Follow the technical data sheet for your product. A taped plastic sheet gives a quick hint of moisture, but it is not a measurement.
What Repair Material Should You Use for Pitted Floors?
Choose by performance needs, not by habit. ICRI 320.2R describes a process for selecting repair materials so the properties needed for a durable repair are specified for each project (ICRI 320.2R).
The main factors are depth, traffic, moisture, coating compatibility and cure time.
| Material | Best use | Main benefit | Main limitation |
|---|---|---|---|
| Polymer-modified repair mortar | Small to medium pits | Good bond and workability | Product depth limits |
| Rapid-set repair mortar | Fast turnaround | Early strength | Short working time |
| Epoxy mortar | Selected high-duty repairs | Strong bond and chemical resistance | Moisture and thermal compatibility |
| Cementitious patch compound | General shallow repair | Easy finishing | Not for every heavy-duty floor |
| Resurfacer | Widespread shallow pitting | Uniform new surface | Requires a sound substrate |
| Structural repair mortar | Deep localized repair | Higher performance | More demanding prep and application |
Do You Need a Concrete Bonding Agent?
Sometimes. Some systems require a primer or bonding agent, while others are designed to bond directly to properly prepared concrete.
Highway repair specifications show both approaches, such as epoxy bonding for early-opening repairs and a sand-cement grout for others. For your product, follow its instructions. Read how to use concrete bonding adhesive for more.
How to Patch Pitted Concrete Floors Step by Step
The order below follows the broad repair sequence in the ACI field guide for horizontal surfaces (ACI RAP-7) and the ACI repair steps already covered. Your product’s instructions always take priority.
Mark the repair areas
Outline each pit and any weak surrounding concrete with chalk or marker. Include a small margin of sound concrete.
Remove loose and unsound concrete
Chip or grind back until only sound concrete remains. Stop when the substrate rings solid and resists a scraper.
Mechanically prepare the pit
Roughen the walls and floor of the cavity as the product requires. Pressure washing alone is rarely enough for a bonded repair.
Vacuum and clean
Remove dust, debris and oil. Clean surfaces bond better than dusty ones.
Condition or prime the substrate as specified
Dampen to SSD, apply a primer or bonding agent, or leave dry, whichever the product states.
Mix the repair material accurately
Measure water and powder exactly and mix for the stated time. Extra water weakens the patch.
Pack material firmly into the pit
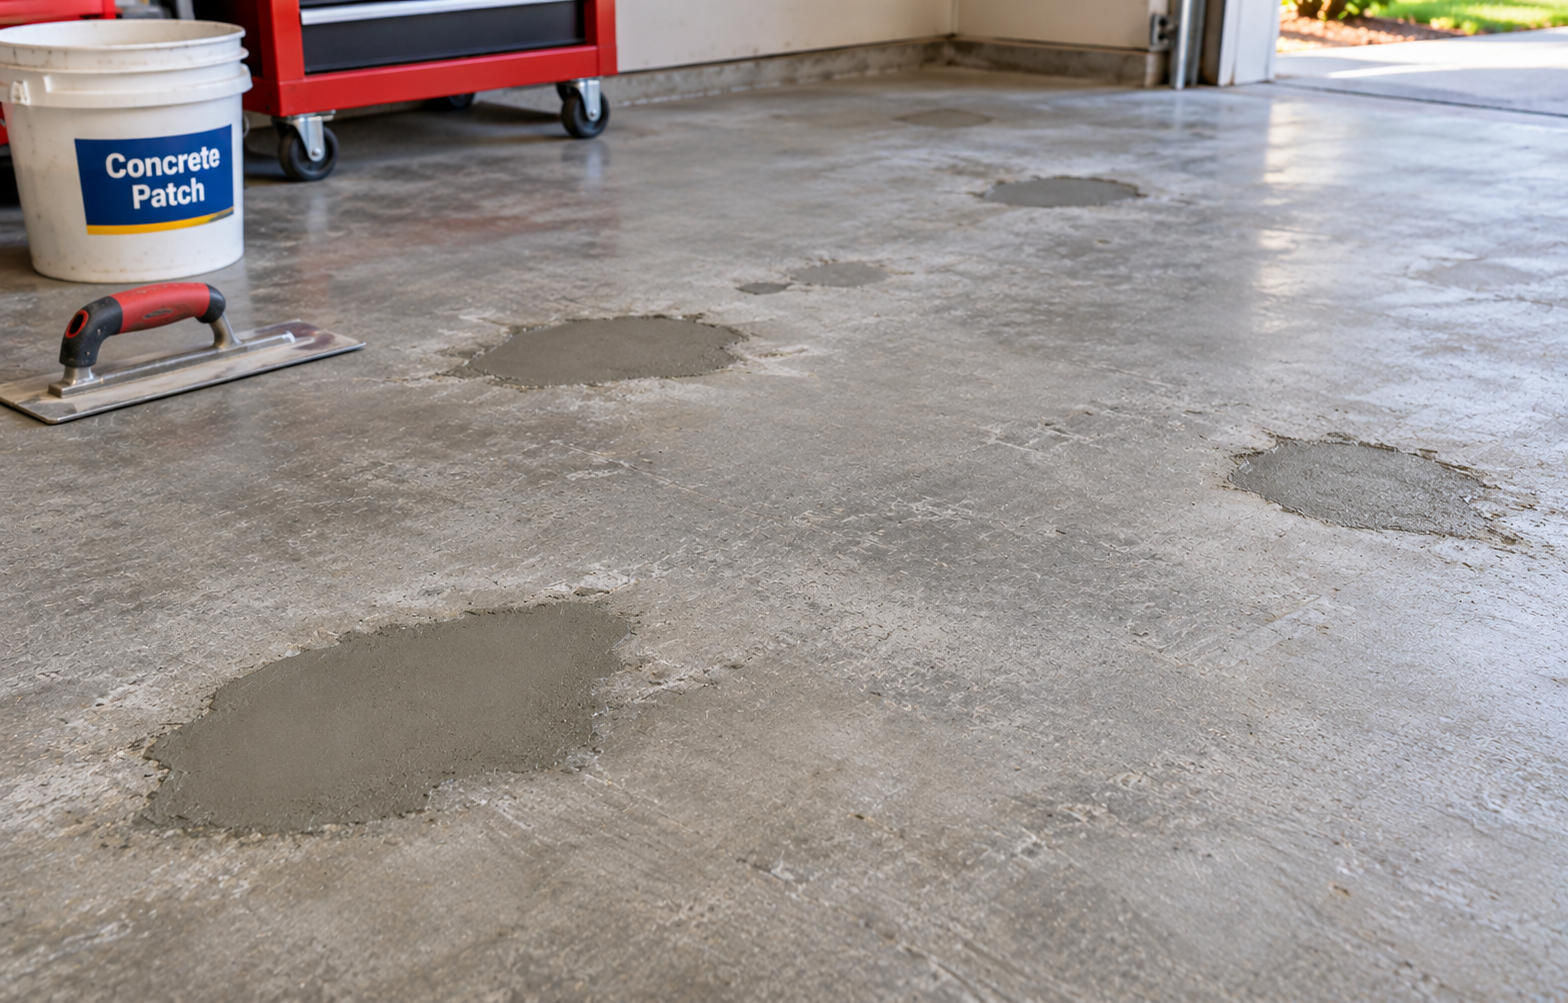
Press the mortar in with a trowel to remove voids, working it into the sides of the cavity.
Finish flush with the surrounding floor
Strike off and trowel level with the floor. Match the texture of the surrounding surface.
Cure and protect
Cure as the product directs and keep traffic and moisture off until it is ready. Cold or hot weather can change the time needed.
Durable pitted-floor repair requires removing weak concrete before patching or resurfacing the sound substrate.
How to Resurface a Pitted Concrete Floor
Resurfacing follows a clear workflow. The key is to fix the substrate before covering it.
- Map the defects.
- Remove unsound concrete.
- Repair the deeper pits first.
- Mechanically profile the whole floor.
- Clean and vacuum.
- Prime if the system requires it.
- Apply the resurfacer or overlay.
- Finish as directed.
- Cure the surface.
- Protect it from traffic until the product allows use.
Deep pits should not be hidden beneath a thin skim coat. A thin layer over a deep cavity can crack, sink or peel as it loses support.
The Concrete Resurfacing Guide covers the full process, and the Concrete Overlay Calculator helps with quantities.
Can You Apply Epoxy Over a Pitted Concrete Floor?
Sometimes, but only after the floor is prepared. An epoxy coating is not a structural filler by itself.
- Pits may need filling with a suitable repair material first.
- The floor must meet the profile the coating requires.
- Moisture must be at an acceptable level.
- Oil and other contamination must be removed.
ICRI 310.2R ties profile to system thickness, so thicker systems need rougher surfaces than thin coatings. Do not pour coating into deep pits unless the system specifically allows it.
How Much Repair Material Do You Need and Why Do Repairs Fail?
For isolated pits, estimate the volume of each cavity with simple geometry, then add them up.
For broad resurfacing, use the manufacturer’s coverage at the thickness you select.
Irregular pitting makes manufacturer yield more reliable than generic square-foot rules. Waste varies with pit depth and irregularity, so confirm the number with the product data.
Example (illustrative geometry only): five pits
Assume each prepared pit is 6 in × 6 in and 0.5 in deep.
Per pit: 0.5 ft × 0.5 ft × (0.5 ÷ 12) ft = 0.0104 ft³. Five pits: 5 × 0.0104 = 0.052 ft³, or about 90 in³.
| Input | Example |
|---|---|
| Number of pits | 5 |
| Average pit size | 6 × 6 in |
| Average depth | 0.5 in |
| Theoretical volume | About 0.052 ft³ |
| Product yield | Enter the value from the data sheet |
| Bags or units required | Round up |
Use the Concrete Repair Calculator for patch quantities, the Concrete Resurfacing Calculator for broad areas, and the Concrete Repair Cost Calculator for budgeting. Treat any fixed thickness or waste assumption in a calculator as a planning number, not a rule.
Repairs fail for predictable reasons. Table 6 matches each failure symptom to its likely cause.
| Failure symptom | Likely cause | Better approach |
|---|---|---|
| Patch pops out | Poor bond | Profile and clean properly |
| Overlay peels | Contamination | Remove oil and coatings |
| Pits reappear | Weak substrate remained | Remove all unsound concrete |
| Edge chips | Feather edge | Follow the product’s edge requirement |
| Repair cracks | Movement or shrinkage | Diagnose the cause and material compatibility |
| Coating blisters | Moisture | Test and manage moisture |
| Surface wears rapidly | Wrong product or cure | Select a floor-rated system |
Avoid thin feather-edge patches unless the product is designed for them. Edge geometry and minimum thickness must follow the technical data sheet, and there is no universal minimum patch depth.
Cure repairs as directed, using the concrete curing and drying time guide and the Curing Time Chart as general context. If cracks are part of the problem, see how to fix cracked concrete.
Pitted Concrete Floor FAQs
Can pitted concrete be repaired?
Yes, if the remaining slab is sound and stable. Evaluate the cause, remove weak or damaged concrete, prepare the surface, then patch or resurface with a suitable repair system.
Why does a garage floor pit?
Common causes include freeze-thaw damage with deicing salts, popouts from aggregate, a weak surface layer from poor finishing or curing, chemical exposure, impact and corrosion. The cause decides the repair.
Can I fill concrete pits with epoxy?
Only with a repair product designed for it, and only after the pits are cleaned and prepared. A thin coating poured into deep pits is not a structural fill, so follow the system’s instructions.
Can I skim coat a pitted floor?
A resurfacer can cover many shallow pits on a sound, prepared slab. Deep pits should be repaired first, because a thin skim coat over a deep cavity can crack or peel.
Do I need to grind before resurfacing?
Usually the surface needs mechanical preparation, such as grinding or shot blasting, to remove weak paste and coatings and create the profile the product requires. Check the product data sheet.
Can I paint over pitted concrete?
Paint will not fix the pits and may peel if the surface is weak, oily or damp. Repair and prepare the floor first, and use a coating designed for concrete floors.
How deep can a concrete patch be?
It depends on the product. Each repair material has its own depth limits and edge requirements, listed in its technical data sheet. There is no universal figure.
Do I need bonding adhesive?
Sometimes. Some repair systems require a primer or bonding agent, and others bond directly to properly prepared concrete. Follow the manufacturer’s instructions.
When should a pitted slab be replaced?
Consider replacement or more extensive repair when deterioration is deep and widespread, the concrete is unsound throughout, or there is serious settlement, structural cracking, corrosion or deep chemical attack.
How do I stop pitting from coming back?
Fix the cause. Remove all unsound concrete, prepare and clean the surface properly, use the right repair material, cure it, and manage moisture, deicing salts and chemicals.
Conclusion
Fix pitted floors in the right order: identify the cause, test the surrounding concrete, remove everything weak, prepare the surface, then patch or resurface. Isolated pits favor spot repair, widespread shallow pitting favors resurfacing, and weak concrete needs removal.
Estimate your repair material before you buy.
Open the Concrete Repair Calculator