How to Level Ground for a Concrete Slab: Measurements, Grading and Excavation
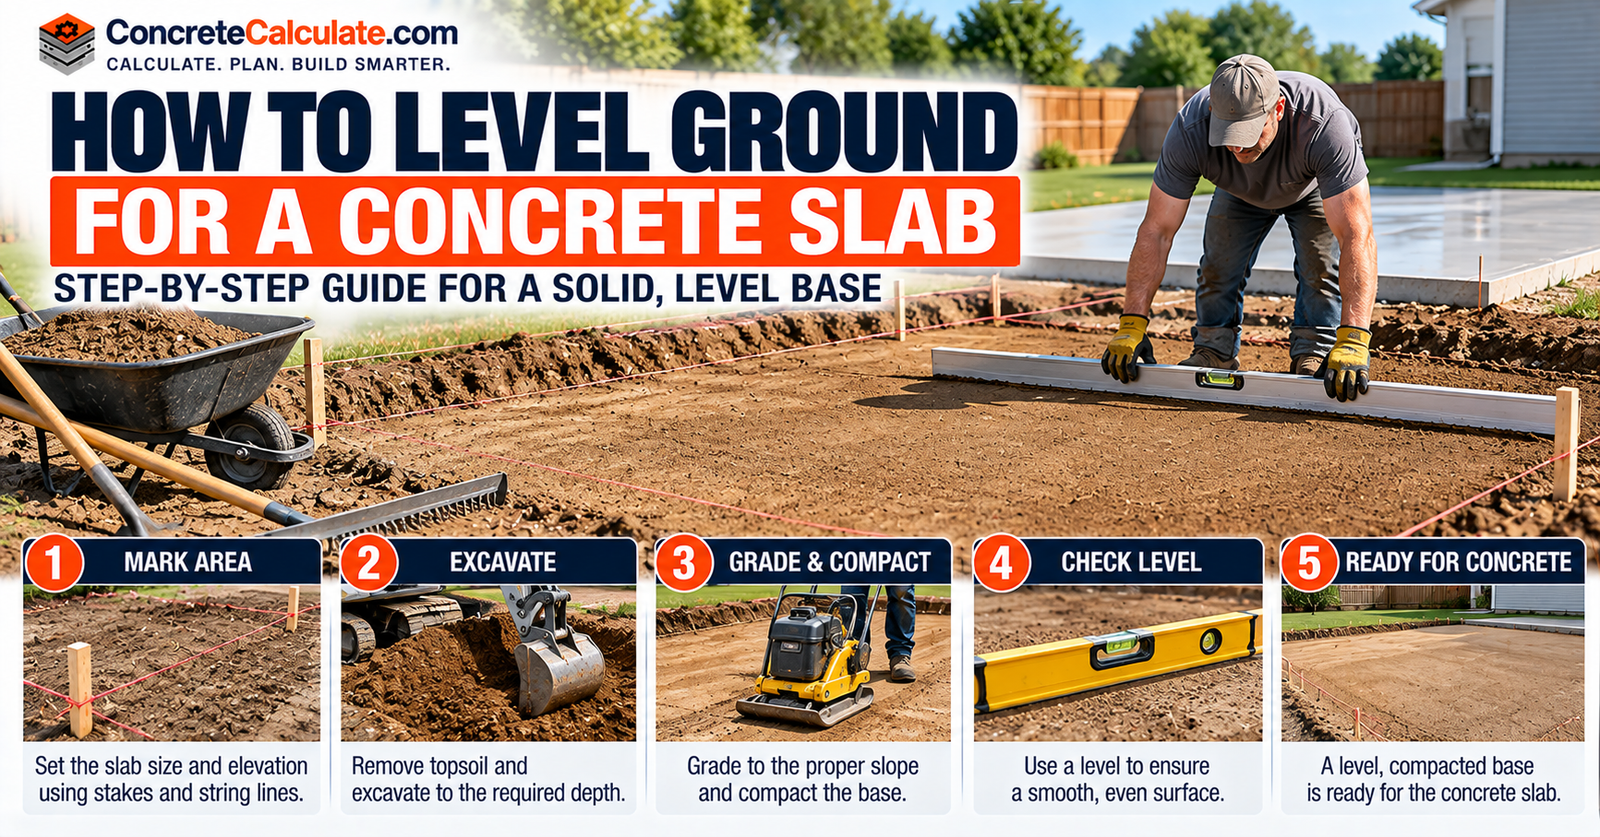
How to establish accurate elevations, calculate excavation depth, level or grade the ground correctly and verify the prepared surface before you pour.
Quick Answer
Mark the slab perimeter, then establish a reference elevation for the finished slab surface. From that reference, calculate the excavation depth by working downward through the concrete thickness and the specified base thickness, then remove unsuitable surface material and bring the ground to the required grade.
Finally, verify elevations across the whole footprint and confirm the subgrade is ready for the specified support system. An indoor slab usually needs a level finished surface, while outdoor flatwork like a patio or driveway usually needs a planned drainage slope instead of a perfectly horizontal surface.
Basic Tools Checklist
Measuring tape, corner stakes, mason’s string, a string level or long spirit level, a laser level with receiver and rod, a straightedge or screed board, marking paint, a rake, shovel and a plate compactor cover most DIY slab projects.
| Task | Level or Sloped? | Typical Reference |
|---|---|---|
| Indoor floor slab | Level, to design elevation | Benchmark and design drawings |
| Patio or driveway | Sloped for drainage | Applicable code and site drainage plan |
| Uniform ground support | Separate requirement from level or slope | Compaction and subgrade verification |
In This Guide
- 1. How to Level Ground for a Concrete Slab: Quick Answer
- 2. What Does Level Ground Actually Mean for a Concrete Slab?
- 3. When Should the Ground Be Level and When Should It Slope?
- 4. Tools and Equipment Needed to Level Ground
- 5. How to Check Whether Your Site Is Suitable for a Concrete Slab
- 6. How to Mark Out a Concrete Slab With Stakes and String
- 7. How to Square a Concrete Slab Layout
- 8. How to Establish a Finished Slab Elevation
- 9. How to Measure Ground Elevation With a String Line
- 10. How to Use a Laser Level to Find High and Low Spots
- 11. How Deep Should You Excavate for a Concrete Slab?
- 12. How to Calculate Cut and Fill at Each Measurement Point
- 13. How to Calculate the Slope and Required Drop for Drainage
- 14. How to Transfer the Required Grade to Stakes and Reference Lines
- 15. How to Remove Grass, Roots, Topsoil and Other Unsuitable Material
- 16. How to Cut Down High Spots Without Overexcavating
- 17. How to Fill Low Spots and Correct Uneven Ground
- 18. How to Grade the Ground With a Rake and Straightedge
- 19. How to Level a Sloping Backyard for a Concrete Slab
- 20. How to Level Ground for a Patio, Driveway, Shed or Garage Slab
- 21. How to Check for Soft Spots, Loose Fill and Unstable Soil
- 22. How to Compact the Leveled Subgrade
- 23. How to Install and Level a Specified Gravel or Aggregate Base
- 24. How to Maintain Slab Thickness on Sloping Ground
- 25. How to Check the Final Subgrade Elevation and Surface Uniformity
- 26. Common Ground-Leveling Mistakes Before Pouring Concrete
- 27. Final Pre-Pour Ground-Leveling Checklist
- 28. How to Level Ground for a Concrete Slab: FAQs
1. How to Level Ground for a Concrete Slab: Quick Answer
Start by marking the slab perimeter and establishing a stable reference elevation for the finished slab surface. From that single reference, calculate the excavation depth downward, accounting for the concrete thickness and the specified base thickness beneath it.
Remove unsuitable material, bring the ground to the required grade, then verify elevations across the footprint before the base and slab go in. An indoor slab generally requires a level finished surface, while outdoor flatwork such as a patio or driveway generally needs a deliberate drainage slope rather than a flat, horizontal surface.
2. What Does Level Ground Actually Mean for a Concrete Slab?
These four terms get used loosely on jobsites, but they describe different things. Level means a horizontal surface with no intended elevation change, while flat means a surface without excessive local high and low spots, which can still be intentionally sloped.
Graded means a surface intentionally shaped to a prescribed elevation or drainage slope, and uniform support is a separate requirement about the condition of the ground underneath, regardless of the surface shape above it. When someone says “level the ground for a patio,” they usually mean flat and graded, not literally horizontal, since most patios need a drainage slope to function properly.
3. When Should the Ground Be Level and When Should It Slope?
Different slab types call for different surface conditions, and mixing them up is a common planning mistake.
| Project | Intended Ground Preparation | Important Consideration |
|---|---|---|
| Interior floor slab | Prepare to the specified design elevation | Final floor level and surface tolerances |
| Patio beside a house | Grade according to the required drainage plan | Drain water away from the foundation |
| Detached patio | Establish the intended finished grade | Drainage and surrounding landscaping |
| Driveway | Follow the approved longitudinal and cross slopes | Garage threshold, runoff and access |
| Walkway | Follow the required route and drainage grades | Accessibility and local requirements |
| Shed or garage foundation | Follow the specified foundation design | Support, finished elevation and drainage |
The 2024 International Residential Code addresses drainage near foundations in Section R401.3. It requires ground immediately adjacent to a foundation to slope away at roughly 5 percent for the first 10 feet in the general case, with a specific minimum of 2 percent for impervious surfaces, such as concrete or asphalt, within that same 10 feet.
This is a specific code provision for foundation drainage, not a universal slope requirement for every sidewalk, accessible route or indoor floor. Always confirm the code actually adopted in your jurisdiction before finalizing a grade.
4. Tools and Equipment Needed to Level Ground
| Tool | Best Suited For |
|---|---|
| Measuring tape | Layout dimensions and diagonal checks on any project |
| Stakes and mason’s string | Establishing perimeter and reference lines |
| String level or long spirit level | Small, simple DIY slabs |
| Laser level, receiver and rod | Larger or more precise elevation work |
| Straightedge or screed board | Checking local high and low spots during grading |
| Marking paint | Recording layout and elevation marks on the ground |
| Rake and shovel | Fine grading and small material adjustments |
| Plate compactor | Small to medium project compaction |
A small, flat DIY patio can often be handled with just stakes, string, a spirit level and hand tools. Larger or irregular projects benefit from a laser level and appropriate excavation equipment to keep the work efficient and accurate.
5. How to Check Whether Your Site Is Suitable for a Concrete Slab
Before setting out any levels, walk the site and look for obvious problems. Watch for existing drainage issues, major elevation changes, nearby structures, soft or spongy ground, existing fill of unknown quality, and any area that might need a retaining wall or engineered grading.
Contact your local utility locating service before digging, since underground lines can be present even in a backyard. Severe slopes, unstable soil and anything near a structural foundation deserve professional involvement rather than a purely DIY approach.
6. How to Mark Out a Concrete Slab With Stakes and String
Establish the perimeter using corner stakes and taut string lines run between them. Set the strings outside the actual excavation area using offset stakes or batter boards, so the reference lines survive the digging and grading work that follows.
Example: 12 x 16 ft Patio
Place four offset reference stakes a few feet outside each corner of the intended footprint. Run string lines between them at a fixed, known height, so the strings stay usable as a reference throughout excavation, base placement and forming, even after the ground inside them has been dug out.
7. How to Square a Concrete Slab Layout
Check corner geometry using the 3-4-5 method for a quick field check, or verify the diagonals of a rectangular layout against each other.
Diagonal Formula
d = sqrt(L squared + W squared)
Where d is the diagonal length, L is the layout length and W is the layout width, all in the same units.
Worked Example: 12 x 16 ft Rectangle
d = sqrt(12 squared + 16 squared) = sqrt(144 + 256) = sqrt(400) = 20 ft.
Both measured diagonals should equal 20 feet if the layout is square. Also check the planned side dimensions and corner angles directly, since equal diagonals alone do not prove every possible four-sided shape is a true rectangle.
8. How to Establish a Finished Slab Elevation
Select a stable benchmark, a fixed point that won’t move or get disturbed during construction, and mark the intended top-of-slab elevation relative to it. For a slab near a building, account for door threshold heights, existing paving, foundation walls and any surface drainage clearances the project needs.
Use one consistent elevation datum throughout the entire article and project, rather than inventing a new reference point at each construction stage. Every later measurement, from excavation depth to base thickness to final grade, should trace back to this same benchmark.
9. How to Measure Ground Elevation With a String Line
Stretch a reference string at a known elevation across the site, then measure vertically downward from that string to the existing ground at each point of interest. Take readings at the corners, along the perimeter, and at additional interior points across the footprint.
Measuring only the four corners can miss a significant hump or depression in the middle of the slab area. A systematic grid of readings catches problems that corner-only measurements would overlook entirely.
10. How to Use a Laser Level to Find High and Low Spots
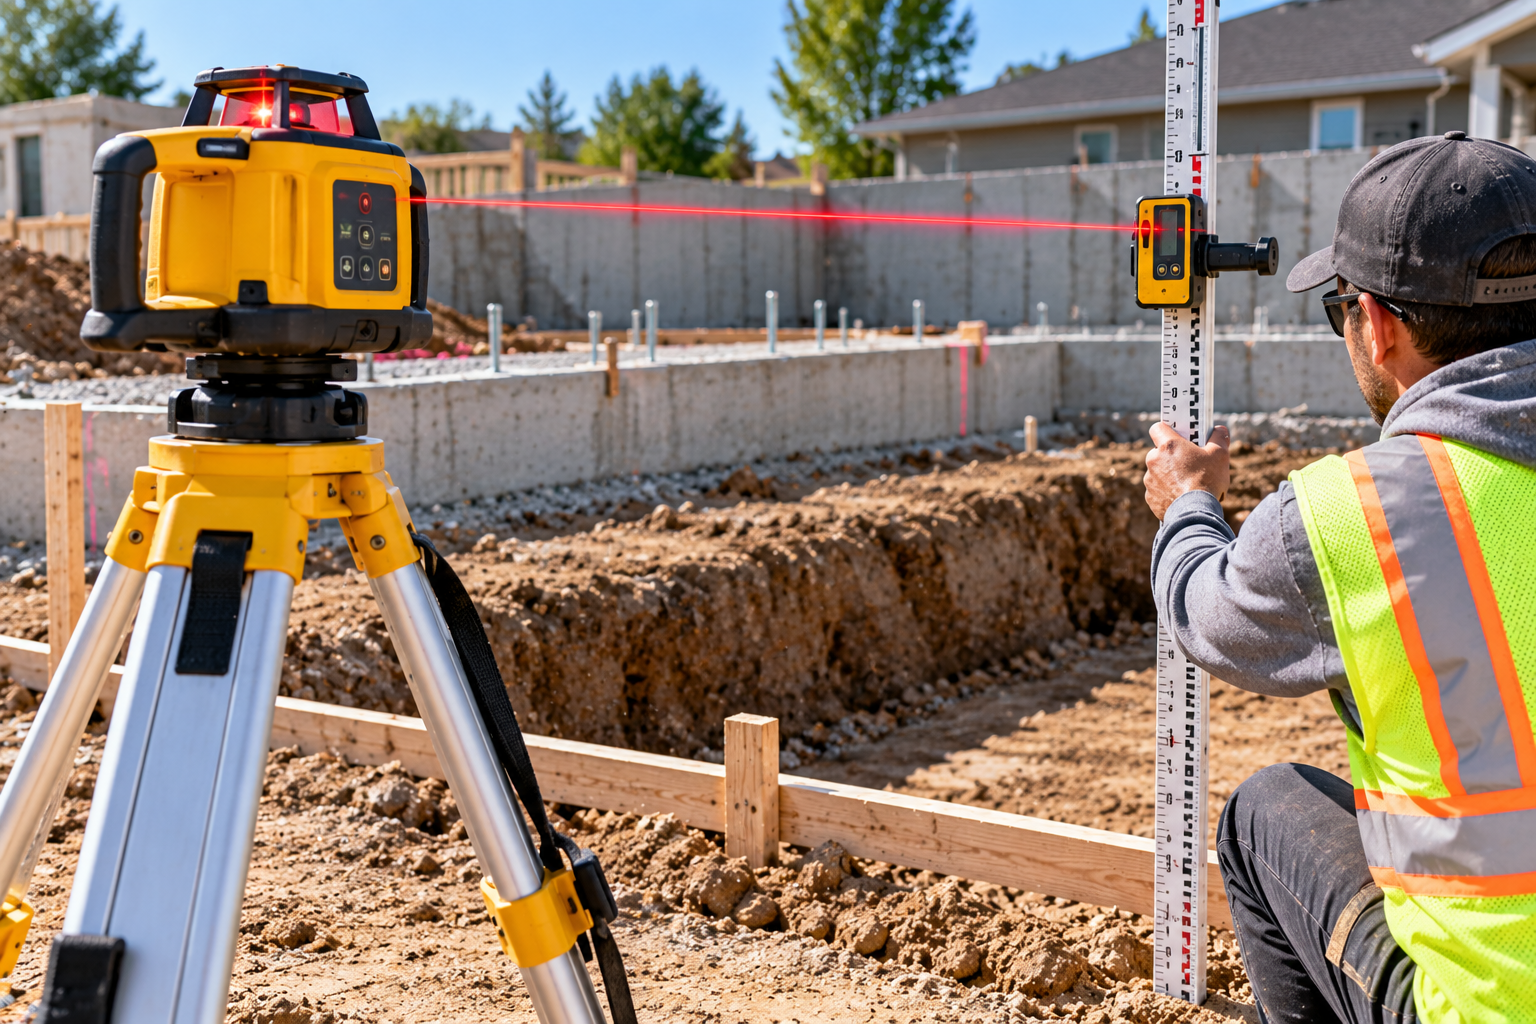
Set a rotary or appropriate construction laser on a stable tripod at a fixed location, then take readings using a compatible receiver and leveling rod at each measurement point. With a horizontal laser plane, a larger distance measured down to the ground generally means that point sits at a lower elevation, and a smaller distance means a higher point.
Worked Example: Three Readings Against One Datum
Point A reads 42 inches down to the ground, Point B reads 38 inches, and Point C reads 45 inches, all measured from the same laser plane. Point C is the lowest of the three, since it has the largest measured distance down, and Point B is the highest, with the smallest distance.
Keep the rod reference consistent and avoid moving the tripod during the survey, since either mistake invalidates the comparison between readings.
11. How Deep Should You Excavate for a Concrete Slab?
Excavation depth depends on the finished slab elevation, the concrete thickness, and the specified base thickness working together.
Simple Excavation Formula
Excavation depth below finished surface = Concrete thickness + Base thickness
This applies to a simple assembly without additional layers such as insulation or a vapor retarder.
| Construction Layer | Thickness | Elevation Relative to Finished Surface |
|---|---|---|
| Finished concrete surface | Reference point | 0 in |
| Concrete slab | 4 in | Bottom at -4 in |
| Specified compacted aggregate base | 4 in | Bottom at -8 in |
| Required prepared subgrade | Target surface | -8 in |
This is an illustrative two-layer assembly, not a universal slab specification. Any project-specific insulation, vapor retarder, thickened edge or other layer must be incorporated into the actual construction drawings for your project.
12. How to Calculate Cut and Fill at Each Measurement Point
Cut means removing existing soil to reach the required subgrade elevation, while fill means adding approved, compactable material where the existing ground sits below that target. Work through your measurement grid point by point, comparing existing ground elevation against the required target elevation at each location.
| Measurement Point | Existing Ground Elevation | Target Elevation | Required Adjustment |
|---|---|---|---|
| Corner A | -5 in | -8 in | Cut 3 in |
| Corner B | -7 in | -8 in | Cut 1 in |
| Corner C | -10 in | -8 in | Add 2 in of suitable, properly compacted fill |
| Corner D | -8 in | -8 in | No nominal adjustment |
| Center | -4 in | -8 in | Cut 4 in |
This example uses a consistent -8 in target for a level finished slab. On a deliberately sloping slab, the target elevation changes at each measurement point, so calculate the required target at every location rather than using one fixed number everywhere. A table of cut-and-fill depths like this is also not the same as a complete earthwork volume estimate.
13. How to Calculate the Slope and Required Drop for Drainage
Once you know the required grade, translate it into an actual measurement you can check on site.
Slope and Drop Formulas
Drop (in) = Run (ft) x Slope (in per ft)
Slope (%) = (Vertical drop / Horizontal run) x 100
Worked Example: 12-ft Patio at 2% Grade
A 2 percent grade equals 0.24 inches of fall per foot of run. Over a 12-foot run, that works out to 0.24 x 12 = 2.88 inches of total fall from the high side to the low side.
Many contractors round this to a conventional 1/4 inch per foot instead, which gives 0.25 x 12 = 3 inches over the same 12-foot run. The 2.88-inch figure is the exact percentage calculation, while the 3-inch figure is a commonly used rounded construction measurement, close to 2 percent but not numerically identical to it.
14. How to Transfer the Required Grade to Stakes and Reference Lines
Mark the high-side and low-side elevations on your stakes, then establish the intended sloping plane between them using a laser level with marked stakes or a properly checked string-line system. Grade the subgrade and specified base consistently with the intended finished surface whenever a uniform slab thickness is required.
If the base follows a different slope than the finished surface, the slab ends up thicker in some areas and thinner in others, which is a design problem covered in more detail later in this guide.
15. How to Remove Grass, Roots, Topsoil and Other Unsuitable Material
Clear organic material, sod, roots and debris from the entire proposed slab footprint before grading begins. This establishes a suitable underlying surface for the layers that follow.
Detailed soil classification and full excavation procedures are covered in more depth in How to Prepare Soil for a Concrete Slab, so this guide keeps that discussion brief and focuses on elevation and leveling instead.
16. How to Cut Down High Spots Without Overexcavating
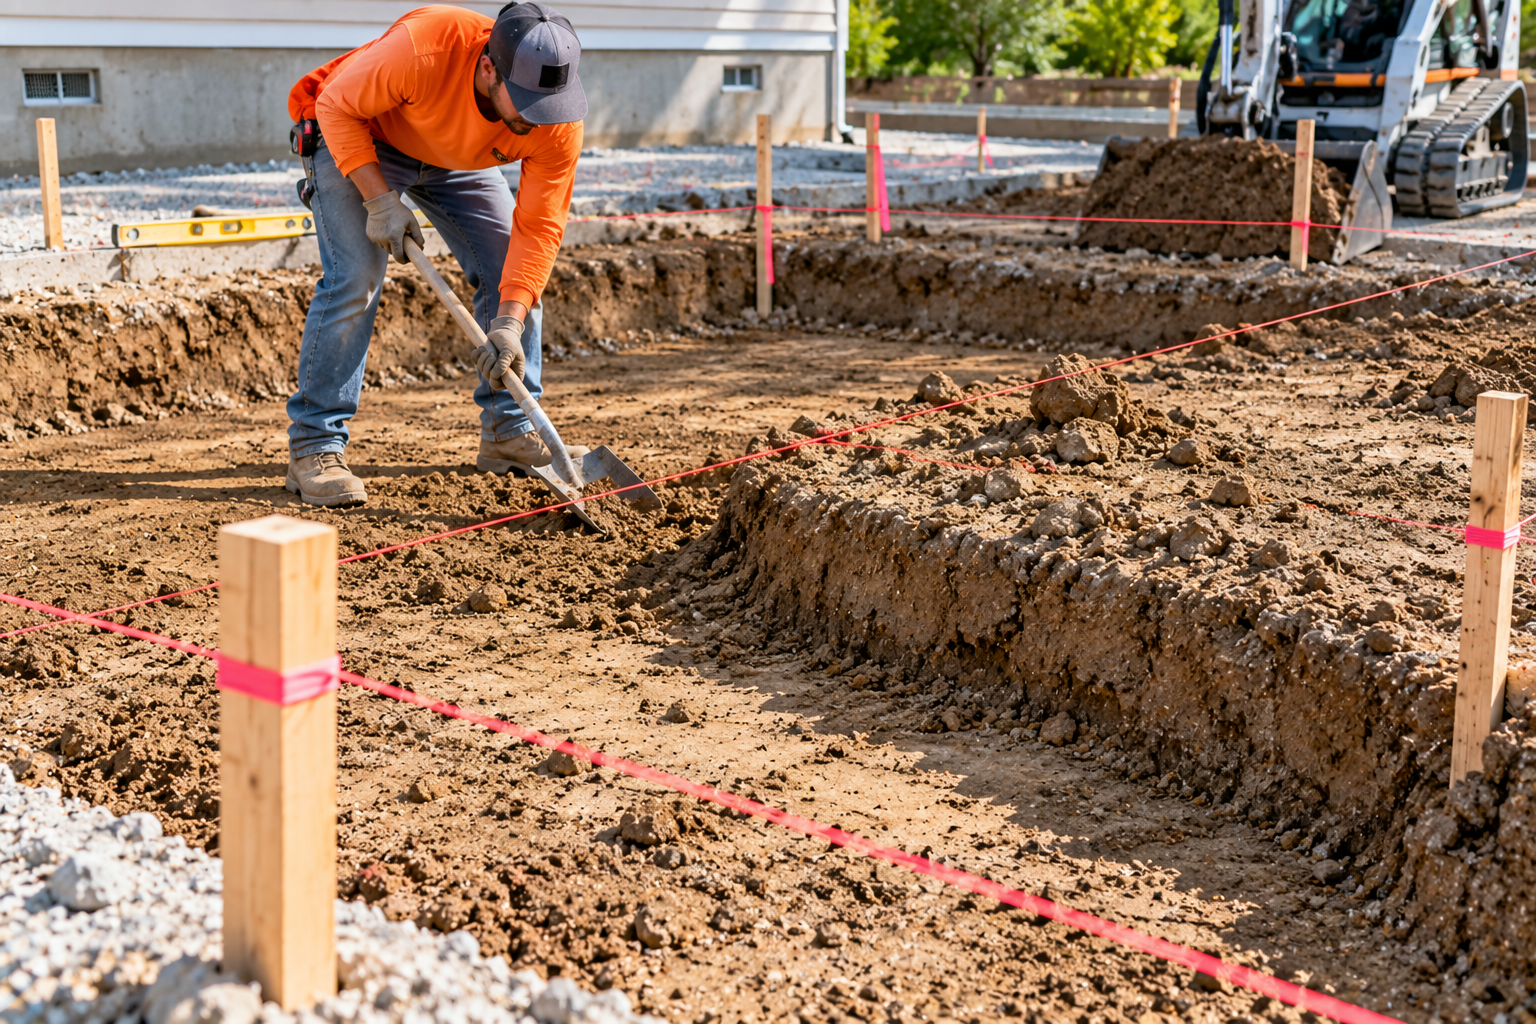
Work toward marked elevation targets in progressive stages, checking your measurements frequently as you go rather than digging in one continuous pass. Removing material gradually is far preferable to digging below the required grade and then trying to fill the resulting hole back in with loose soil.
17. How to Fill Low Spots and Correct Uneven Ground
Low areas need an appropriate, compactable fill system, not loose, randomly placed material dumped in and left alone. Use approved fill material, place it in appropriate layers, condition its moisture content as needed, and compact each layer properly.
Pay extra attention to utility trenches and any area of previously disturbed ground, since these commonly settle unevenly if not properly compacted. There’s no single universal lift thickness or compaction percentage that applies to every soil and project, so follow the specification appropriate to your site and material.
18. How to Grade the Ground With a Rake and Straightedge
Distribute suitable material across the footprint, then drag a long straightedge or screed board across the surface to identify remaining local high and low spots. Check your progress against the elevation pins, strings or laser readings you already established, without disturbing those reference points.
19. How to Level a Sloping Backyard for a Concrete Slab
Minor surface grading is a different task from correcting a significantly sloped site, which may require substantial excavation, engineered fill, drainage improvements, or a retaining structure. Creating a deep wedge of fill under one edge of a slab to make up for a sloped yard is a common but risky shortcut, since deep fill is more prone to uneven settlement than undisturbed native soil.
When the site slope is severe enough to require a deep fill wedge or a retaining wall, bring in a professional for soil assessment and engineered grading rather than attempting it as a standard DIY task.
20. How to Level Ground for a Patio, Driveway, Shed or Garage Slab
| Site Condition | Measurement Method | Ground-Working Approach |
|---|---|---|
| Small, relatively flat DIY slab | Stakes, string and spirit level | Hand tools and suitable compaction equipment |
| Medium patio with planned drainage | Laser or carefully checked string references | Controlled excavation, grading and appropriate compaction |
| Larger driveway or garage | Laser level and systematic measurement grid | Appropriate excavation and grading equipment |
| Significantly sloping site | Professional survey or suitable layout system | Engineered grading where necessary |
| Weak or unstable soil | Professional site investigation | Treatment or replacement according to the approved design |
Patios and driveways both need outdoor drainage planning as a top priority. Garage slabs add threshold height and equipment access to the list of considerations, while shed foundations need to match whatever foundation design the shed manufacturer or local code requires.
The intended slab use and the locally applicable design determine the actual thickness and base requirements in every case, so check the concrete slab thickness chart for typical ranges by application.
21. How to Check for Soft Spots, Loose Fill and Unstable Soil
Watch for footprints that sink deeply, rutting under equipment that shouldn’t rut on stable ground, soil that pumps or squishes visibly under load, visible organic material, and areas that stay wet or deform noticeably underfoot. A surface can look perfectly level and still have unsuitable support hidden beneath it.
These warning signs should direct you toward a proper investigation. They don’t replace a geotechnical assessment when the signs are significant or widespread.
22. How to Compact the Leveled Subgrade
Suitable soil moisture, appropriate compaction equipment, and properly placed fill all matter for getting a subgrade that will actually support the slab. A plate compactor works fine for small residential projects, but larger or more demanding work needs project-specific equipment, controlled lift thickness, and density testing.
NRMCA’s slab guidance stresses stable, uniformly compacted support as central to reducing cracking problems later. For the full compaction procedure, see How to Prepare Soil for a Concrete Slab, since this guide focuses on elevation control rather than compaction detail.
23. How to Install and Level a Specified Gravel or Aggregate Base
Establish the required aggregate grade by working down from your design elevation, then select the specified base material, place it in appropriate layers, and verify its final elevation against your reference. Granular base material specified for slab support is different from ordinary landscaping gravel, and not every slab needs the same base depth.
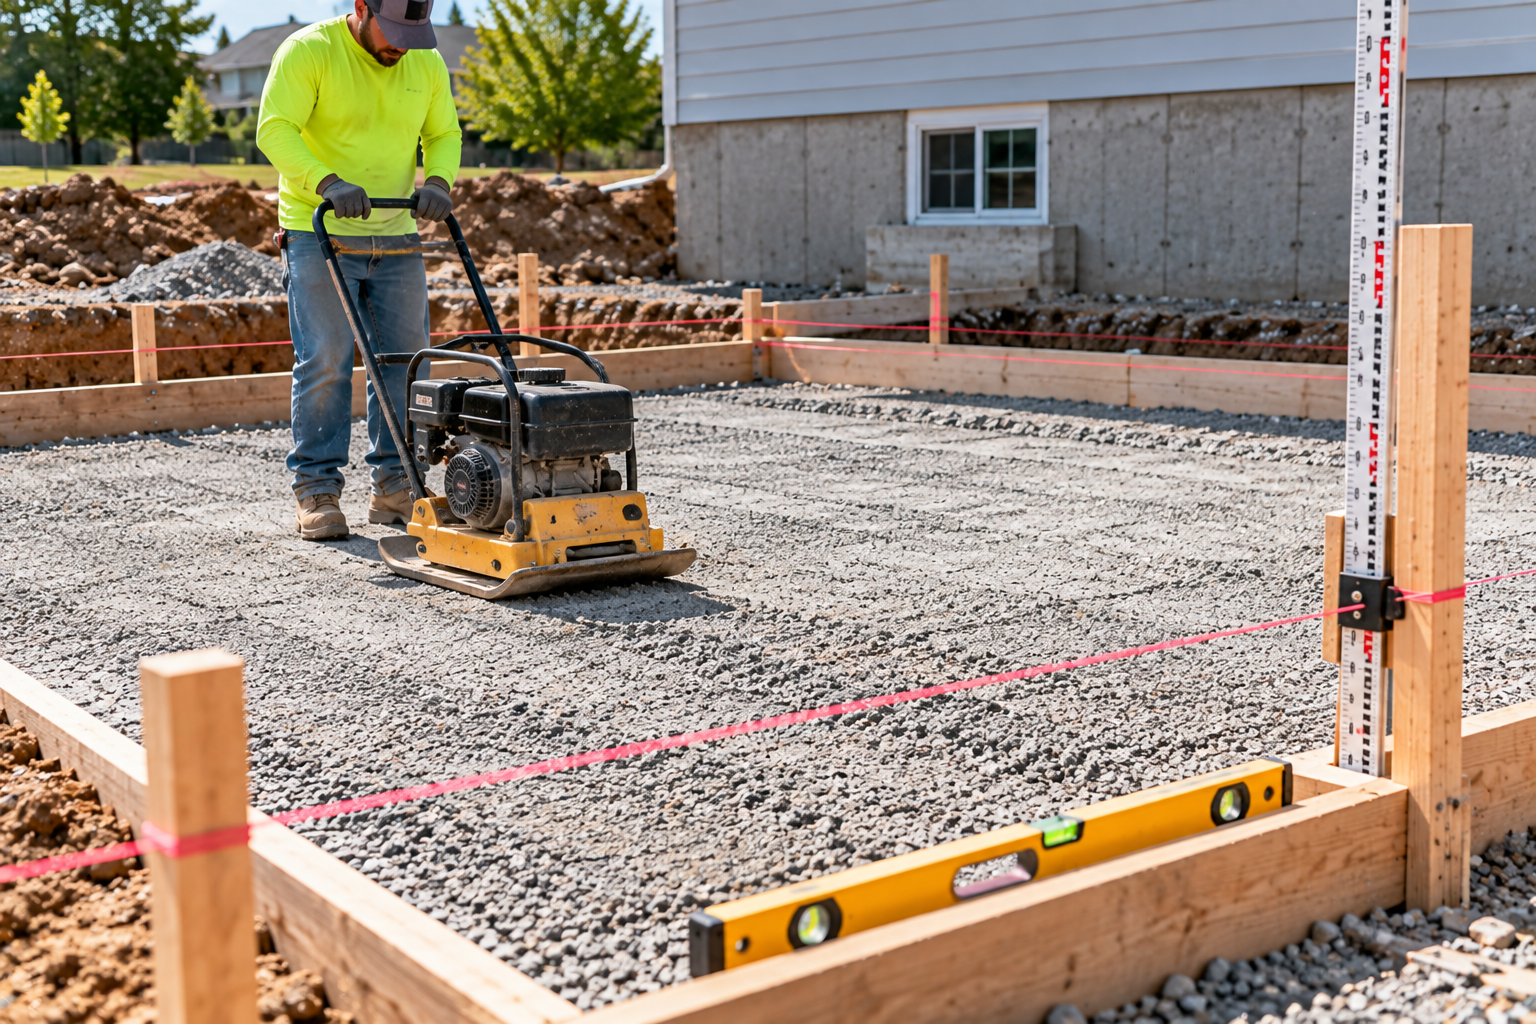
This section focuses on elevation control for the base layer. Detailed aggregate selection and geotechnical design considerations are covered in your dedicated soil-preparation guide.
24. How to Maintain Slab Thickness on Sloping Ground
A common mistake is excavating the ground perfectly level, then trying to slope only the top surface of the concrete for drainage. That approach creates variable slab thickness, thick at the low end and thin at the high end, since the bottom of the slab stays level while only the top slopes.
The correct approach grades the subgrade and base to follow the same slope as the intended finished surface, keeping slab thickness constant throughout. Deliberately thickened edges, tapered slabs and engineered transitions are different, purpose-built designs, and they shouldn’t be confused with an accidental thickness variation caused by inconsistent grading.
25. How to Check the Final Subgrade Elevation and Surface Uniformity
Perform a final survey using your original benchmark and the same measurement grid you used earlier. Check for remaining high and low spots, confirm the slope direction matches the design, verify elevations against the design targets, and inspect the condition of the compacted surface.
Use a pass or rework decision based on your project’s specified tolerances, rather than inventing a universal maximum deviation that may not apply to your specific design.
26. Common Ground-Leveling Mistakes Before Pouring Concrete
| Mistake | Possible Consequence | Better Approach |
|---|---|---|
| Digging before establishing the finished elevation | Incorrect slab height or insufficient space for the base | Set the benchmark and calculate downward first |
| Making a patio perfectly horizontal | Water may pond or flow toward the house | Establish the required drainage slope |
| Checking only the four corners | Undetected central humps or depressions | Use a systematic measurement grid |
| Filling holes with loose soil | Uneven settlement | Use appropriate material and required compaction |
| Assuming smooth ground provides adequate support | Hidden soft areas remain | Inspect and verify the support system |
| Forgetting to recheck after compaction | Final grade may differ from the intended grade | Perform a final elevation survey |
27. Final Pre-Pour Ground-Leveling Checklist
Site Grading Checklist
Passing this checklist confirms that the basic leveling and grading tasks are complete. It doesn’t confirm that the project has received any required engineering review or building inspection, which should be pursued separately according to your local requirements.
28. How to Level Ground for a Concrete Slab: FAQs
Can I level ground for a concrete slab without a laser level?
Yes. Stakes, mason’s string, and a string level or long spirit level work well for small, straightforward slabs. A laser level becomes more valuable as the project gets larger or the required grading becomes more complex.
Should a concrete slab be perfectly level or slightly sloped?
It depends on the application. Indoor floors are usually leveled to a design elevation, while outdoor flatwork like patios and driveways usually needs a deliberate drainage slope to move water away from structures.
How much soil should I remove before pouring a slab?
Enough to reach the required subgrade elevation, which equals the finished slab elevation minus the concrete thickness and the specified base thickness. The exact amount varies by project and should be calculated from your specific design, not estimated by eye.
How do I fix a low spot in the ground before pouring concrete?
Add approved, compactable fill material in appropriate layers, condition the moisture as needed, and compact each layer properly rather than dumping loose soil in and leaving it unaddressed.
Is gravel always necessary under a concrete slab?
Not universally, but a specified compacted base is common for supporting slabs on many soil types. Whether it’s required, and how thick it should be, depends on your specific soil conditions and project design.
Can sand be used as fill under a concrete slab?
Sand can be appropriate in some specified assemblies, but it isn’t a universal substitute for the specified base material on every project. Check your project’s design requirements before substituting one material for another.
How accurate does the subgrade need to be?
Accuracy requirements vary by project type and specification. Follow the tolerances called out in your specific construction documents rather than assuming a single universal number applies everywhere.
When does a sloped site need a professional instead of a DIY approach?
When correcting the slope would require a deep fill wedge, a retaining wall, or engineered grading, or when the soil shows signs of being unstable or previously disturbed in ways that raise support concerns.
Calculate Your Elevation and Slope
Use the Elevation Grade Calculator to work out rise, run and grade percentage for your specific site before you start excavating.
Open the Elevation Grade CalculatorReferences
- American Concrete Institute, ACI 302.1R-15, Guide to Concrete Floor and Slab Construction. Used for design elevations, base and subbase requirements, uniform support, applicable tolerances and verification. This guide addresses construction of industrial, commercial and institutional floors, and its principles should be applied within the scope of a residential project.
- National Ready Mixed Concrete Association, CIP 4, Cracking Concrete Surfaces. Used for the importance of stable, uniformly compacted subgrade, proper preparation and the relationship between support and cracking.
- 2024 International Residential Code, Chapter 4, Foundations, Section R401.3. Used for drainage requirements, including the distinction between general lot grading and the specific minimum for impervious surfaces near foundations. Always confirm the code actually adopted in the reader’s jurisdiction.
- National Ready Mixed Concrete Association, CIP 29, Vapor Retarders Under Slabs on Grade. Used for the brief distinction between leveling and designing an appropriate moisture control assembly.
- Federal Highway Administration, Concrete Pavement Subgrade Preparation and Verification. Used as a supporting technical reference for proof rolling, uniform support and elevation verification. Its numerical tolerances are specific to the pavement project documented there and are not presented as residential slab requirements.