Concrete Spalling 2026: Causes, Repair and Prevention
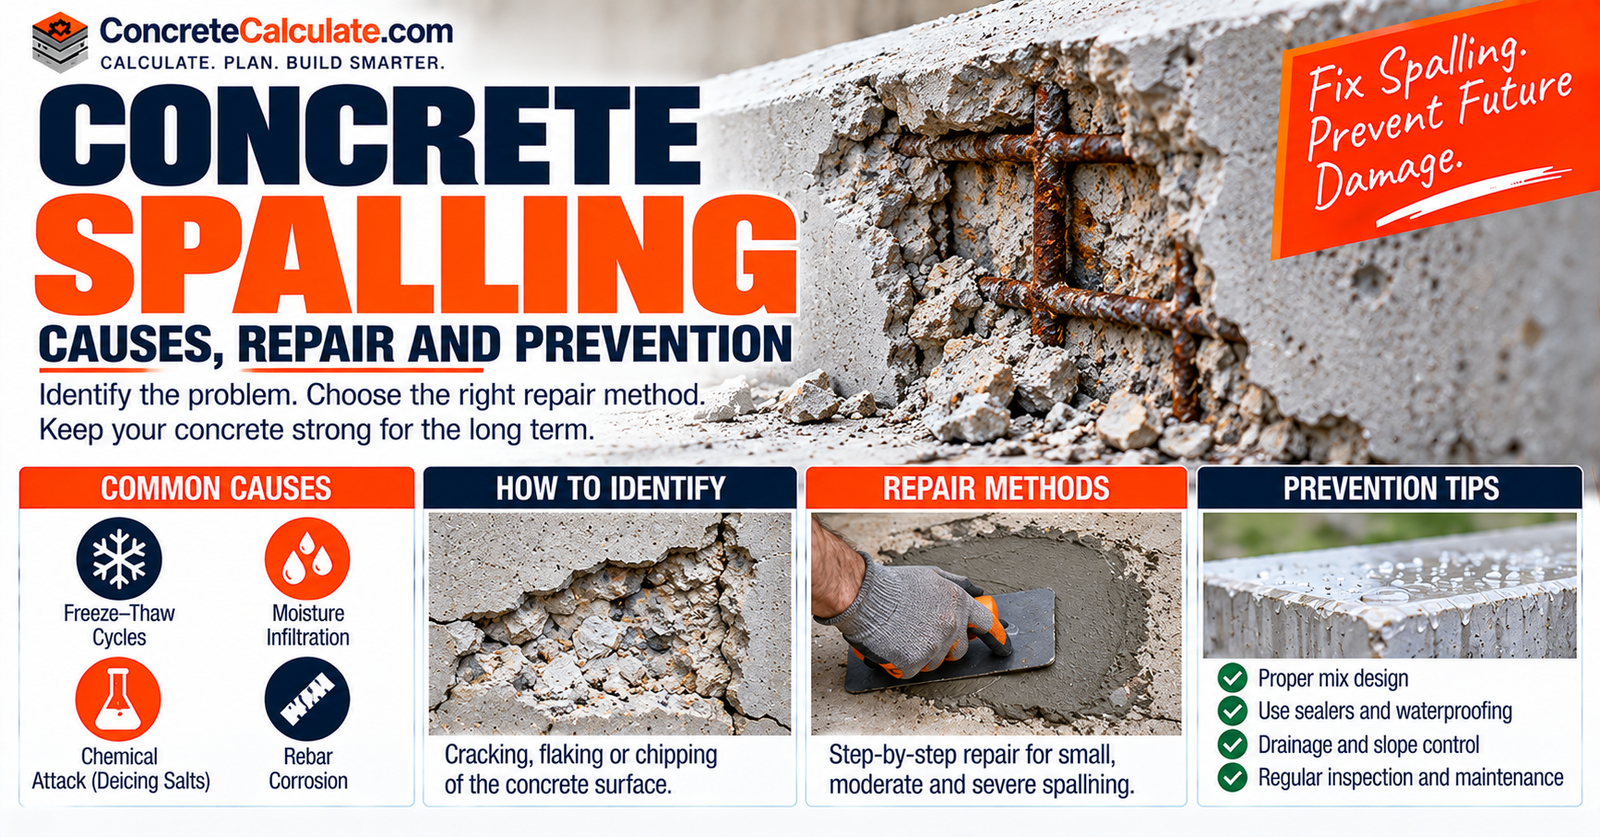
Concrete Spalling: Causes, Repair and Prevention
How to identify spalling, understand what caused it, choose the right repair method and stop it from coming back.
Quick Answer
Concrete spalling is the chipping, breaking or flaking away of pieces of concrete from a larger slab, wall or structural element. It ranges from a shallow, cosmetic surface chip to deep deterioration that exposes corroded reinforcing steel. Common causes include freeze thaw cycles, deicing salts, reinforcement corrosion, poor placement or curing, and stress at joints and edges.
Small isolated spalls on sound, nonstructural concrete can often be patched with a compatible repair mortar. Spalling that involves exposed corroded rebar, structural elements, elevated slabs or overhead surfaces should be evaluated by a qualified concrete repair contractor or engineer before any repair is attempted.
In This Guide
- 1. What Is Concrete Spalling?
- 2. What Does Spalling Concrete Look Like?
- 3. Concrete Spalling vs. Scaling, Cracking, Delamination and Popouts
- 4. Is Concrete Spalling Serious or Just Cosmetic?
- 5. Why Is My Concrete Spalling? The Main Causes
- 6. Freeze Thaw Damage and Concrete Spalling
- 7. Deicing Salts, Moisture and Chemical Deterioration
- 8. Reinforcement Corrosion and Concrete Spalling
- 9. Poor Concrete Placement, Finishing and Curing
- 10. Spalling at Concrete Joints, Edges and Corners
- 11. Why Is New Concrete Already Spalling?
- 12. How to Inspect Spalling Concrete Before Repair
- 13. How to Measure the Area and Depth of a Concrete Spall
- 14. When Can Spalling Concrete Be Patched?
- 15. Concrete Patching vs. Resurfacing vs. Full Depth Repair vs. Replacement
- 16. When Should You Hire a Concrete Repair Contractor or Engineer?
- 17. Tools, Materials and Safety Equipment for Spall Repair
- 18. How to Prepare Spalling Concrete for Repair
- 19. How to Repair Localized Spalling Concrete: Step by Step
- 20. What Is the Best Material for Repairing Spalled Concrete?
- 21. How to Repair Spalling on Driveways, Patios and Garage Floors
- 22. Spalling on Concrete Steps, Walls and Structural Members
- 23. How Long Does Spalling Repair Take to Cure?
- 24. How Much Does Concrete Spalling Repair Cost?
- 25. How to Calculate Spalling Repair Material
- 26. How to Prevent Concrete Spalling
- 27. Why Concrete Spalling Repairs Fail
- 28. Concrete Spalling FAQs
1. What Is Concrete Spalling?
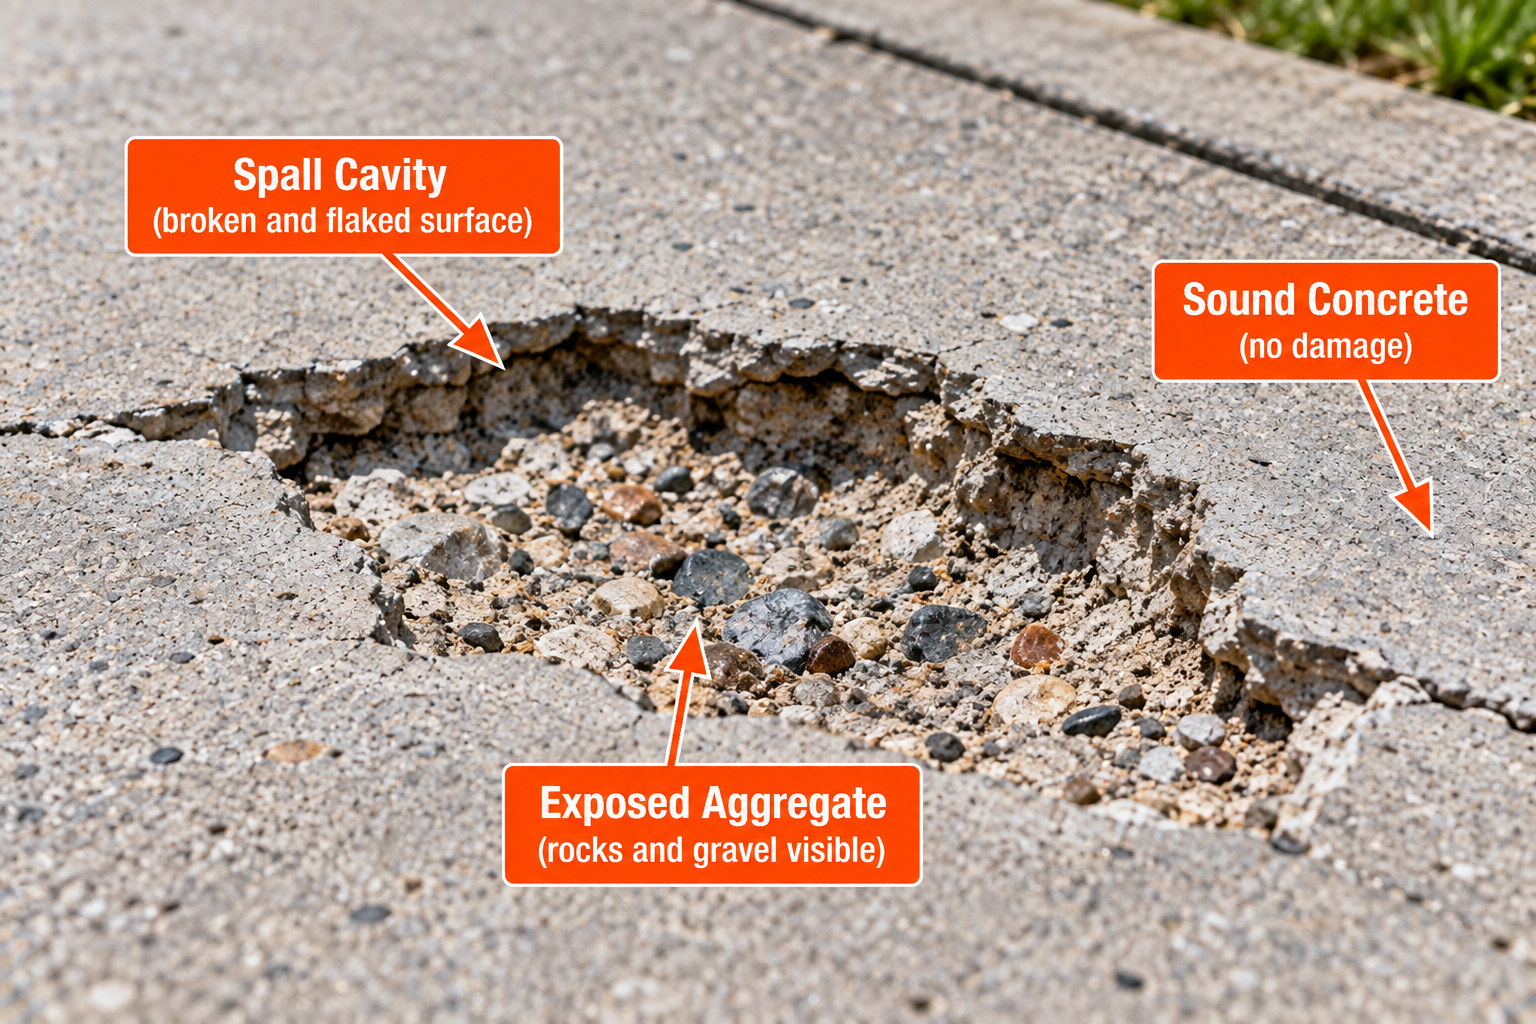
Concrete spalling happens when pieces of concrete chip, break or separate from the larger concrete element they were originally part of. The damage can be as small as a shallow surface chip the size of a coin or as significant as a deep cavity that exposes the coarse aggregate or the reinforcing steel underneath.
How serious a spall actually is depends on several things working together: its depth, its location, what caused it, how much area it covers, and whether the affected concrete is a structural element such as a beam, column or elevated slab. A small chip at the corner of a nonstructural patio slab is a very different situation from a spall on a parking garage beam that exposes rusted rebar.
Visually, spalling commonly shows up as irregular cavities, broken or missing edges and corners, exposed coarse aggregate, or in more advanced cases, exposed and often corroded reinforcing steel. The American Concrete Institute’s field guidance on horizontal spall repair notes that this type of deterioration is commonly associated with corrosion of embedded reinforcement, freezing and thawing, and chemical attack, and that an evaluation of the cause should inform the repair plan before work begins.
What This Guide Covers
This article focuses specifically on identifying spalling, understanding its likely causes, choosing an appropriate repair approach, and reducing the chance it happens again. For general crack patterns unrelated to material loss, see Why Is My Concrete Cracking? For basic mix and slab fundamentals, see How to Calculate Concrete.
2. What Does Spalling Concrete Look Like?
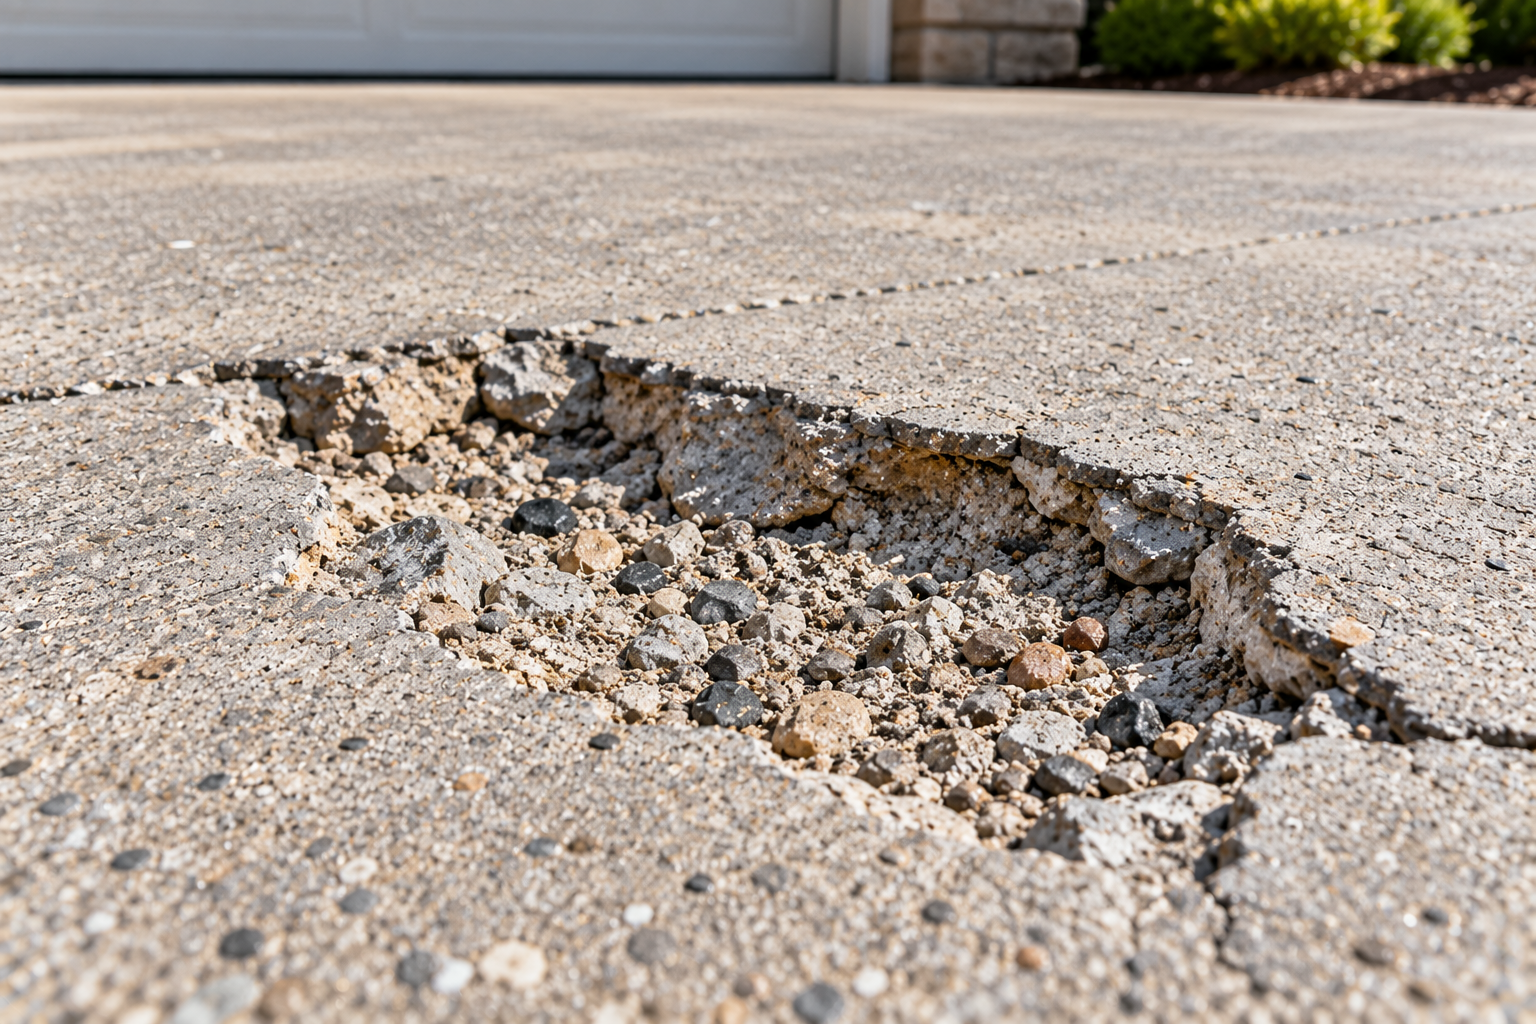
Spalling doesn’t have one single appearance. It shows up differently depending on where it occurs and what triggered it, but a few visible patterns are common across most residential and light commercial concrete.
- Small shallow chips: localized loss of a thin layer of surface concrete, often at a corner, edge or high-traffic area
- Broken slab corners: a triangular or wedge-shaped piece missing from a slab corner, often at a joint
- Joint-edge spalls: concrete breaking away immediately alongside a control joint or expansion joint
- Irregular missing patches: cavities of varying shape and depth scattered across a driveway, walkway or floor
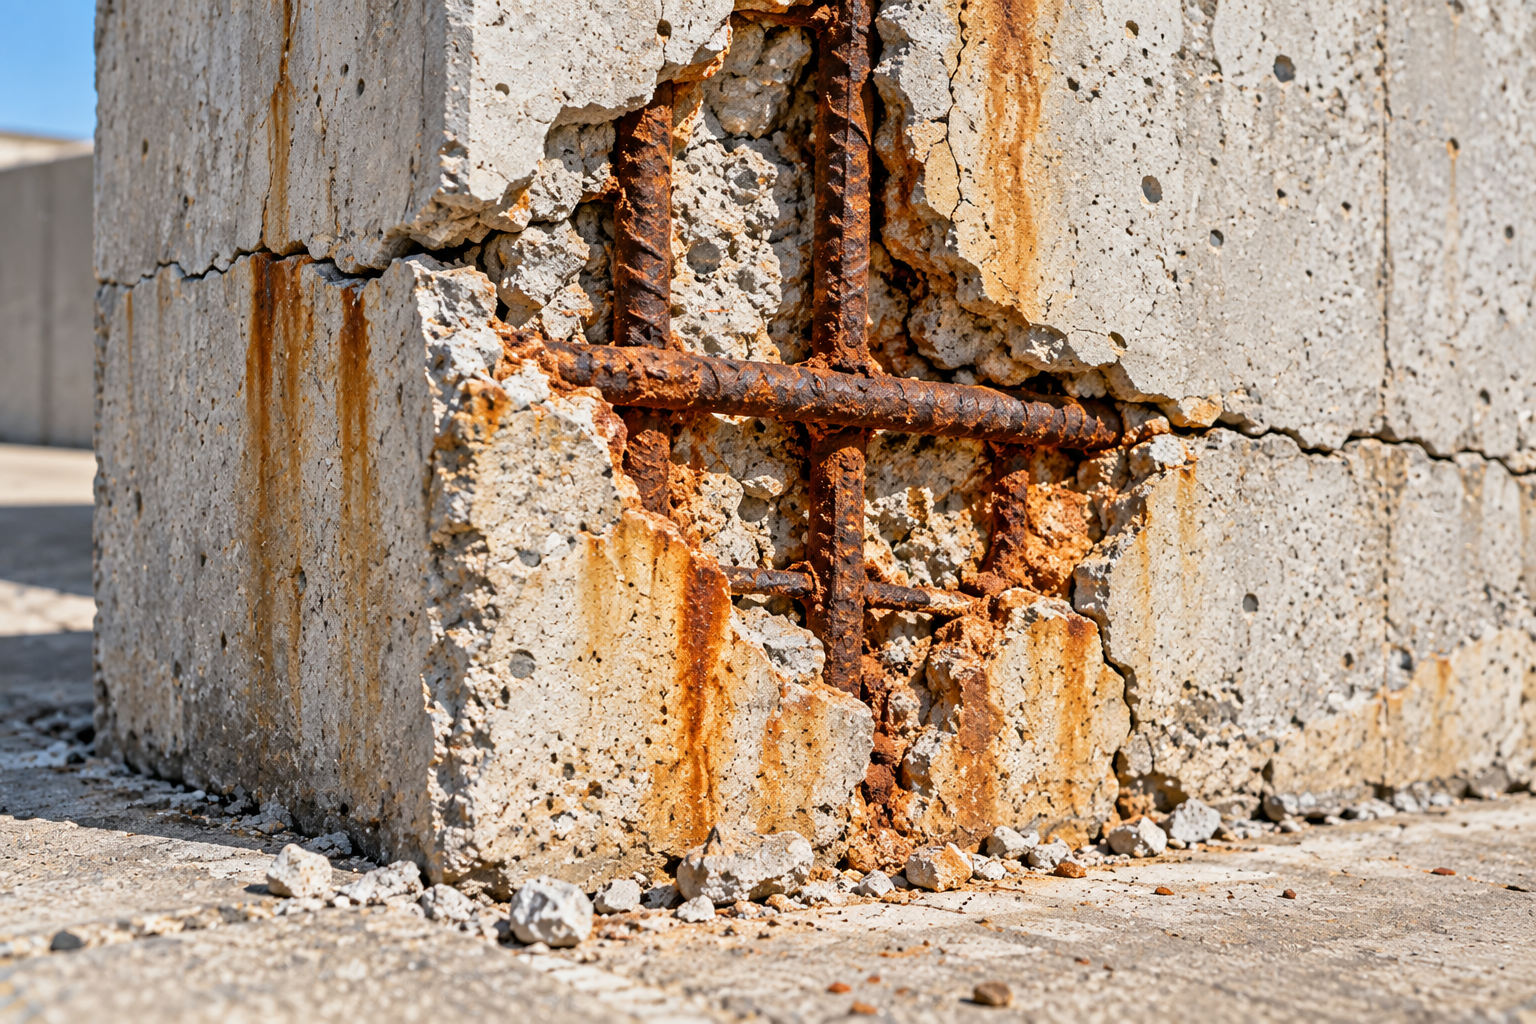
- Deeper spalls with exposed reinforcement: cavities that extend past the concrete cover and reveal rebar, often with rust staining around the exposed steel
Driveways and garage floors tend to show traffic-related and deicer-related spalling near the surface, while reinforced elements such as beams, columns, foundation walls and elevated slabs are more likely to show corrosion-related spalling with exposed steel. It’s worth remembering that a photograph only shows what’s visible at the surface. Delamination, or hidden separation beneath an intact-looking surface, can be present around a visible spall without being obvious until it’s tested or until more concrete eventually breaks away.
3. Concrete Spalling vs. Scaling, Cracking, Delamination and Popouts
Several types of concrete surface deterioration can look similar at first glance, but they have different mechanisms and call for different responses. Getting the identification right matters because the repair approach for scaling is not the same as the repair approach for a deep, corrosion-related spall.
| Defect | What It Looks Like | Distinguishing Feature | Appropriate Next Step |
|---|---|---|---|
| Spalling | Broken pieces and localized cavities | Concrete material has detached | Investigate cause and repair depth |
| Scaling | Thin surface layers flake away | Often widespread, relatively shallow surface deterioration | Check exposure and surface condition |
| Cracking | Fracture lines | Concrete may remain intact on both sides | Assess pattern and movement |
| Delamination | Surface layer separates, may sound hollow | Separation can remain hidden until surface breaks | Determine extent of unsound concrete |
| Popouts | Small, localized holes | Often centered on an aggregate particle | Identify the cause before selecting treatment |
These conditions are not always separate from one another. A delaminated area can eventually break away and become a visible spall, and a slab with a structural crack can also lose material at the surface near that crack. If your damage looks more like widespread flaking than a discrete broken cavity, see the difference explained further in a future ConcreteCalculate guide on concrete scaling. If it’s primarily a fracture line without missing material, Why Is My Concrete Cracking? is the more relevant resource, and How to Fix Cracked Concrete covers crack-specific repair methods.
4. Is Concrete Spalling Serious or Just Cosmetic?
Not every spall is a warning sign, and not every spall is harmless. A small, isolated chip in a sound, nonstructural patio or walkway is a different situation than falling concrete fragments from an elevated balcony, or a spall that has exposed corroded reinforcing steel in a load-bearing element.
Rather than relying on a single depth or area measurement to decide how serious a spall is, it helps to think through several practical questions:
- Trip hazard: is the damaged area on a walking surface where the cavity or broken edge could catch a foot or heel
- Falling debris hazard: is the spall on an overhead or elevated surface, such as a balcony soffit, stair underside or elevated slab, where loose material could fall
- Water intrusion: is water pooling in or entering the damaged area, which can accelerate further deterioration
- Progressive damage: has the area grown, or have new spalls appeared nearby since it was first noticed
- Structural warning signs: is there exposed and corroded reinforcement, cracking that follows the line of embedded steel, or any sign of movement or sagging
Important Safety Note
Spalling on beams, columns, elevated slabs, balconies or structural foundation elements should not be treated as an ordinary DIY surface repair when structural damage or falling concrete is possible. These conditions call for assessment by a qualified concrete repair contractor or a structural engineer before any repair work begins.
5. Why Is My Concrete Spalling? The Main Causes
Before getting into any single mechanism in detail, it helps to see the range of possible causes side by side. Each clue below points toward a possible cause, not a confirmed diagnosis. Several causes can also act together on the same slab.
| Possible Cause | Common Clues | What to Investigate |
|---|---|---|
| Freeze thaw deterioration | Flaking and broken areas on exposed surfaces | Moisture, climate and mixture suitability |
| Reinforcement corrosion | Rust staining, cracks along steel, detached cover concrete | Steel condition, cover and moisture source |
| Joint distress | Chipping or broken concrete beside joints | Joint debris, movement, seals and loading |
| Inadequate consolidation | Voids, honeycombing and localized weakness | Construction history and underlying soundness |
| Finishing and curing problems | Weak or deteriorating surface layers | Finishing timing and early curing conditions |
| Impact or abrasion | Localized damage at traffic or impact points | Loading and repeated mechanical damage |
The following sections walk through each of these possible causes in more detail so you can narrow down what’s likely happening on your own concrete.
6. Freeze Thaw Damage and Concrete Spalling
When concrete that is saturated with water is repeatedly exposed to freezing and thawing, the water inside the concrete’s pore structure expands as it freezes. If the concrete doesn’t have enough capacity to accommodate that expansion, internal stress builds up cycle after cycle, and the surface can eventually flake, crack or break away.
It’s worth separating two related but different outcomes. Widespread, relatively shallow surface scaling across a large area often points toward general freeze thaw exposure combined with surface weakness. More localized or deeper spalling can still be freeze thaw related, but it may also be concentrated at a spot where water collects, such as a low point, a joint or an area beneath a downspout.
Several factors influence how vulnerable a given slab is to freeze thaw damage, including how saturated the concrete becomes, whether appropriate air entrainment was used in the mix for the exposure it faces, the overall quality and consolidation of the concrete, and how well the site drains water away from the slab. A high compressive strength number by itself is not a guarantee of freeze thaw durability. Air entrainment and a suitably low water-cementitious ratio for the exposure matter just as much as strength alone.
7. Deicing Salts, Moisture and Chemical Deterioration
Winter exposure, persistent moisture and certain chemical environments can all contribute to concrete deterioration over time, but it’s easy to oversimplify what’s actually happening. Deicing chemicals used on driveways and walkways can accelerate surface scaling and, when chlorides penetrate to embedded reinforcement, can also contribute to corrosion-related deterioration deeper in the slab.
These are two distinct mechanisms. Surface damage from repeated freeze thaw cycling combined with deicer exposure tends to look like scaling or shallow spalling concentrated at the surface. Chloride-associated reinforcement corrosion develops more slowly, requires the chlorides to reach the steel through the concrete cover, and tends to produce rust staining, cracking along the line of the reinforcement, and eventually deeper spalling as corrosion products expand and push cover concrete away from the steel.
It would be inaccurate to assume that every spall on a salted driveway was caused by salt alone. Persistent moisture, inadequate air entrainment, poor drainage and the concrete’s original mix design and finishing all play a role alongside deicer exposure.
8. Reinforcement Corrosion and Concrete Spalling
Corrosion of embedded reinforcing steel is one of the most common causes of spalling in reinforced concrete, and it follows a fairly well understood sequence.
Moisture and aggressive agents such as chlorides first work their way through the concrete cover to reach the embedded steel. Once corrosion begins, the resulting corrosion products occupy more volume than the original steel, creating expansive internal pressure. That pressure cracks the surrounding concrete along the line of the reinforcement, and continued corrosion eventually causes the cover concrete to delaminate and then detach entirely, exposing the corroded steel as a visible spall.
Warning signs to look for include rust staining on the concrete surface, cracks that run parallel to where reinforcement would be located, exposed steel with visible corrosion, and repeated spalling in a pattern that suggests an underlying corrosion problem rather than an isolated impact. Because corrosion-related deterioration tends to continue spreading beneath the surface even after a visible spall is patched, a qualified repair professional or structural engineer should assess the condition, especially where the affected element is structural or where corrosion appears widespread rather than isolated.
9. Poor Concrete Placement, Finishing and Curing
Several construction-related issues can leave concrete more vulnerable to later material loss, even though they don’t always cause spalling directly on their own. These include insufficient consolidation during placement, finishing the surface too early while bleed water is still present, a weak layer of surface paste, improper or shortened curing, and placing concrete under unsuitable weather conditions.
It matters to keep these construction defects distinct from spalling itself. Finishing over bleed water, for example, is more commonly associated with dusting, scaling or a soft, powdery surface than with a deep broken cavity. Insufficient consolidation is more directly linked to voids and honeycombing, which can create localized weak spots that eventually contribute to material breaking away under load or exposure. Not every finishing defect leads to deep spalling, but any of these construction issues can make concrete more susceptible to the other mechanisms described in this guide, particularly freeze thaw damage and moisture-related deterioration.
10. Spalling at Concrete Joints, Edges and Corners
Joints, edges and corners are common locations for spalling because they concentrate several kinds of stress at once. Debris that becomes trapped inside a joint can prevent the joint from closing properly as the surrounding concrete expands with temperature changes, which creates localized crushing pressure at the joint edge.
Restrained joint movement, failed or missing joint sealant, repeated vehicle or foot traffic impacts near an edge, and general local weakness at a thin or poorly consolidated corner can all contribute as well. The Federal Highway Administration’s pavement guidance specifically identifies incompressible debris trapped in joints, along with corroding dowel bars and reinforcement, as contributors to joint-related spalling on concrete pavements. That guidance is written for pavement applications and shouldn’t be read as a universal explanation for every residential joint spall, but the underlying principle, that trapped debris and restrained movement concentrate stress at joint edges, applies broadly.
11. Why Is New Concrete Already Spalling?
It’s understandably frustrating when a driveway, patio or slab shows spalling within the first year or two of its life. Several categories of issues can explain early spalling, and figuring out which one applies usually requires looking at both the visible symptoms and the construction history together.
- Premature exposure: foot or vehicle traffic, or exposure to freezing conditions, before the concrete had adequately cured
- Finishing and curing defects: surface finishing performed while bleed water was still present, or curing that was cut short
- Concrete unsuited to the exposure: a mix that lacked adequate air entrainment or an appropriate water-cementitious ratio for the climate and use
- Material issues: problems with the batch itself, including improper proportioning or unauthorized water added at the jobsite
- Damage during early use: deicing salts applied too soon, or heavy loads placed on the slab before it reached adequate strength
Before assigning responsibility to a contractor, supplier or specific cause, it’s worth documenting exactly when the spalling appeared, what the weather and usage conditions were around that time, and whether the affected areas share a common pattern, such as all being near an edge, a joint or a low drainage point.
12. How to Inspect Spalling Concrete Before Repair
A useful inspection doesn’t require special equipment for most residential situations, but it does benefit from being methodical. Before deciding on a repair approach, work through the following steps.
- Photograph the damage: capture the full area along with close-up detail shots, including a reference object such as a tape measure for scale
- Record location and dimensions: note where the spall is located and its approximate length, width and depth
- Check for loose fragments: gently test whether any surrounding concrete is loose or ready to break away on its own
- Inspect adjacent cracks: look for cracking that connects to or surrounds the spalled area, which can indicate a larger problem
- Look for rust staining: check the cavity and surrounding surface for orange or brown staining that suggests reinforcement corrosion
- Evaluate drainage: note whether water pools at or near the damaged area
Professionals often use sounding methods, such as tapping the surface with a hammer or dragging a chain across it, to identify hidden delamination that isn’t visible from the surface. A dull or hollow sound where a solid area should give a sharp ring can indicate unsound concrete beneath an intact-looking surface. This kind of sounding takes practice to interpret reliably, and it has clear limits: it can flag suspect areas, but it can’t tell you the underlying cause or confirm structural adequacy. For anything beyond a small, clearly isolated spall, this is where a qualified inspector adds real value.
13. How to Measure the Area and Depth of a Concrete Spall
For a roughly rectangular spall, measure the length and width of the visible damage in inches or feet, and estimate the average depth by measuring at a few points within the cavity, since spall depth is rarely perfectly uniform.
Keep in mind that the visible cavity is often smaller than the final prepared repair area will be. Once unsound concrete is removed down to solid material, the actual repair boundary frequently extends beyond what was originally visible, sometimes significantly, especially if delamination extends past the edges of the visible break.
For irregular damage that doesn’t fit a simple rectangle, sketch the affected area on paper, break it into a few simpler rectangular or triangular sections, and measure representative dimensions for each section. Use U.S. units, feet and inches, throughout your measurements. The actual quantity formula for converting these measurements into a material volume is covered later in this guide, in the calculation section.
14. When Can Spalling Concrete Be Patched?
Localized patching is generally a suitable approach when several conditions are met together, not just one of them.
Shallow surface patching is generally unsuitable in a few specific situations: where sounding reveals unsound concrete extending well beyond the visible spall, where corroded reinforcement remains in or near the repair area without being properly treated, or where the underlying cause, such as ongoing joint movement or active corrosion, hasn’t been addressed. Patching over an unresolved cause tends to produce a repair that fails again within a relatively short time.
15. Concrete Patching vs. Resurfacing vs. Full Depth Repair vs. Replacement
Choosing the right repair method starts with an honest assessment of the extent, depth and cause of the damage. The decision diagram and table below are meant to organize that thinking, not to replace a professional assessment for anything beyond straightforward, isolated damage.
| Condition | Possible Approach | Key Limitation |
|---|---|---|
| Small, isolated spall with sound surrounding concrete | Compatible local patch | The underlying cause must be addressed |
| Localized deeper deterioration | Engineered or contractor-designed repair | Must assess repair depth and remaining concrete |
| Widespread shallow surface damage on sound concrete | Resurfacing, if compatible | Unsound substrate must first be removed or repaired |
| Deterioration involving corroded reinforcement | Professional corrosion assessment and repair | A cosmetic patch alone may fail |
| Extensive full depth deterioration | Full depth repair or replacement | Determine extent and support condition |
| Structural or overhead spalling | Professional assessment before repair | Safety and structural performance govern the solution |
The Federal Highway Administration’s partial-depth repair guidance for concrete pavements applies specifically to spalls confined to the top third of a pavement slab, on pavement that is otherwise structurally sound. That depth criterion is written for pavement applications and shouldn’t be copied over as a universal rule for every residential slab, wall or structural element. It’s mentioned here to illustrate that repair-depth limits do exist and are method specific, not because the exact pavement figure applies to your project.
If your concrete shows widespread shallow deterioration rather than isolated spalls, resurfacing may be worth exploring once any unsound material is removed. Learn more with the Concrete Resurfacing Calculator and the Concrete Overlay Calculator.
16. When Should You Hire a Concrete Repair Contractor or Engineer?
A number of specific conditions call for professional involvement rather than a DIY patch.
A concrete repair contractor experienced in surface repair procedures can generally handle straightforward horizontal patching, resurfacing and even moderate full-depth repairs on nonstructural flatwork. Conditions involving structural elements, active corrosion in load-bearing members, or any uncertainty about whether the concrete can safely carry its intended load call for an engineering assessment before repair work proceeds.
17. Tools, Materials and Safety Equipment for Spall Repair
A typical nonstructural horizontal spall repair calls for tools across several categories.
- Inspection and measuring: tape measure, hammer or sounding rod, chalk or marking paint, camera
- Removal: cold chisel, hammer, masonry grinder or small demolition tool appropriate to the repair size, and a diamond blade saw for cutting a clean repair boundary where needed
- Cleaning: wire brush, shop vacuum, and water for rinsing the prepared cavity
- Repair material: the specific product selected for the application, following its manufacturer instructions
- Finishing: trowel, float and edging tool sized appropriately for the repair area
- Curing: plastic sheeting, curing compound or a wet-cure method appropriate to the product
- Protective equipment: safety glasses, gloves, knee protection and hearing protection when using power tools
Respirable Crystalline Silica Precautions
Cutting, sawing, grinding, drilling and chipping concrete generates respirable crystalline silica dust, which is a recognized health hazard. OSHA’s construction standard for respirable crystalline silica calls for using wet methods, such as applying water at the point where a saw blade or grinding wheel contacts the concrete, along with appropriate local exhaust ventilation and dust collection where applicable, to control worker exposure during these activities. Follow the specific control methods and any required respiratory protection listed for your task and equipment.
18. How to Prepare Spalling Concrete for Repair
Surface preparation is usually the single factor that determines whether a patch bonds successfully or debonds within months. Rushing this stage is one of the most common reasons repairs fail.
Identifying the Complete Repair Boundary
Sound the surrounding concrete to find the true extent of unsound or delaminated material, which frequently reaches beyond the visible spall. Mark the full boundary clearly before beginning removal so the repair area isn’t limited to only what was obviously broken.
Removing Deteriorated Concrete
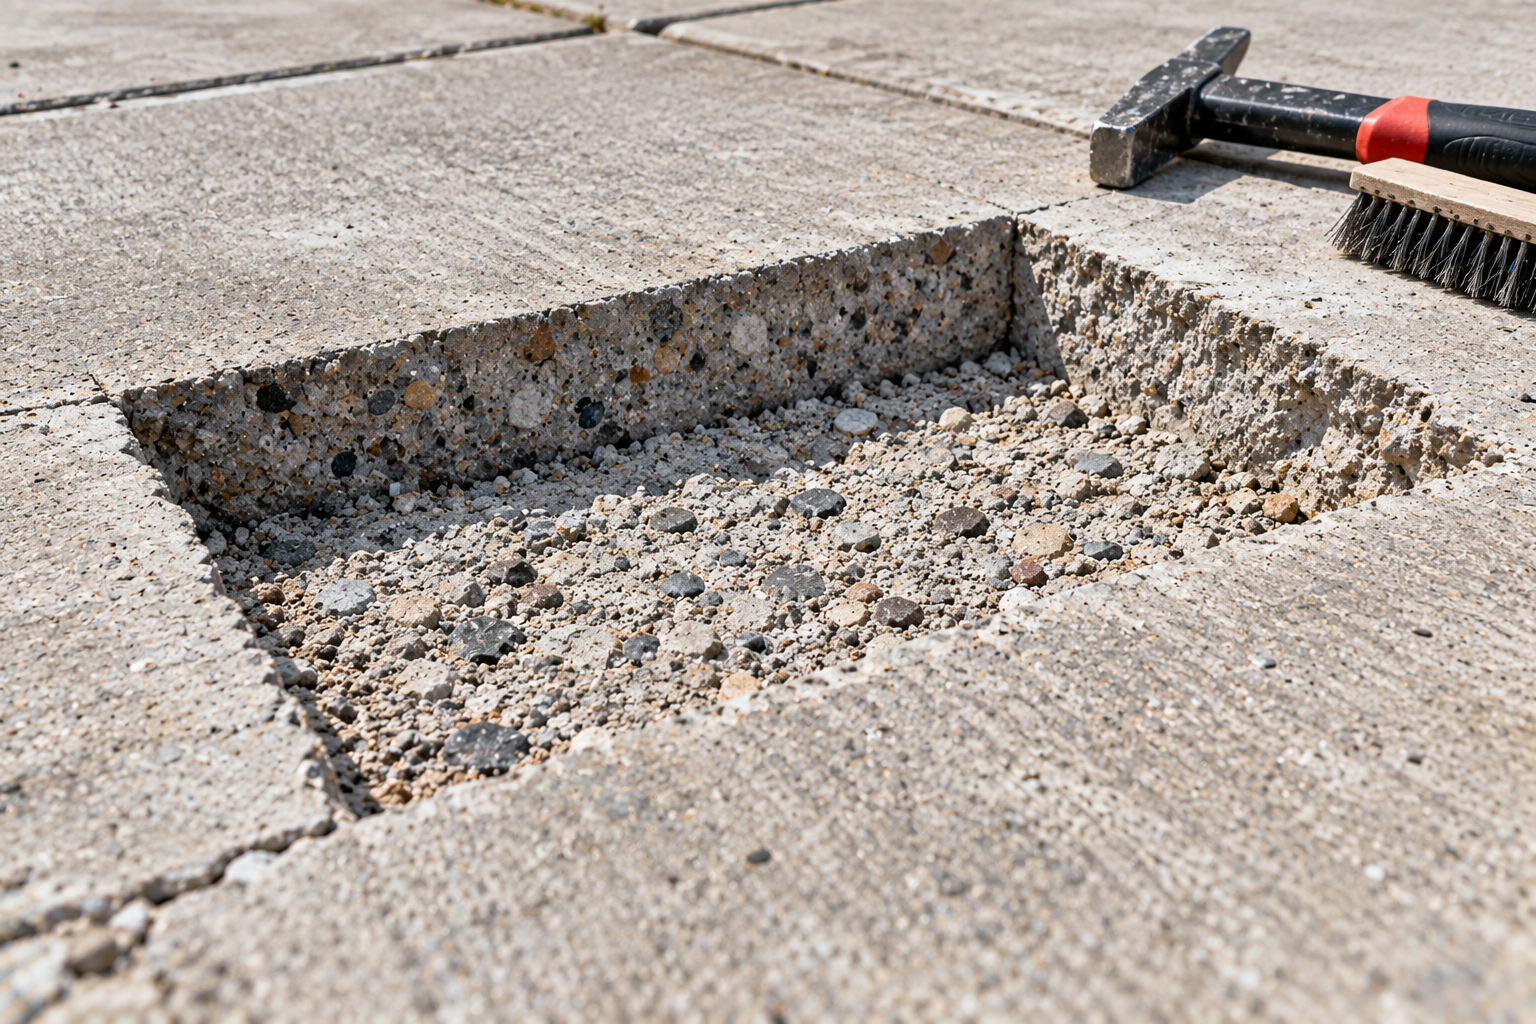
Remove all unsound concrete within the marked boundary using an appropriate method for the repair size, such as hand chiseling for small areas or a light-duty pneumatic tool or grinder for larger ones. Continue removal until sound, solid concrete is reached and confirmed by sounding the bottom and sides of the cavity.
Preparing Appropriate Edges
Square, vertical edges at the repair perimeter generally provide a stronger bond than shallow, feathered edges that taper the repair material to a thin, weak edge. Where a saw cut is used to establish a clean perimeter, keep the cut within the intended repair boundary.
Cleaning Contaminants
Remove all dust, loose particles, oil, and any residue left over from cutting or chipping. A shop vacuum followed by a water rinse, or air blowing where appropriate for the product, helps ensure the repair material bonds to clean concrete rather than to dust or debris.
Verifying the Remaining Substrate Is Sound
Sound the prepared cavity one more time before placing any repair material. If any area still responds with a dull or hollow sound, continue removal in that spot rather than proceeding over unsound concrete.
Protecting Joints and Reinforcement
Where the repair area sits next to a functional joint, protect the joint so repair material doesn’t bond across it and interfere with its intended movement. Where reinforcement is present and sound, protect it from further damage during removal. Where it’s exposed and corroded, it typically needs cleaning or treatment as part of the repair, which is a task better suited to an experienced repair professional.
19. How to Repair Localized Spalling Concrete: Step by Step
This section provides one coherent procedure for a suitable nonstructural horizontal patch on sound surrounding concrete. It assumes the preparation details from the previous section have already been completed and focuses on the practical sequence to follow.
- Inspect the damage and identify likely causes. Confirm the spall is isolated, nonstructural and free of the warning signs described earlier in this guide.
- Establish the actual repair boundary. Sound the surrounding area and mark the full extent of unsound concrete.
- Remove unsound concrete using an approved method. Chip, grind or saw-cut to the marked boundary and continue until solid concrete is reached at the bottom and sides.
- Prepare and clean the substrate. Remove all dust and debris, and confirm square, sound edges throughout the cavity.
- Meet the specified moisture and bonding requirements. Follow the selected repair product’s instructions for pre-wetting the substrate or applying a bonding agent, as applicable.
- Mix and place the compatible repair material. Follow the manufacturer’s mixing ratio and working time exactly, and place the material into the prepared cavity without delay.
- Consolidate and finish as required. Work the material into the corners and edges of the repair to eliminate voids, then finish the surface to match the surrounding concrete’s texture and elevation.
- Cure and protect the repair. Follow the product’s specified curing method and duration, and keep the repair free of traffic or loading until it has reached the necessary strength.
Authoritative Procedure Reference
ACI RAP-7, Spall Repair of Horizontal Concrete Surfaces, published by the American Concrete Institute, provides the authoritative field-level procedure framework this sequence is based on, covering layout, removal, edge preparation, bonding, placement and curing for horizontal surface repairs such as slabs, exterior flatwork and floors.
20. What Is the Best Material for Repairing Spalled Concrete?
There is no single best repair material for every spall. The right choice depends on the repair’s depth, whether the surface is horizontal, vertical or overhead, the bond strength required, exposure conditions, expected traffic, curing constraints and compatibility with the surrounding concrete.
| Material | Potential Application | What to Check Before Choosing |
|---|---|---|
| Cementitious patching mortar | Suitable localized patches | Thickness limits, substrate moisture and curing |
| Polymer-modified repair mortar | Applications requiring specified bond or performance characteristics | Compatibility, surface preparation and exposure |
| Rapid-setting repair material | Repairs needing faster reopening | Working time, temperature and required strength before traffic |
| Repair concrete with coarse aggregate | Larger or deeper repairs where specified | Minimum placement depth, consolidation and structural requirements |
| Vertical or overhead repair mortar | Compatible wall or overhead repairs | Non-sag properties, thickness limits and approved procedure |
Always check the current technical data sheet for the specific product you’re considering rather than relying on general assumptions, since minimum and maximum placement depth, required surface preparation and curing needs vary between manufacturers and product lines.
21. How to Repair Spalling on Driveways, Patios and Garage Floors
The general repair sequence described earlier in this guide applies across these locations, but each one carries its own practical considerations worth keeping in mind.
Driveways face vehicle traffic loads and, in many climates, deicing chemical exposure, so the selected repair material needs to tolerate both. Confirm the required cure time before returning the driveway to vehicle use.
Patios are primarily a visual and pedestrian-use surface, so appearance and surface texture matching often matter more here than load capacity. Drainage around the repair also deserves attention, since standing water at a patio repair can undermine its long-term performance.
Garage floors see abrasion from tire contact, parked-vehicle point loads, and often tracked-in deicing salt during winter months, even though they’re indoors. Choose a repair product rated for the abrasion and chemical exposure the floor will actually see.
In every case, the repair material must meet both the actual physical demands of the application and the manufacturer’s stated requirements. A product suited to a lightly used patio isn’t automatically suited to a driveway that sees daily vehicle traffic.
22. Spalling on Concrete Steps, Walls and Structural Members
Chipped step nosings and other clearly localized, nonstructural damage on steps can often be treated similarly to other horizontal or near-horizontal patches, once the cause is understood. Steps do see concentrated foot traffic and impact at their edges, so nosing repairs benefit from a durable, well-bonded material.
Spalling on walls, beams, columns or other structural members is a different situation. Vertical and overhead surfaces require repair materials specifically formulated to resist sagging before they set, and the procedures for evaluating and repairing structural elements differ meaningfully from horizontal driveway patching. The American Concrete Institute publishes separate field guidance, ACI RAP-6, specifically for vertical and overhead spall repair, reflecting how different these applications are from a horizontal slab patch. Structural members should not be repaired using the same assumptions or materials as a nonstructural driveway spall without appropriate evaluation first.
23. How Long Does Spalling Repair Take to Cure?
Cure and reopening times vary by product, so it helps to separate several distinct timeframes rather than expecting one universal number.
- Working time: how long the mixed material remains workable before it begins to set
- Initial set: the point at which the material has hardened enough to hold its shape
- Curing period: the time needed for the material to develop adequate strength and durability
- Minimum time before foot traffic: when light pedestrian use can safely resume
- Minimum time before vehicle loading: when the repair can safely support vehicle weight
All of these depend heavily on the specific repair product used, ambient and surface temperature, the depth of the repair, and general project conditions such as humidity. Rather than offering one universal reopening time here, always refer to the current product data sheet for the exact material you’re using, since rapid-setting products and standard cementitious mortars can have very different timelines. For general curing principles that apply to concrete more broadly, see the Concrete Curing and Drying Time Guide.
24. How Much Does Concrete Spalling Repair Cost?
Repair cost is shaped by several components working together rather than by one flat number: the extent and depth of the deterioration, the specific repair material selected, the amount of surface preparation required, site access, whether professional labor is involved, any necessary reinforcement treatment, and whether the damage turns out to require a deeper repair once removal begins.
DIY repairs are generally limited to material costs, tool costs or rental, and your own labor, which keeps cash cost lower for small, straightforward spalls. Professional repair adds labor, mobilization, and often a more thorough diagnosis and warranty, which tends to cost more upfront but can be the appropriate choice for larger, structural or corrosion-related damage.
Hypothetical Example Quote
For illustration only, not a market price guarantee: a homeowner obtains a hypothetical quote from a local supplier for a single isolated driveway spall measuring roughly 4 feet by 3 feet by half an inch deep. The quote separates a small charge for a bag of polymer-modified patching mortar, a minor tool rental fee for a handheld grinder to prepare the edges, and no additional labor since the homeowner plans to complete the repair themselves. A professional quote for the same spall would add contractor labor, mobilization and typically a warranty on the completed work.
Actual material and labor costs vary by region, supplier and current market conditions. Request quotes from local suppliers and contractors for your specific project rather than relying on a generic national estimate. For broader cost context, see the Concrete Cost Per Yard Guide, the Concrete Driveway Repair Cost Calculator and the Garage Floor Repair Cost Calculator.
25. How to Calculate Spalling Repair Material
Once you’ve measured your prepared repair cavity, use the formula below to estimate how much repair material you need.
Repair Volume Formula
Volume (cubic feet) = Length (ft) x Width (ft) x [Depth (in) / 12]
Where Length and Width are the prepared cavity’s dimensions in feet, and Depth is the average prepared depth in inches, divided by 12 to convert to feet.
Worked Example
Given: a hypothetical prepared patch measuring 4 ft long, 3 ft wide and 0.5 in average depth.
Step 1: Convert depth to feet: 0.5 in / 12 = 0.0417 ft
Step 2: Calculate volume: 4 ft x 3 ft x 0.0417 ft = 0.50 ft³
Result: approximately 0.5 cubic feet of repair material is needed before any suitable allowance for waste or an irregular cavity.
What it means: divide this required volume by your selected repair product’s published yield per bag or unit, then round up to the next whole bag or unit. Manufacturer yields vary by product, so always check the current bag or unit yield listed on the packaging or technical data sheet you’re actually using.
| Input | Example |
|---|---|
| Prepared patch length | 4 ft |
| Prepared patch width | 3 ft |
| Average patch depth | 0.5 in |
| Calculated repair volume | 0.50 ft³ |
| Manufacturer’s published yield | Enter from selected product |
| Required bags | Round up after dividing volume by bag yield |
| Local material price | Enter supplier quote |
| Other costs | Tools, preparation, labor and applicable fees |
For an irregular cavity, break the shape into a few simpler rectangular sections as described earlier in the measurement section, calculate the volume of each section separately, then add them together for the total required volume. This worksheet approach gives you a workable estimate without needing to model every curve or notch in the damaged area precisely.
Estimate Your Repair Materials
Use the Concrete Repair Calculator’s spall and patch option to estimate material quantities for your specific repair dimensions, or use the Concrete Patch Calculator for a single localized patch.
Open the Concrete Repair Calculator26. How to Prevent Concrete Spalling
Preventing spalling works best when it targets the specific cause behind the deterioration rather than applying one generic fix to every situation.
- Specify appropriate concrete for the exposure: match air entrainment, water-cementitious ratio and strength to the actual freeze thaw, moisture and chemical exposure the concrete will face
- Follow proper placement and curing practices: adequate consolidation, correctly timed finishing, and a full curing period support long-term durability
- Improve drainage: grade surfaces and manage downspouts so water doesn’t pool on or beside the slab
- Adjust winter maintenance: use deicing products and application rates appropriate for the concrete’s age and condition
- Protect reinforcement: maintain adequate concrete cover and address any early corrosion signs before they progress
- Maintain joints: keep joints clear of debris and reseal them as sealant deteriorates
- Consider a compatible surface treatment: a suitable sealer can reduce moisture and chloride intrusion for certain exposure conditions
Sealing Has Limits
A surface sealer can be a genuinely useful preventive step for certain exposure conditions by reducing water and chloride penetration, but it cannot correct existing corrosion, reverse deep delamination, or resolve structural movement that’s already occurring. Sealing is a preventive measure for sound concrete, not a repair for concrete that’s already deteriorating from one of these underlying causes. For guidance on sealing schedules, see When to Seal a Concrete Driveway and How to Seal Concrete.
27. Why Concrete Spalling Repairs Fail
Repairs that don’t hold up usually trace back to one or more recurring issues rather than bad luck.
- Incomplete removal of unsound concrete: leaving weak or delaminated material in place under the new patch
- Contamination: dust, oil or debris left in the cavity before the repair material was placed
- Inadequate surface preparation: feathered edges, insufficient roughness, or skipping a required bonding step
- Incompatible repair material: a product not suited to the repair’s depth, orientation or exposure
- Incorrect placement thickness: placing material thinner or thicker than the product’s specified range
- Poor curing: allowing the repair to dry out or freeze before it developed adequate strength
- Failure to correct the underlying cause: patching visible damage while active corrosion, joint movement or drainage problems continue
A repair patch and the surrounding original concrete also behave somewhat differently from each other, since they’re different materials with different shrinkage and thermal movement characteristics. This can lead to debonding at the interface over time, particularly if preparation or curing was inadequate. Both the Federal Highway Administration’s and the American Concrete Institute’s repair guidance place heavy emphasis on complete removal of deteriorated material, thorough surface preparation and proper curing as the central factors in whether a repair actually performs over time, which lines up closely with why so many DIY and professional repairs alike tend to fail when one of these steps is shortcut.
28. Concrete Spalling FAQs
Does concrete spalling spread if left untreated?
It can, particularly when the underlying cause, such as ongoing corrosion, freeze thaw exposure or joint movement, is still active. Spalling driven by an unresolved mechanism tends to progress over time rather than stay static, which is one reason addressing the cause matters as much as patching the visible damage.
Can spalling concrete be repaired without full replacement?
In many cases, yes. Small, isolated spalls on otherwise sound concrete can often be patched successfully. Whether full replacement is necessary depends on the extent, depth and cause of the deterioration, which is why the repair-selection guidance earlier in this article walks through several possible approaches rather than assuming one outcome.
Will sealing my concrete prevent spalling from coming back?
A compatible sealer can reduce moisture and chloride intrusion going forward, which may help prevent new spalling related to those exposures. It cannot reverse existing corrosion, delamination or structural movement, so sealing works best as a preventive step on sound concrete rather than a fix for active deterioration.
Is exposed rebar in a spall always serious?
Exposed reinforcement, especially if it shows active corrosion, generally warrants a closer look before repair, since corrosion tends to continue spreading beneath the surface even after a visible patch is applied. Whether it’s urgent depends on the element involved and whether the corrosion appears isolated or widespread, which is a good reason to have a qualified professional assess exposed, corroded steel.
Can spalling be fixed by resurfacing instead of patching individual spots?
Resurfacing can be appropriate for widespread, shallow surface damage on concrete that’s otherwise sound, once any unsound material has been removed or repaired first. It’s generally not a substitute for addressing isolated deeper spalls or corrosion-related deterioration on its own.
How do I know if a spalling repair has failed?
Common signs include the patch cracking or separating from the surrounding concrete along its edges, a hollow sound when tapped, staining or discoloration developing around the repair, or new deterioration appearing adjacent to the original repair area. Any of these suggest the bond, preparation or underlying cause wasn’t fully addressed.
Is it normal for a new concrete driveway to develop small spalls?
Occasional very minor surface chips can happen from incidental impact, but spalling appearing broadly across a new driveway within its first year or two is not typical and usually points toward a placement, finishing, curing or mix-suitability issue that’s worth investigating rather than dismissing as normal wear.
References
- American Concrete Institute, RAP-7: Spall Repair of Horizontal Concrete Surfaces. Used for horizontal spall causes, inspection, substrate preparation, placement and curing procedures.
- Federal Highway Administration, Partial-Depth Repairs, Concrete Pavement Preservation Guide. Used for pavement spalling causes, repair selection criteria and pavement-specific repair limitations.
- National Ready Mixed Concrete Association (NRMCA), Concrete in Practice technical series. Used to support general information on concrete surface defects, scaling and cracking.
- American Concrete Institute, RAP-6: Vertical and Overhead Spall Repair. Used to distinguish horizontal repair procedures from wall and overhead repair applications.
- Occupational Safety and Health Administration, Respirable Crystalline Silica in Construction (29 CFR 1926.1153). Used for dust control and worker safety guidance during concrete removal and surface preparation.
Ready to Plan Your Repair?
Estimate the exact amount of patching material your repair needs before you buy, so you avoid running short mid-project or overbuying material you won’t use.
Use the Concrete Repair Calculator