
How to Repair Concrete Steps That Are Crumbling: Causes, Repair Methods and Prevention
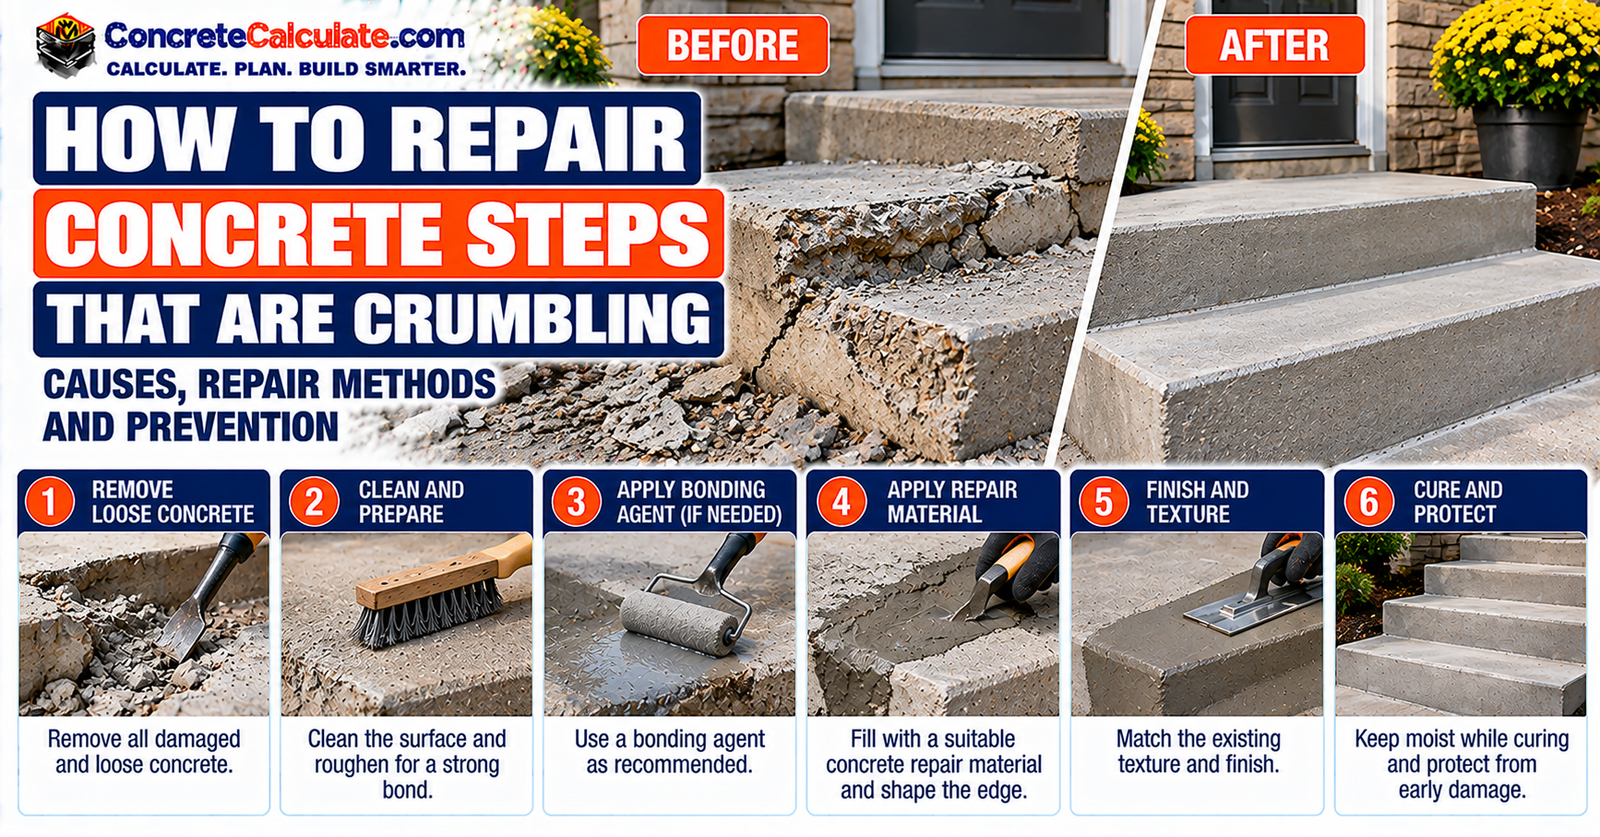
How to Repair Concrete Steps That Are Crumbling
Find out why your steps are crumbling, decide between a local patch, edge rebuild, resurfacing or replacement, and learn how to remove weak concrete, rebuild the nosing, cure the repair and prevent a repeat.
Why Are My Concrete Steps Crumbling?
Do not patch over crumbling concrete. The loose or delaminated material has to come out until you reach sound concrete, because a repair is only as good as the concrete it bonds to. FHWA’s partial-depth repair guidance starts with locating and removing all deteriorated concrete.
Before you repair anything, figure out why the steps are failing. Common causes include:
- Freeze-thaw cycles.
- Deicing salts.
- Poor concrete quality.
- Trapped moisture.
- Surface scaling.
- Impact damage.
- Reinforcement corrosion.
- Bad previous patching.
- Drainage problems.
What Does Crumbling Concrete Look Like?
“Crumbling” can describe several different defects. Look for these signs:
- A flaky surface.
- Sandy, soft mortar.
- Exposed coarse aggregate.
- A broken tread nosing.
- Chipped corners.
- Hollow-sounding areas.
- Detached chunks.
Step edges and corners are the most vulnerable spots. QUIKRETE notes that damage usually occurs at the leading edge of the tread or at corners.
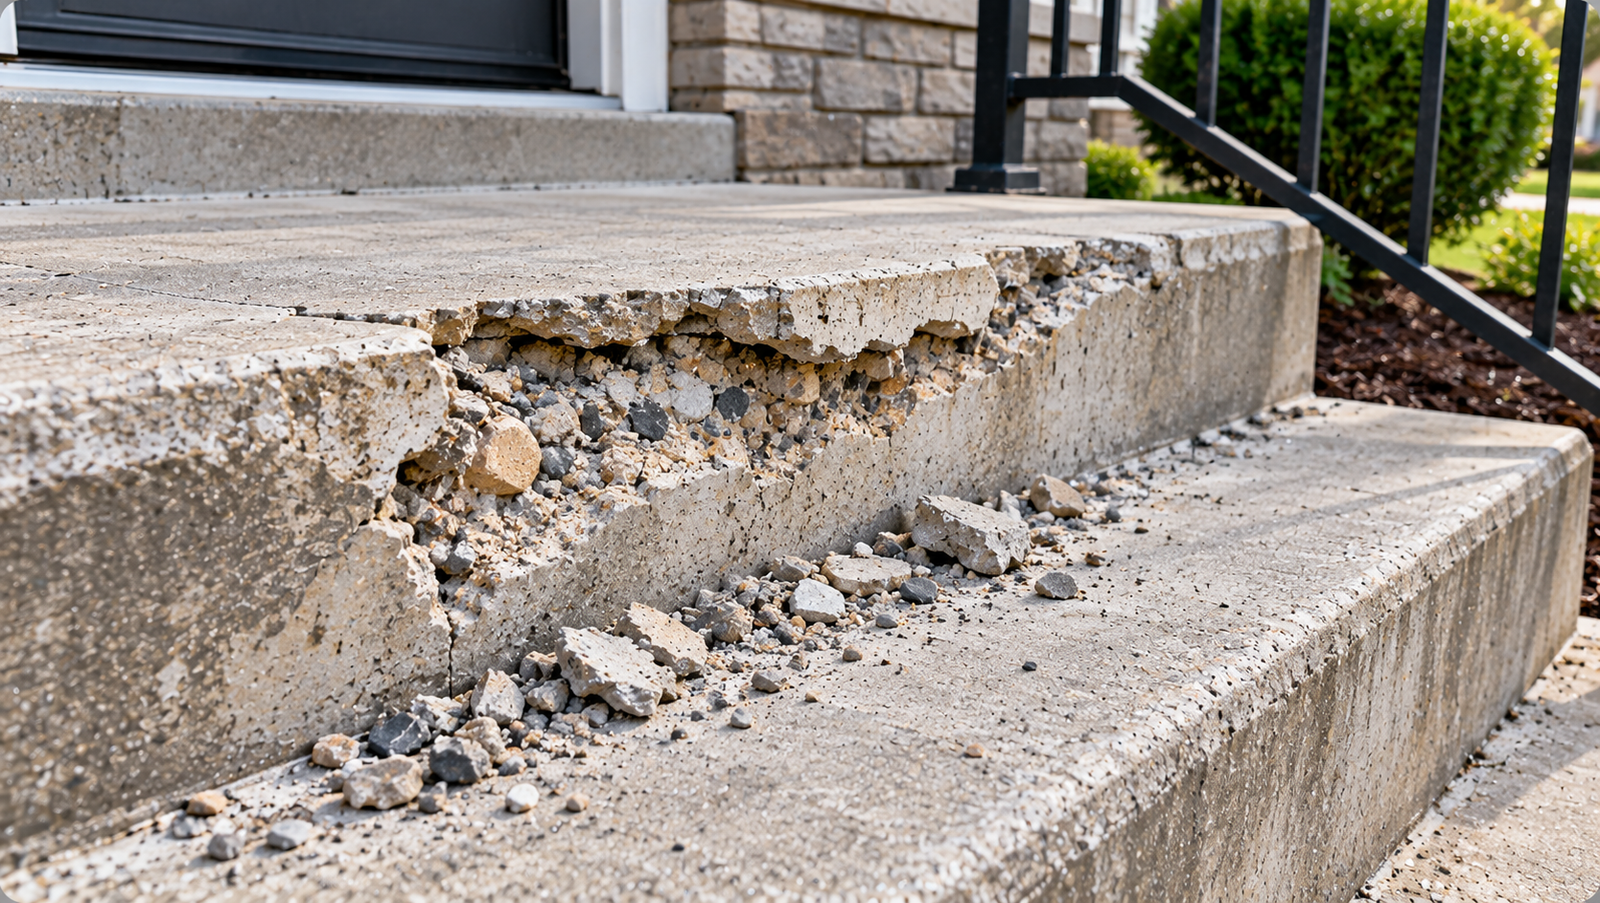
Scaling vs. Spalling vs. Crumbling Step Edges
The repair path depends on what you have. NRMCA defines scaling as local flaking or peeling of the hardened surface from freezing and thawing. Deeper missing chunks are covered in Concrete Spalling, and powdery surfaces in Concrete Dusting.
| Condition | Typical appearance | Likely repair path |
|---|---|---|
| Light scaling | Thin flakes, mortar loss | Clean/remove weak layer; possibly resurface |
| Localized spall | Missing chunk/cavity | Local patch |
| Broken nosing | Leading edge broken off | Edge rebuild |
| Broken corner | Corner missing | Formed or hand-shaped repair |
| Delamination | Hollow-sounding intact area | Remove full delaminated zone |
| Dusting | Powdery surface | Diagnose weak surface first |
| Corrosion spall | Rust/exposed steel | Professional assessment/repair |
| Structural crack/settlement | Step body moving | Stabilize/rebuild rather than cosmetic patch |
Crumbling concrete steps can range from shallow surface scaling to deeper spalling or corrosion-related deterioration, and the repair method changes accordingly.
Is the Damage Just at the Surface or Deeper?
Depth and extent decide what kind of repair you need. The damage may be shallow loss of surface mortar, a localized cavity, a deep spall, exposed reinforcement, or damage through the section.
NRMCA describes moderate scaling as the loss of surface mortar, with light scaling not exposing coarse aggregate. This guide avoids universal depth numbers, because each step is different. Sound the area to find out how far the weak concrete goes. Concrete Delamination explains hollow areas.
How to Check for Hollow or Loose Concrete
Tap the step with a light hammer or similar tool and listen. FHWA uses sounding to find deterioration beyond what shows on the surface.
- A clear ringing sound usually means sounder concrete.
- A dull or hollow sound suggests possible delamination.
Mark the dull areas with chalk or paint. Homeowner sounding is a screening method and is not structural certification.
Can Crumbling Concrete Steps Be Repaired?
Yes, many localized step defects can be repaired when the remaining concrete is sound and stable.
Repair becomes questionable with deep or widespread deterioration, major movement, structural cracking, exposed corroded reinforcement, an unstable footing, or a severely deteriorated stair body.
Patch vs. Resurface vs. Replace Concrete Steps
The best option depends on how much of the stair is damaged and how deep the damage goes.
| Condition | Patch | Resurface | Replace |
|---|---|---|---|
| One chipped corner | Best choice | No | Rarely |
| One broken tread nose | Best choice | No | If structural damage exists |
| Several shallow scaled treads | Possible but inefficient | Often suitable if substrate sound | If deep deterioration |
| Deep spalling on multiple steps | Limited | Usually insufficient | Consider larger repair/replacement |
| Moving stair assembly | No | No | Stabilize/rebuild |
| Exposed corroded reinforcement | Engineer/repair specialist | No | Depends on extent |
| Major settlement | No | No | Structural correction |
When Is a Local Patch the Best Choice?
A local patch is the best fit for isolated damage in an otherwise sound step:
- A broken corner.
- A chipped nose.
- An isolated spall.
- A small tread cavity.
- Localized surface loss.
For the general patching approach, see How to Patch Concrete Without Removing Old Concrete.
When Should You Resurface the Steps Instead?
Resurfacing makes sense when several treads are shallowly worn, the deterioration is broad but shallow, the step body is sound, and you want a uniform finish. NRMCA notes light to moderately scaled surfaces can be repaired with thin bonded resurfacing, though the repair will not match the original color.
Read the Concrete Resurfacing Guide for methods, and the Concrete Resurfacing Calculator for quantities.
When Should Concrete Steps Be Replaced?
Replacement is the right call when the stair itself is failing. Warning signs include:
- Major settlement.
- Deep cracking through several steps.
- An unstable stair base.
- Widespread deep deterioration.
- Rebar corrosion throughout.
- Several failed previous repairs.
- Geometry that is no longer safe.
For a rebuild, use the Concrete Stairs Calculator, the Stair Calculator, and the Stair Rise and Run Chart. Budget with the Concrete Stairs Cost Calculator.
Freeze-Thaw Damage and Scaling
Concrete that is saturated with water and exposed to repeated freezing and thawing is prone to scaling. NRMCA explains that water expands as it freezes, which creates stress inside the concrete.
The more freeze-thaw cycles, the greater the risk. Air-entrained concrete resists this because tiny air bubbles absorb the expansion.
Repairs last longer when the source of repeated saturation and freeze-thaw deterioration is also addressed.
How Deicing Salts Accelerate Step Damage
Deicing chemicals make winter damage worse. NRMCA says they increase saturation of the concrete surface and the number of freeze-thaw cycles.
- More saturation.
- More freeze-thaw stress.
- Surface scaling.
- Corrosion risk around reinforcement.
NRMCA considers sodium chloride and calcium chloride acceptable in moderate amounts. It warns against ammonium sulfate, ammonium nitrate, and magnesium-based salts, and suggests clean sand for traction. No deicer is universally safe for all concrete.
Poor Drainage and Standing Water
Water that sits on the steps shortens the life of any repair. Watch for water trapped on treads, poor nosing or drip detail, water at the stair-wall junction, and snowmelt that refreezes.
A patch will fail again if the step stays chronically saturated. Fixing drainage can matter as much as the patch itself.
Poor Finishing, Curing or Concrete Quality
Poor finishing and curing create weak surfaces that peel. NRMCA notes that concrete can peel or scale without freeze-thaw, often from early steel troweling, over-finishing, or finishing while bleed water is on the surface.
- Finishing over bleed water.
- Excess water added to the mix.
- Poor curing.
- Weak surface mortar.
Excess jobsite water raises the chance of a weak mortar layer at the surface.
Reinforcement Corrosion Inside Concrete Steps
Steel inside the step can corrode when moisture and chlorides reach it. The rust expands, cracks the cover concrete, and delamination or spalling follows.
If steel is exposed or heavily corroded, do not use a cosmetic patch. Get a professional evaluation. The Concrete Cover Chart explains why cover over steel matters.
What Tools and Materials Do You Need?
Most step repairs need these categories of tools and materials:
- Eye protection and waterproof gloves.
- Dust control and respiratory protection as required.
- Hammer and chisel.
- A grinder or other controlled removal tool.
- A stiff nylon brush and a vacuum.
- Trowels.
- Wood form material.
- A compatible repair mortar.
- A primer or bonding agent, if the product requires one.
- Curing and protection materials.
QUIKRETE’s step-repair instructions list a cold chisel, ball peen hammer, goggles and gloves, trowels, a paintbrush, and scrap lumber for forms.
How Much Damaged Concrete Should You Remove?
Remove all loose, weak, and delaminated concrete until the remaining base is sound. FHWA makes this the first requirement of a successful partial-depth repair.
Its depth limits and saw-cut dimensions are for pavements and are not step rules. If sounding keeps finding weak concrete, the damage is deeper than first thought, and a bigger repair or replacement may be needed.
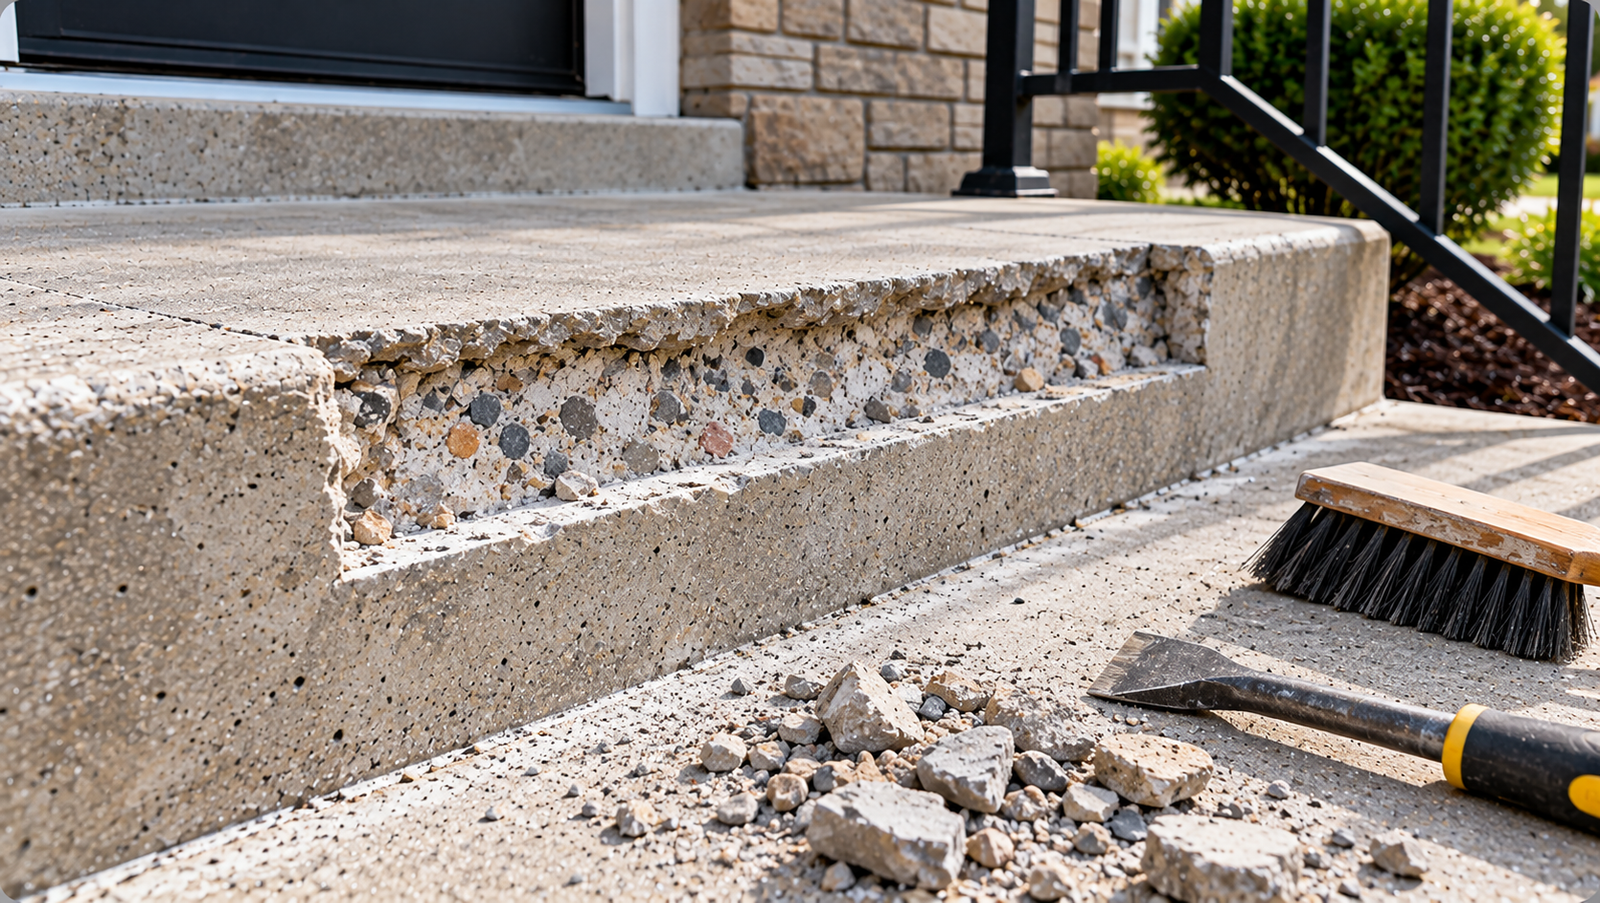
How to Remove Crumbling Concrete Without Damaging the Step
Use the lightest tool that works. A hammer and chisel suit small repairs, and a grinder or a small demolition hammer can speed larger ones.
FHWA warns that even light chipping equipment can damage sound concrete if it is poorly controlled. Avoid heavy impact on the concrete you are keeping. Cutting concrete makes silica dust, so use dust control and respiratory protection.
How to Prepare the Repair Edges
Ragged feathered edges are a problem for many repair mortars, because very thin material at the border cracks and peels. A stable perimeter with enough product thickness works better.
QUIKRETE’s step guide tells users to undercut and widen the broken area with a cold chisel instead of smearing material onto a thin crumbling edge. That is one product’s method. Follow the edge geometry your repair mortar requires.
How Clean Should the Repair Area Be?
Remove everything that could get between the repair and the sound concrete: dust, loose material, grease, oil, dirt, and old loose patch material.
FHWA states that dust and dirt prevent bond. Scrub with a stiff bristle brush and vacuum the area.
Should the Old Concrete Be Dry or Damp?
Requirements vary by product. QUIKRETE, for example, says to dampen the repair area with enough water to saturate the concrete and then remove any standing water.
Its reason is that dry concrete acts like a rigid sponge and pulls water from the repair, weakening the bond and causing shrinkage cracks. Other mortars may call for dry, damp, SSD, or primer-treated concrete, so follow your product’s data sheet.
| Item | Ready? |
|---|---|
| Loose concrete removed | Yes/No |
| Hollow/delaminated areas removed | Yes/No |
| Repair perimeter stable | Yes/No |
| Dust removed | Yes/No |
| Oil/grease removed | Yes/No |
| Reinforcement condition checked | Yes/No |
| Correct substrate moisture condition achieved | Yes/No |
| Primer/bonding agent confirmed | Yes/No |
| Form ready if needed | Yes/No |
What Repair Material Should You Use for Crumbling Steps?
There is no single best material. The right product depends on the size, location, and shape of the repair.
| Material | Typical use | Main advantage | Main limitation |
|---|---|---|---|
| Polymer-modified repair mortar | Shallow/local step repairs | Strong bond/workability | Product thickness limits |
| Quick-setting repair mortar | Corners/nosings | Rapid set, hand shaping | Short working time |
| Vertical/non-sag repair mortar | Riser/edge repairs | Holds shape | Product-specific depth |
| Conventional repair concrete | Larger cavity | Good for volume | Requires form and consolidation |
| Resurfacer | Broad shallow wear | Uniform renewed surface | Requires sound substrate |
| Epoxy repair mortar | Specialized repairs | High bond | Not universal; compatibility matters |
Ordinary thin mortar or neat cement paste is usually not the right universal answer. QUIKRETE points to its quick-setting cement, mixed with acrylic fortifier, for corners and nosings, and a vinyl patcher for thin repairs.
Do You Need a Concrete Bonding Agent?
Maybe. Some repair systems require a bonding primer, polymer modifier, or slurry, while others do not. For example, QUIKRETE uses acrylic fortifier mixed into its quick-setting cement for step edges.
Read the repair product’s data sheet, and see How to Use Concrete Bonding Adhesive for how bonding systems differ.
How to Repair a Crumbling Concrete Step Edge or Corner
This is a general sequence. Your repair mortar’s instructions override the details.
Mark the full damaged area
Sound the step and outline everything that is loose or hollow.
Remove all weak concrete
Chip or grind back to sound concrete, with a stable edge.
Clean and condition the substrate
Brush and vacuum away dust, then bring the surface to the moisture condition your product requires.
Install a form if the nosing or corner needs support
QUIKRETE notes forms are used for larger repairs or when the tread projects out from the riser. Hold the form firmly so mortar cannot push out.
Mix only the amount of repair mortar you can place within the working time
Measure the mixing water accurately. QUIKRETE warns that more water means weaker bond and compressive strength.
Pack the material firmly against the substrate and into the edge
Press the first layer in with firm trowel pressure so no voids are left, then build up in layers.
Rebuild the nosing and edge profile
Shape the edge to match the surrounding step. For a quick-setting product, QUIKRETE trims the patch once it is firm enough to hold a thumbprint.
Finish and texture to match the existing tread
Level the patch with the surrounding concrete and brush it to match the existing non-slip texture.
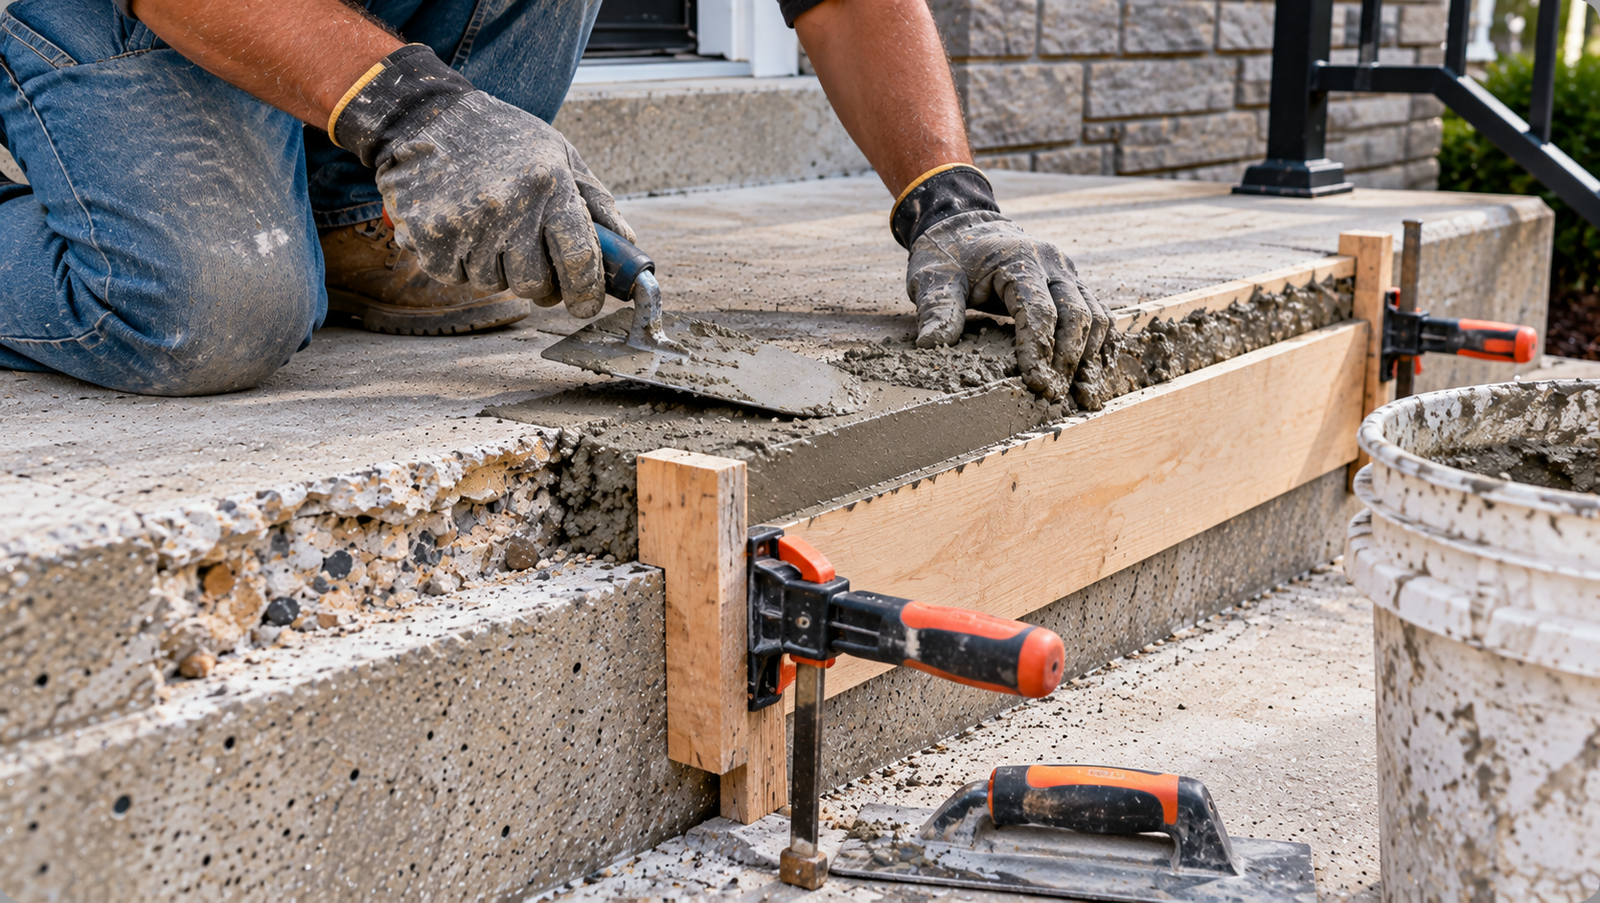
A durable step-edge repair starts by removing all weak concrete before the nosing is rebuilt against a sound, prepared substrate.
How to Repair a Crumbling Tread Surface
For a damaged tread surface, remove all weak surface material first. Then decide whether patching or resurfacing is more efficient.
Preserve safe tread and riser geometry. Do not change the step height or depth enough to make the stairs inconsistent, because uneven risers are a trip hazard. Finish with suitable traction, such as a broom finish.
How to Finish, Cure and Protect the Repair
Finish flush with the existing step, and recreate the non-slip broom texture. Do not add water to the surface, since QUIKRETE warns that it weakens the surface and promotes shrinkage cracks.
Protect the repair from rain, freezing, and foot traffic. QUIKRETE specifies keeping its example repair off foot traffic for 24 hours, and the Concrete Curing Time Chart gives curing background.
FHWA stresses curing because small patches have a high surface-area-to-volume ratio and lose moisture fast, which can cause shrinkage and delamination. Follow your product’s cure and return-to-service instructions.
| Failure | Likely cause | Better approach |
|---|---|---|
| Patch falls off | Weak/dusty substrate | Remove to sound concrete and clean |
| New corner breaks | Thin feathered edge/impact | Use proper repair geometry and material |
| Patch cracks | Shrinkage, movement or poor cure | Correct cause and cure properly |
| Repair surface flakes | Too much finishing water | Follow product finishing instructions |
| Edge stays soft | Wrong water ratio | Measure mixing water accurately |
| Repair delaminates | Hidden unsound concrete left behind | Sound and expand repair boundary |
| Damage returns after winter | Saturation/freeze-thaw/deicer exposure | Improve moisture management and durability strategy |
How Much Repair Material Do You Need, and How Do You Stop the Steps From Crumbling Again?
Estimate quantity from the prepared cavity, not the original visible chip.
Repair Volume
Volume (ft³) = L (ft) × W (ft) × D (in) ÷ 12
Example: a damaged tread edge 3 ft long, 4 in (0.333 ft) wide, and 1 in deep.
Calculation: 3 × 0.333 × 1 ÷ 12 = 0.083 ft³.
| Input | Example |
|---|---|
| Length | 3 ft |
| Width | 4 in |
| Average prepared depth | 1 in |
| Theoretical volume | ~0.083 ft³ |
| Product yield | Enter manufacturer data |
| Bags required | Round up |
| Waste/irregularity | Add reasonable allowance |
Use the Concrete Patch Calculator for chips and corner breaks, and the Concrete Repair Calculator for spalls and resurfacing. For budgeting, try the Concrete Repair Cost Calculator.
To stop the steps from crumbling again, tackle the causes:
- Manage water and keep drainage working.
- Use deicers in moderation and avoid aggressive types.
- Seal compatible exterior concrete with a breathable sealer when appropriate.
- Repair cracks and joints.
- Keep snow and ice from sitting on damaged surfaces.
Crumbling Concrete Steps FAQs
Why are my concrete steps crumbling?
Common causes are freeze-thaw cycles, deicing salts, poor concrete quality, trapped moisture, impact, reinforcement corrosion, and bad earlier repairs.
Can crumbling concrete be repaired?
Often yes, if the remaining concrete is sound. Loose and weak concrete must be removed first.
Can I patch directly over crumbling concrete?
No. A repair is only as good as the concrete it bonds to, so remove loose and delaminated material until you reach sound concrete.
What is the best repair material for a concrete step?
It depends on the repair. Quick-setting repair mortar suits corners and nosings, and a polymer-modified mortar suits shallow repairs. Check the product data sheet.
Do I need bonding adhesive?
Maybe. Some systems require a bonding primer or polymer modifier and others do not.
Can I repair a broken step corner without replacing the steps?
Usually, yes, if the rest of the step is sound. Remove the weak concrete, use a form if needed, and rebuild the corner.
Can badly scaled steps be resurfaced?
Light to moderate scaling can often be repaired with thin bonded resurfacing. Severe or progressing scaling may not be feasible to repair.
How long before I can walk on the repair?
It depends on the product. One manufacturer example calls for 24 hours of protection from foot traffic, but yours may differ.
Will sealing stop concrete from crumbling?
Not by itself. A breathable sealer can help reduce water absorption, but it does not make concrete immune to freeze-thaw damage.
When should concrete steps be replaced?
When there is major settlement, deep or widespread deterioration, unstable footing, corroded reinforcement throughout, or repeated failed repairs.