How to Repair Cracks in Concrete Walls Before Painting
How to Repair Cracks in Concrete Walls Before Painting
Learn which wall cracks can be filled as part of paint preparation, which need a different repair, and the sequence from diagnosis and moisture checks through repair, primer, and paint.
Can You Repair a Concrete Wall Crack Before Painting?
Yes, many stable nonstructural cracks can be repaired before painting. The wall should not simply be filled and painted until the cause, movement, and moisture condition have been considered.
Painting is the last step, not the repair. This is the workflow the guide follows:
- Inspect the crack and the wall around it.
- Classify the crack as stable, moving, leaking, or structural.
- Repair it with a method that suits its behavior.
- Let the repair cure.
- Clean the wall.
- Verify that the wall is dry enough for the coating.
- Prime.
- Paint.
What Kind of Concrete Wall Crack Do You Have?
Crack appearance gives clues, but not a diagnosis. These are the types homeowners usually find:
- Hairline shrinkage cracks: fine cracks that form as concrete dries and shrinks.
- Vertical cracks: common in poured walls.
- Horizontal cracks: can reflect lateral pressure and need closer attention.
- Diagonal cracks: often seen near corners and openings.
- Stair-step cracks: follow mortar joints in concrete masonry.
- Cracks around openings: start at window and door corners.
- Leaking cracks: let water through.
Do not judge structural significance from orientation alone. The U.S. Army Corps of Engineers (USACE) notes that it can be hard to tell structural from nonstructural cracks by visual examination.
If the cause is unclear, start with Why Is My Concrete Cracking?.
Hairline vs. Wider vs. Moving Cracks
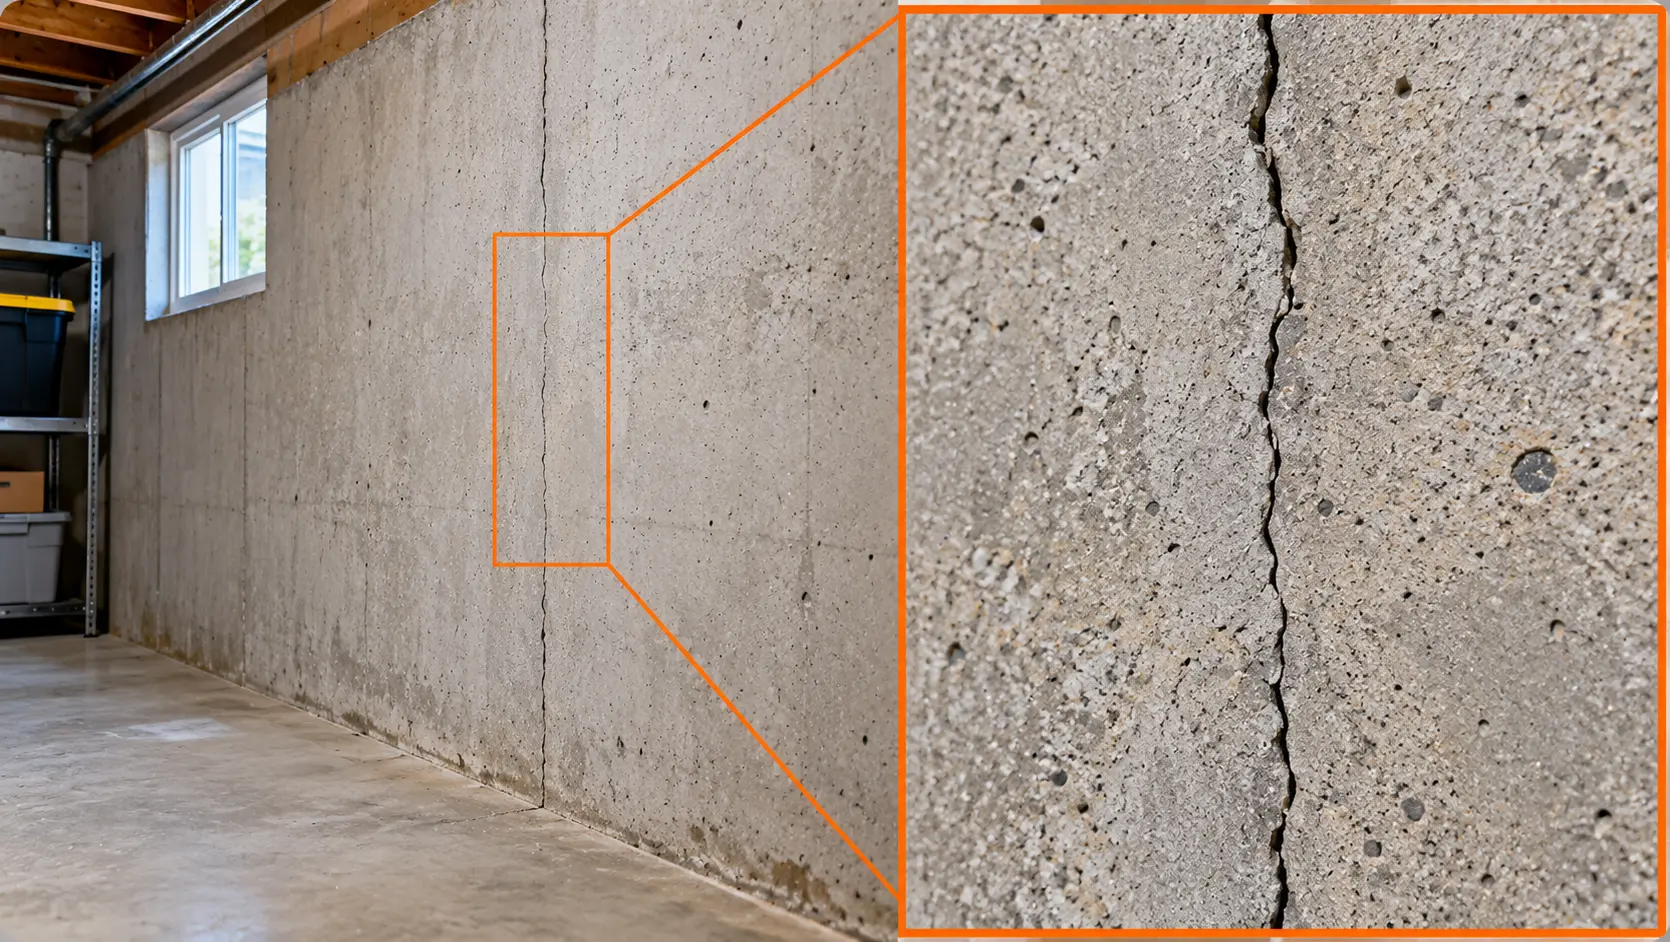
Width is useful for documenting a crack, but movement and cause matter more. USACE, citing ACI guidance, describes widths as fine (under about 0.04 in), medium (about 0.04 to 0.08 in), and wide (over 0.08 in).
Those categories describe a crack. They are not repair rules. A narrow crack can be moving and a wide one can be stable, so measure width over time, not once.
The same idea runs through our cracking guide, which avoids tying one crack width to a decision.
Stable Crack vs. Active Crack: Why It Matters
A stable crack shows no meaningful ongoing movement. An active crack keeps opening, closing, extending, or shifting.
USACE defines an active crack as one that is currently moving, whatever caused it. It adds that a crack whose cause cannot be determined should be treated as active.
- Take dated photographs from the same spot.
- Mark the crack ends with a pencil and date them.
- Use a simple crack gauge.
- Repeat width readings over several weeks or seasons.
This matters because rigid filler on an active crack will often reopen. ACI RAP-1 makes the same point for epoxy: if a crack is subject to later movement, epoxy repair may not apply.
Repair method depends on whether the crack is stable, moving or associated with structural movement.
When Should You NOT Fill and Paint Over a Wall Crack?
Some warning signs mean the wall needs more than a cosmetic repair. Do not fill and paint over a wall with any of these:
- A horizontal crack with displacement.
- A crack that keeps widening.
- A bowing wall.
- A significant offset between the two sides.
- Active water flow.
- Exposed or corroded reinforcement.
- A crack that has failed repairs repeatedly.
- Several cracks associated with settlement.
- A crack in a load-bearing wall of uncertain significance.
| Crack condition | Typical concern | Paint-prep repair appropriate? | Next step |
|---|---|---|---|
| Fine stable hairline crack | Shrinkage/cosmetic | Often | Compatible filler/patch |
| Stable wider crack | Local repair | Possibly | Select repair by geometry |
| Moving crack | Ongoing movement | Not with rigid filler alone | Diagnose movement |
| Wet/leaking crack | Moisture path | Not until moisture issue is addressed | Correct source + repair |
| Horizontal displaced crack | Possible structural pressure/movement | No simple cosmetic repair | Professional assessment |
| Crack with bowing wall | Structural movement | No | Engineer/foundation specialist |
| Crack with rust/exposed steel | Corrosion | No cosmetic-only repair | Repair assessment |
When Should a Structural Engineer Inspect the Crack?
Bring in a structural engineer when the crack could involve more than shrinkage. Typical reasons include:
- Foundation movement.
- A bowing wall.
- Substantial displacement.
- A crack at a beam or column connection.
- A structural or retaining wall.
- Not being able to tell what caused the crack.
USACE advises that any significant isolated crack should be referred to a structural engineer and considered possibly structural. There is no universal rule such as “over X inches means structural,” so use judgment and ask when in doubt.
Is Water Coming Through the Crack?
Active leakage changes the whole repair strategy. Water can come from rain-driven leakage, groundwater, poor foundation drainage, pipe leaks, or condensation.
Paint is not a substitute for correcting an active moisture source. Find where the water comes from, fix that, and only then repair and coat the wall.
ACI 224.1R adds that epoxy injection generally does not apply to cracks that are actively leaking and cannot be dried, except for certain moisture-tolerant epoxies. Leaking cracks usually call for a different approach.
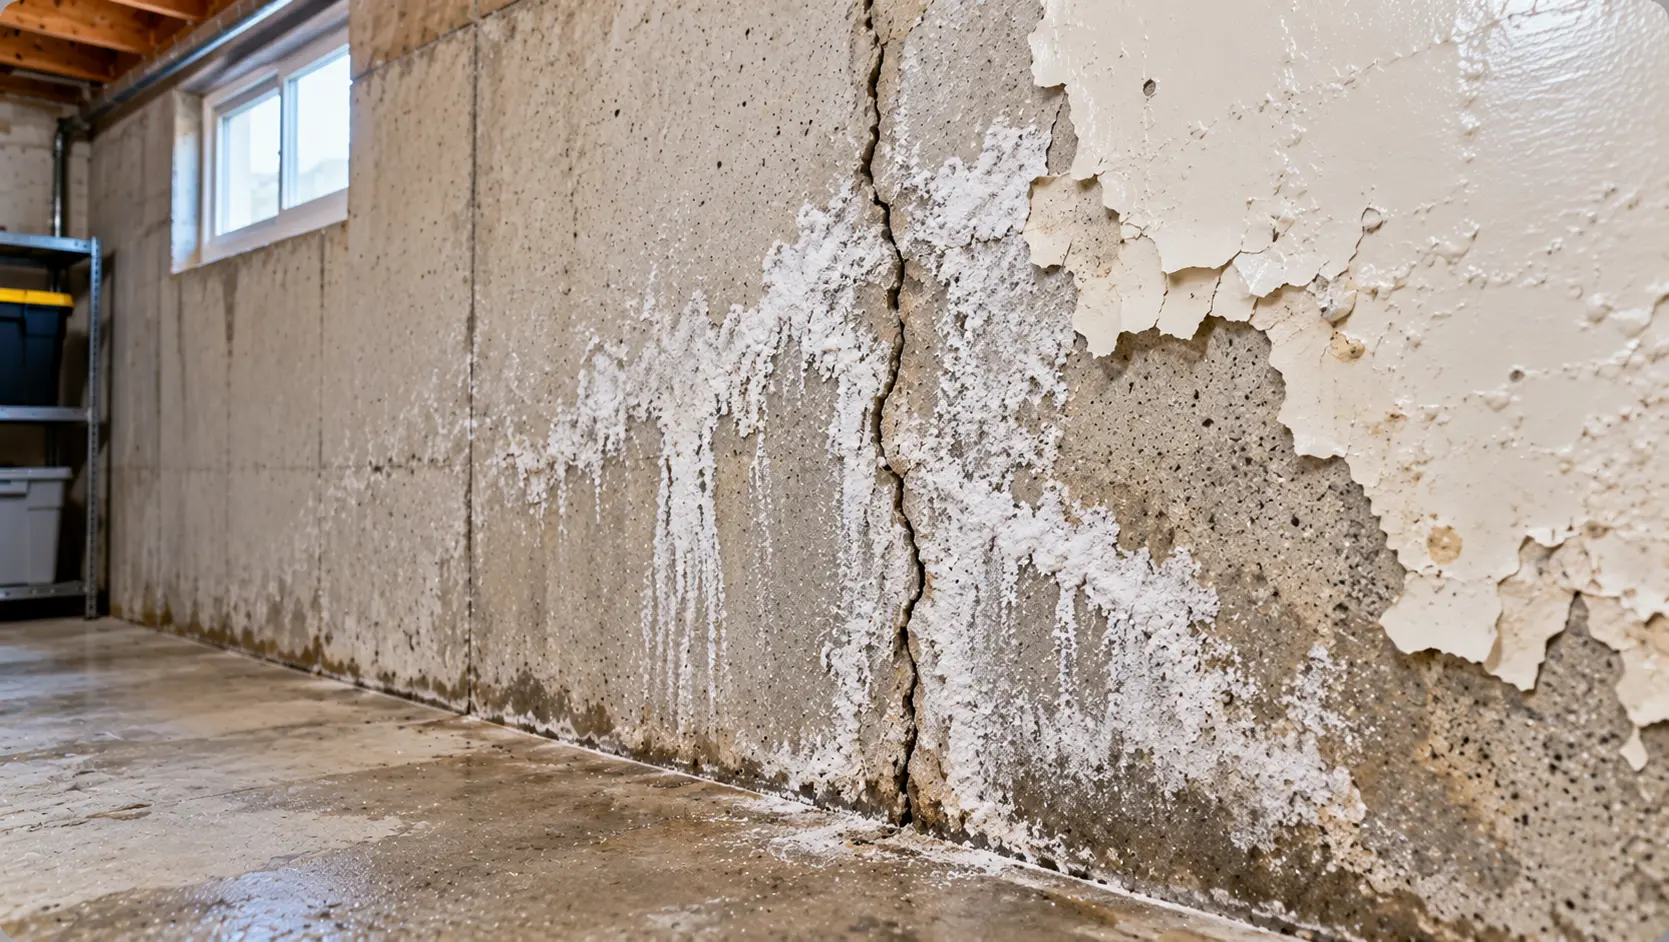
Efflorescence, Dampness and Peeling Paint Around Cracks
Moisture leaves signs around a crack. Look for:
- White deposits on the surface.
- Dark, damp areas.
- Blistered paint.
- Peeling coating.
- A musty odor.
Sherwin-Williams lists moisture, efflorescence, and other contaminants as coating problems to correct during preparation. Efflorescence is covered in the concrete efflorescence guide.
Repairing the visible crack without correcting moisture can lead to recurring efflorescence, blistering and peeling paint.
How to Check Whether a Concrete Wall Is Dry Enough to Paint
Check dryness before you prime. Trapped moisture is a leading cause of bubbling and peeling.
A simple screening method comes from Sherwin-Williams. Tape all four edges of a 4-mil plastic sheet, 18 by 18 inches, to the bare wall, wait at least 16 hours, and look for moisture, discoloration, or condensation on the concrete or under the plastic.
Moisture meters give a number, but the limit depends on the product. One Sherwin-Williams guide says no higher than 5 percent, while a primer data sheet allows 15 percent or lower. Follow your coating’s data sheet, not a single figure.
Other conditions matter too. Sherwin-Williams calls for a surface pH between 6 and 9 and air and surface temperatures of at least 50°F during application.
Concrete Wall Crack Repair Methods Compared
Different cracks need different repairs. The table lines up the common methods, from simple filler to injection.
| Method | Best suited for | Movement accommodation | Paint-prep role |
|---|---|---|---|
| Concrete patch/filler | Stable shallow crack | Low | Smooth cosmetic repair |
| Cementitious repair mortar | Wider localized defect | Low | Build/restore surface |
| Elastomeric sealant | Small movement | Moderate/high by product | Check paintability |
| Routing + sealing | Stable/dormant crack or movement-compatible detail | Depends on sealant | Creates controlled repair geometry |
| Hydraulic cement | Selected water-stop/static defects | Low | Specialized use |
| Epoxy injection | Selected structural crack repair | Rigid | Professional repair before coating |
No single tube of crack filler is right for every crack. Match the material to what the crack is doing.
When to Use Concrete Crack Filler or Patching Compound
Patching compound suits shallow, stable cracks, minor cosmetic cracks, and small surface voids next to them. Sherwin-Williams, for instance, says to fill bug holes, air pockets, and other voids in block and concrete with a cement patching compound.
Filler is not automatically structural. It covers and smooths the surface. It does not restore strength across the crack.
When to Use Flexible Sealant
Where a crack may move slightly, a flexible sealant can follow that movement instead of cracking. Elastomeric sealants are made for this purpose.
Check two things on the label. The sealant must be compatible with masonry, and it must be paintable. Not every sealant accepts paint.
Routing and Sealing Concrete Wall Cracks
Routing and sealing turns the crack into a controlled joint. The principle is simple.
- Open the crack to a groove the sealant allows.
- Clean the groove.
- Create the geometry the sealant data sheet calls for.
- Fill it with a compatible sealant.
ACI 224.1R describes routing and sealing as treating the crack like a joint. USACE lists it among its crack-repair techniques. Neither treats it as a fix for a crack under significant water pressure.
When Is Epoxy Injection Appropriate?
Epoxy injection is a specialized repair, not normal paint preparation. It is generally meant for selected structural cracks where restoring continuity makes sense.
ACI RAP-1 is devoted to it. It covers preparation, port and cap-seal installation, injection, and quality control, and it notes the crack should not be subject to later movement.
Cracks caused by corroding reinforcement should not be repaired this way, because continuing corrosion makes new cracks. Leave injection to a qualified contractor.
Should You Use Hydraulic Cement?
Hydraulic cement sets quickly and is sometimes used on static cracks or seepage details. It can be useful for a defined hole or a crack that is not moving.
- It can be rigid and may not tolerate movement.
- It does not stop the source of water pressure.
- It is not automatically suitable for every wall crack.
Follow the product specification, and treat it as a patch for a specific condition, not a general answer.
Patching Compound vs. Sealant vs. Epoxy
This table compares the three repair families homeowners meet most often.
| Question | Filler/patch | Flexible sealant | Epoxy injection |
|---|---|---|---|
| Stable cosmetic crack? | Often suitable | Sometimes | Usually unnecessary |
| Moving crack? | Poor choice | Potentially suitable | Generally inappropriate unless movement resolved |
| Structural restoration? | No | No | Potentially, when properly designed |
| Easy to paint over? | Usually after cure | Product-dependent | Usually surface must be finished/prepared |
| DIY suitability | Common | Common | Specialist/professional |
| Moisture-active crack? | Limited | System-specific | Cause must be understood |
How to Prepare a Concrete Wall Crack for Repair
Preparation decides whether the repair holds. Sherwin-Williams says coating substrates should be clean, dry, sound, and free of cracks or spalling before they are coated. Work through this list:
- Remove loose paint.
- Remove loose concrete.
- Clean the crack edges.
- Remove dust.
- Remove oil and other contamination.
- Allow any required drying time.
Sherwin-Williams also notes that up to 80 percent of coating failures can be traced to inadequate surface preparation.
Should You Widen a Concrete Wall Crack Before Filling It?
Sometimes. A stable surface crack may be routed into a controlled groove if the repair system calls for it.
Do not grind every hairline crack into a deep V-groove. That removes sound concrete and can make the repair larger than the problem. Follow the product instructions for the geometry it needs.
How Deep Should You Fill a Concrete Wall Crack?
Fill depth depends on the repair system, the crack geometry, whether backer material is required, and whether the repair is surface sealing or injection. There is no universal depth.
A sealant usually needs a defined width and depth, and filler for a wider crack may go in layers. Always read the data sheet for the product you chose.
How to Clean Dust and Loose Material From the Crack
Dust left in a crack keeps filler from bonding. Remove it with a vacuum and a stiff brush.
ACI RAP-1 recommends wire brushing the surface about 1/2 inch to each side of a crack before epoxy injection, because mechanical grinders may fill cracks with dust. Oil-free compressed air is another option where appropriate.
Check the repair product for any specific cleaning steps, such as dampening the crack.
Durable paint preparation begins with a clean, sound crack repair, not filler spread over loose concrete.
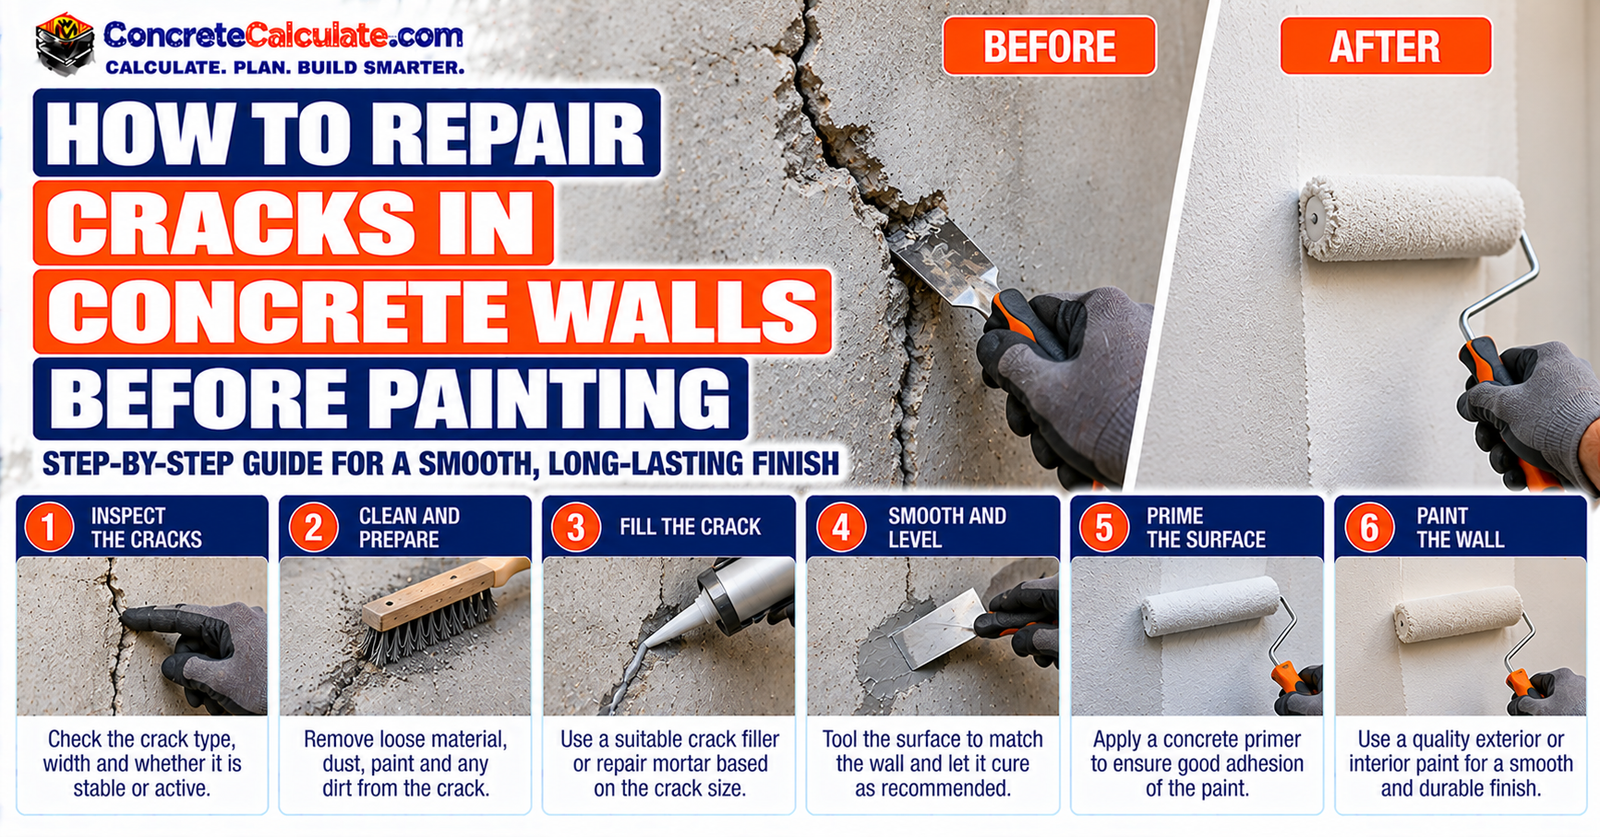
How to Repair a Stable Concrete Wall Crack Before Painting
This is the main procedure for stable, nonstructural cracks. The repair product’s instructions override every detail.
Step 1: Confirm the crack is suitable for cosmetic repair
Check that it is stable, dry, and not part of a structural problem.
Step 2: Remove loose paint and concrete
Scrape and brush away anything that is not firmly attached.
Step 3: Prepare the crack to the repair product’s required geometry
Open it only as far as the product requires.
Step 4: Clean the crack thoroughly
Vacuum out the dust and wipe away oil or grime.
Step 5: Apply the selected filler or repair material
Press it firmly into the crack so it fills completely and contacts both sides.
Step 6: Tool or finish the repair flush
Smooth it level with the wall surface.
Step 7: Allow full curing and drying
Wait for the time the product states, not the time you would like.
Step 8: Sand or feather the repair only if the product permits
Some fillers sand well and others should be left alone. Check the label.
To estimate how much material you need, convert the crack to consistent units and multiply length, width, and depth.
Crack Filler Volume
V = L × W × D, with all three in inches.
Example: 12 ft = 144 in, so V = 144 × 0.25 × 0.25 = 9 in³ (about 0.0052 ft³).
| Input | Example |
|---|---|
| Crack length | 12 ft |
| Average fill width | 0.25 in |
| Designed fill depth | 0.25 in |
| Theoretical fill volume | 9 in³ |
| Cartridge/product yield | Enter manufacturer data |
| Number of cartridges | Round up |
As a hypothetical, if a cartridge yielded 18 in³, then 9 ÷ 18 = 0.5, so you would buy one cartridge and allow for waste. Use your real product yield.
Estimate Your Crack Filler
Enter crack length, width, and fill depth to estimate sealant or filler once you have chosen a method.
Open the Concrete Crack Filler Calculator Concrete Repair CalculatorHow to Repair a Deeper or Wider Wall Crack
Deeper or wider cracks need more than one pass. Options include:
- Multiple thin layers of filler.
- Backer material behind a sealant.
- Routing and sealing.
- Professional injection.
Most repair products limit how thick one layer can be, so build up deep fills in lifts and let each one set as instructed. If the crack is wide because the wall is moving, go back to the diagnosis before filling anything.
For other repair methods, see How to Fix Cracked Concrete.
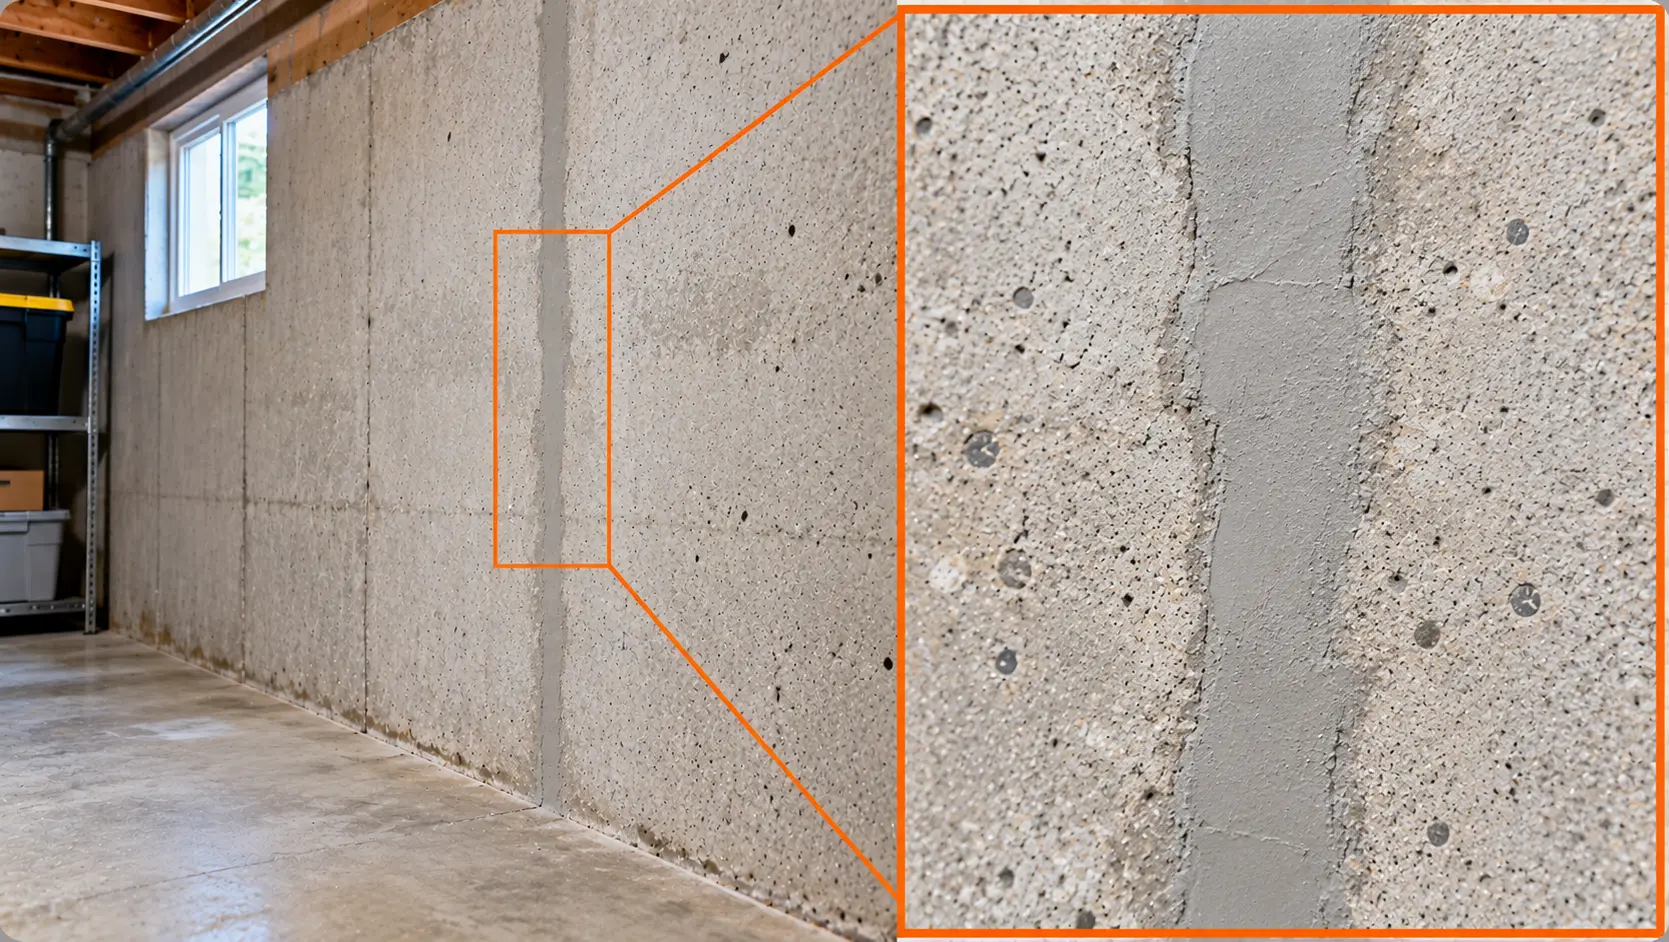
How Long Should Crack Repair Cure Before Painting?
Cure and dry time depends on the repair material. Cementitious repair, acrylic filler, polyurethane sealant, and epoxy all behave differently, so there is no universal 24-hour rule.
Check the repair manufacturer’s data sheet and the paint manufacturer’s data sheet. Sherwin-Williams tells users to let patch material cure completely according to the manufacturer’s instructions.
Sherwin-Williams also suggests testing the coating system on a patch of 2 to 3 square feet and waiting a week before checking adhesion, especially where concrete treatments may interfere.
Should You Sand the Repaired Crack?
Sand only when the product allows it. Patching compounds and cementitious feathering materials often sand smooth, which helps the repair blend into the wall.
A flexible sealant is different. Sanding can cut or tear it, so tool it smooth when you apply it and leave it alone afterward.
How to Clean a Concrete Wall Before Priming
The wall must be clean before primer goes on. Remove all of these:
- Dust and dirt.
- Loose paint.
- Efflorescence.
- Grease.
- Curing compounds.
- Form-release agents.
Sherwin-Williams requires concrete and masonry to be free of laitance, concrete dust, dirt, release agents, curing membranes, loose cement, and hardeners. Its consumer guide suggests dish soap and warm water, with TSP for tougher stains.
Concrete treatments must be compatible with the coating or be removed.
Do You Need Primer Over a Repaired Concrete Wall?
Usually yes. Primer evens out how much paint the wall absorbs, improves adhesion, and keeps the patch from showing through as a dull or shiny spot. This effect is called flashing.
Sherwin-Williams recommends a concrete primer before painting interior concrete. Some masonry primers are also alkali and efflorescence resistant. The coating system you choose controls the primer you need.
| Item | Ready for paint? |
|---|---|
| Crack cause understood | Yes/No |
| Crack stable | Yes/No |
| Repair cured | Yes/No |
| Wall dry enough for coating | Yes/No |
| No active leakage | Yes/No |
| Loose paint removed | Yes/No |
| Efflorescence removed/cause addressed | Yes/No |
| Dust and debris removed | Yes/No |
| Primer selected | Yes/No |
| Repair material compatible with paint | Yes/No |
If any answer is no, fix it before opening the paint can.
Common Crack-Repair and Painting Mistakes
Most problems come from skipped steps. Watch for these mistakes:
- Painting over moisture.
- Using rigid filler on an active crack.
- Not removing loose paint.
- Painting before the filler cures.
- Poor cleaning.
- Skipping primer.
- Using a sealant that cannot be painted.
- Ignoring efflorescence.
- Filling structural cracks cosmetically.
| Failure symptom | Likely cause | Better approach |
|---|---|---|
| Crack reopens | Ongoing movement | Use appropriate flexible method or fix movement source |
| Paint peels over repair | Moisture or poor adhesion | Correct moisture and prepare properly |
| Patch appears as different sheen | Uneven porosity/no primer | Prime repaired area or full wall as specified |
| Filler falls out | Poor crack prep | Clean/profile correctly |
| Rust stain returns | Reinforcement corrosion | Repair corrosion source |
| White deposits return | Moisture/efflorescence | Correct moisture path |
| Sealant rejects paint | Nonpaintable product | Use compatible coating/sealant system |
If the wall also has missing concrete or hollow areas, see concrete spalling and concrete delamination.
Concrete Wall Crack Repair Before Painting FAQs
Can I paint over a hairline crack?
Often yes, after the crack is confirmed stable and filled with a compatible material, then primed. Painting alone usually does not hide it for long.
What is the best filler for concrete wall cracks?
It depends on the crack. Stable shallow cracks take a concrete patching compound, small moving cracks may need a flexible sealant, and structural cracks may need epoxy injection.
Should I widen the crack first?
Only if the repair product requires it. Do not grind every hairline crack into a groove.
Can I use caulk on concrete cracks?
Only an exterior or masonry-rated, paintable sealant that suits the crack. Many caulks are not meant for masonry or movement.
Do I need primer after patching?
Usually yes. Primer evens out absorption and helps the patch blend, but your coating system decides.
How long after patching can I paint?
It depends on the patch material and the paint. Check both data sheets, since cure times differ widely.
Why does the crack show through the paint again?
Most often the crack is still moving or moisture is coming through. Fix those causes before repainting.
Can I paint over hydraulic cement?
Often after it has cured and the wall is dry, but check the product and the paint manufacturer. Prime first.
What if the crack is leaking?
Find and correct the water source first. Paint is not a substitute, and a leaking crack calls for a different repair than a dry one.
When does a wall crack need an engineer?
When it is displaced, widening, associated with a bowing wall, in a structural or retaining wall, or you cannot tell what caused it.