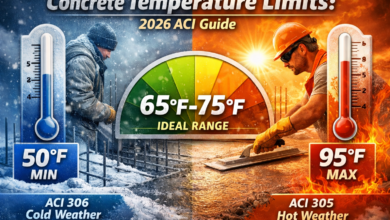
How Much Does a 10×20 Concrete Patio Cost? 2026 Price Guide
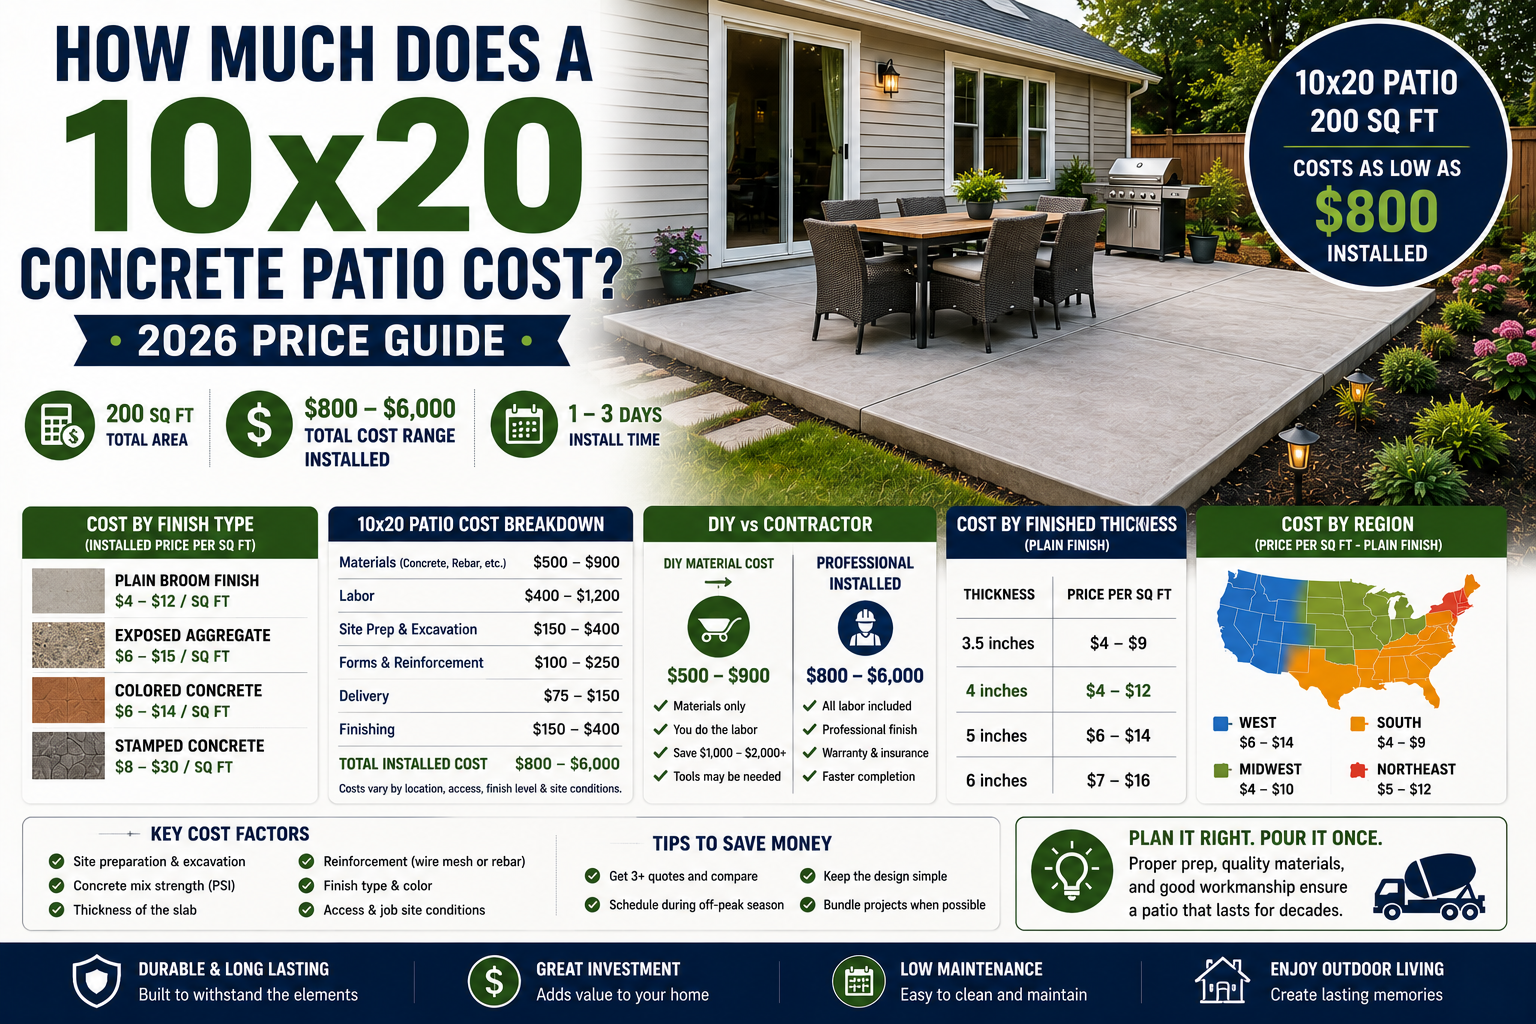
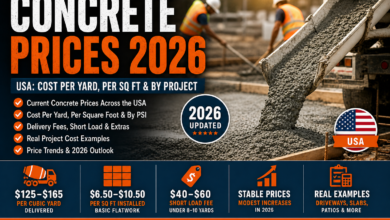
A 10×20 concrete patio costs $800 to $2,400 for a plain finish and $1,600 to $6,000 for stamped or colored concrete in 2026. At 200 square feet, a 10×20 layout is one of the most practical and popular residential patio sizes in the US wide enough for a full dining setup, long enough to run the full width of many back doors, and a size that most concrete contractors can complete in a single day. This guide covers every cost layer: your exact concrete volume, a full component-by-component price breakdown, all four finish types priced, a real DIY vs. contractor comparison, regional price differences, and the most effective ways to reduce total cost without compromising quality.
10×20 Cost Summary
Here are the four key price tiers for a fully installed 10×20 concrete patio in 2026. All totals include materials, delivery, base preparation, forming, pouring, finishing, and a first sealer coat applied by the contractor.
Plain Broom Finish
$4–$12/sq ft — standard gray concrete, wire mesh, broom texture
Exposed Aggregate
$6–$15/sq ft — washed surface revealing decorative stone
Colored Concrete
$7–$18/sq ft — integral pigment or acid stain applied post-cure
Stamped Concrete
$8–$30/sq ft — pattern stamps, two-tone coloring, decorative border
Get your concrete volume and full cost estimate nailed down before the first contractor conversation. Use the 10×20 Concrete Slab Calculator for your exact cubic yards, and the Concrete Patio Cost Calculator for a full installed price at any finish level.
How Much Concrete You Need for a 10×20 Patio
Knowing your exact volume before calling a supplier means you order the right amount, avoid short-pour problems, and catch inflated quotes that pad the yardage. Here is the calculation at the most common residential thicknesses.
10 × 20 × (4 ÷ 12) ÷ 27 = 66.7 ÷ 27 = 2.47 cubic yards
+ 10% waste = 2.72 yards → order 2.75 yards
| Thickness | Cubic Yards (10×20) | Order Amount (+ 10%) | Approx. Concrete Cost |
|---|---|---|---|
| 3 inches | 1.85 yards | 2.04 yards | $255 – $360 |
| 3.5 inches | 2.16 yards | 2.38 yards | $295 – $415 |
| 4 inches (standard) | 2.47 yards | 2.72 yards | $340 – $475 |
| 5 inches | 3.09 yards | 3.40 yards | $425 – $595 |
| 6 inches | 3.70 yards | 4.07 yards | $510 – $710 |
For any custom shape or non-rectangular patio, use the Concrete Slab Calculator or the Concrete Cubic Yard Calculator to confirm your volume. Prefer bagged concrete? The Concrete Bag Calculator shows how many 60-lb or 80-lb bags you need and compares the total cost against a ready-mix order.
Cost by Finish Type
The finish you choose is the biggest lever on total patio cost after the base pour. Here is a detailed look at each major finish option — what it involves, what it costs on a 10×20, and when it is the right choice.
Plain Broom Finish — $4 to $12/sq ft ($800–$2,400 total)
The standard US residential concrete finish. After the slab is screeded and floated smooth, the contractor drags a stiff-bristled broom across the surface while it is still workable, creating a light linear texture that provides traction in rain. It is the most affordable, fastest to apply, and requires no specialized decorative skills. The result is a clean, functional, gray slab that suits utilitarian patios, side-yard pads, and homeowners who plan to cover the surface with outdoor rugs or tile in the future. This is the right choice when budget is the primary concern.
Exposed Aggregate — $6 to $15/sq ft ($1,200–$3,000 total)
After screeding, a surface retarder is applied to the freshly poured concrete, and then the top layer of cement paste is washed away the following day, exposing the decorative aggregate — typically pea gravel, river stone, crushed quartzite, or granite — embedded in the mix. The result is a naturally textured, colorful surface with built-in slip resistance that ages beautifully. Exposed aggregate handles foot traffic well, hides stains and tire marks better than plain concrete, and looks far more natural and interesting than broom finish. It costs more because of the retarder application, washing step, and the premium aggregate in the mix, but it requires no more skill than standard concrete work.
Colored Concrete — $7 to $18/sq ft ($1,400–$3,600 total)
Color transforms the look of a slab at a relatively modest premium. There are two main approaches. Integral color is pigment added directly to the concrete mix at the plant, tinting the entire slab from top to bottom — the most durable coloring method since the color runs through the full depth of the slab. Popular choices are buff, tan, terra cotta, slate gray, and charcoal. Integral color adds $15 to $40 per cubic yard to material cost — on a 10×20 pour (approximately 3 yards), that is only $45 to $120 extra. Acid stain is applied post-cure and creates translucent, organic color variations that penetrate the surface. Either way, colored concrete requires resealing every 2 to 3 years to maintain vibrancy. The combination of integral color plus a broom finish is one of the best cost-per-impact upgrades for any patio.
Stamped Concrete — $8 to $30/sq ft ($1,600–$6,000 total)
Rubber stamp tools are pressed into the concrete surface while it is still plastic, creating patterns that mimic natural slate, flagstone, cobblestone, brick, or wood plank. Stamping is combined with a release agent that settles into the low points of the stamp, producing a two-tone aged effect that makes the surface look like real stone or brick. A 10×20 patio at 200 square feet is a good size for a stamped pour — large enough that the pattern repeats look intentional, small enough that a crew can manage the timing comfortably. Use the Stamped Concrete Cost Calculator for a design-specific estimate and read the Stamped Concrete Patio Cost Guide for a full pattern-by-pattern breakdown.
| Finish Type | Cost Per Sq Ft | 10×20 Total (200 sq ft) | Reseal Every | Lifespan |
|---|---|---|---|---|
| Plain broom finish | $4 – $12 | $800 – $2,400 | 3–5 years | 25–50 years |
| Exposed aggregate | $6 – $15 | $1,200 – $3,000 | 3–5 years | 25–50 years |
| Colored (integral or stain) | $7 – $18 | $1,400 – $3,600 | 2–3 years | 20–40 years (surface) |
| Stamped concrete | $8 – $30 | $1,600 – $6,000 | 1–3 years | 20–30 years (surface) |
Full Installed Cost Breakdown
Understanding each cost component lets you verify contractor quotes line by line and identify where savings are possible. Here is the full breakdown for a standard professionally installed 10×20 plain patio.
| Cost Component | Cost for 10×20 (200 sq ft) | Notes |
|---|---|---|
| Concrete material | $340 – $480 | ~2.75 yards x $125–$175/yard (short-load rate) |
| Short-load delivery fee | $75 – $150 | Standard for orders under 5–7 cubic yards |
| Excavation and grading | $100 – $500 | Flat sites: $100–$200; sloped or overgrown: $300–$500 |
| Gravel sub-base (4 in compacted) | $100 – $300 | Crushed stone; essential for drainage and stability |
| Wire mesh reinforcement | $60 – $150 | 6×6 welded wire fabric; $0.30–$0.75/sq ft installed |
| Forming and stripping | $100 – $200 | Wood forms for 60 linear feet of perimeter |
| Labor — pour and finish | $400 – $1,000 | $2–$5/sq ft; screed, float, broom, edge, cure |
| Saw-cut control joints | $40 – $80 | 2–3 cuts x approx. 10–20 ft x $1–$2/lf |
| Curing compound | $20 – $60 | Spray-applied; retains moisture for proper strength gain |
| Sealer (first coat) | $100 – $300 | Acrylic or penetrating sealer; $0.50–$1.50/sq ft applied |
| TOTAL — plain finish | $1,335 – $3,220 | $6.68–$16.10 per sq ft fully installed |
Real-World Example: 10×20 Plain Broom-Finish Patio in Charlotte, NC
Size: 10×20 ft = 200 sq ft, 4 inches thick = 2.47 yards
Concrete (2.75 yards x $130/yard): $358
Short-load delivery fee: $100
Excavation and grading (flat lot): $160
Gravel sub-base (4 inches compacted): $160
Wire mesh reinforcement ($0.45/sq ft): $90
Forming and stripping: $120
Labor — pour and broom finish ($3.00/sq ft): $600
Saw-cut joints (2 cuts x 10 ft x $1.50): $30
Curing compound: $30
Acrylic sealer applied: $160
Total: $1,808
Per square foot: $9.04
For material quantities, use the 10×20 Concrete Slab Calculator for concrete volume, the Concrete Wire Mesh Calculator for mesh quantity, and the Subbase Calculator for gravel volume.
DIY vs. Professional Installation
A 10×20 patio is a very achievable DIY concrete pour. At roughly 2.5 to 3 yards, it is large enough that a ready-mix truck makes economic sense but small enough that a crew of 3 can manage the pour and finish comfortably within the working window. Here is the honest side-by-side comparison.
| Cost Item | DIY Cost | Contractor Cost |
|---|---|---|
| Concrete material (2.75 yards) | $340 – $480 | $340 – $480 |
| Short-load delivery fee | $75 – $150 | $75 – $150 |
| Gravel sub-base | $80 – $160 | $100 – $300 |
| Wire mesh | $35 – $70 | $60 – $150 |
| Lumber for forms | $40 – $80 | Included in labor |
| Tool rental (screed, float, edger, broom) | $80 – $160 | Included in labor |
| Sealer | $35 – $75 | $100 – $300 |
| Labor | $0 (your time + 2 helpers) | $400 – $1,000 |
| Total | $685 – $1,175 | $1,335 – $3,220 |
DIY saves $650 to $2,045 — roughly 50 to 65% of the total project cost. That is a meaningful saving for most homeowners willing to invest a weekend and recruit two capable helpers.
When to Hire a Contractor Instead
- You want a stamped, stained, or decorative finish — these require experienced decorative concrete crews
- Your site has a significant slope, drainage issues, or difficult access
- You are removing an existing concrete slab first
- You need a warranty on the pour quality and finish
- You cannot assemble 2 to 3 capable, physically fit helpers for the full day
How Thickness Affects Your 10×20 Patio Cost
Slab thickness is the most direct lever on concrete material cost. Each extra inch adds proportionally more material — and the difference in durability between 3.5 and 4 inches is significant, while the cost difference is small.
| Thickness | Volume (10×20) | Concrete Cost | vs. 4 in Baseline | Recommended For |
|---|---|---|---|---|
| 3 inches | 1.85 yards | $230 – $325 | Save $110–$150 | Not recommended — prone to premature cracking |
| 3.5 inches | 2.16 yards | $270 – $380 | Save $60–$95 | Acceptable for mild climates, foot traffic only |
| 4 inches ✅ | 2.47 yards | $340 – $475 | Baseline | Standard for all residential patios |
| 5 inches | 3.09 yards | $385 – $540 | +$65–$115 more | Freeze-thaw climates, riding mowers, golf carts |
| 6 inches | 3.70 yards | $460 – $645 | +$120–$170 more | Heavy vehicles, RV pads, very poor soil |
For a backyard patio carrying outdoor furniture, a grill, and foot traffic, 4 inches is the correct spec. In freeze-thaw states, use an air-entrained 4,000 PSI mix. The $65 to $115 premium for 5 inches is worth it only if you live in a climate with harsh winters or have soft, unstable soil. Use the Concrete Slab Thickness Calculator to get a specification recommendation based on your actual use case and the Concrete PSI Guide for mix strength guidance.
How a 10×20 Compares to Other Patio Sizes
A 10×20 patio is squarely in the mid-range of residential patio sizes. Here is how it compares in cost and usability against the most common alternatives.
| Patio Size | Sq Ft | Plain Finish Cost | Stamped Cost | Comfortable For |
|---|---|---|---|---|
| 10×10 | 100 | $400 – $1,200 | $800 – $3,000 | 2 chairs + side table |
| 12×12 | 144 | $580 – $1,730 | $1,150 – $4,300 | 4-person dining set |
| 10×20 ✅ | 200 | $800 – $2,400 | $1,600 – $6,000 | 6-person dining + grill |
| 12×16 | 192 | $770 – $2,300 | $1,540 – $5,760 | 6-person dining + grill |
| 16×16 | 256 | $1,025 – $3,070 | $2,050 – $7,680 | Dining + seating area |
| 20×20 | 400 | $1,600 – $4,800 | $3,200 – $12,000 | Full outdoor living room |
The 10×20 layout has a specific advantage over square patios of similar area: the long, narrow format fits naturally against a home’s rear wall, creating a defined outdoor room that flows from the back door all the way across the house’s width. A 12×12 is slightly smaller and more square; a 16×16 is significantly larger but costs about 30% more. For most homes, the 10×20 is the optimal first patio size. Use the Concrete Patio Cost Calculator to compare any two sizes side by side.
Cost by State and Region
Labor is the biggest geographic variable in concrete patio pricing. Material costs vary more modestly — primarily by distance from aggregate quarries and cement plants, and by fuel surcharge on delivery. Here is the installed price range for a standard plain 4-inch broom-finish 10×20 patio by US region.
| Region | Plain Finish Cost (10×20) | Stamped Cost (10×20) | Key Markets |
|---|---|---|---|
| California | $1,800 – $3,200 | $3,500 – $6,500 | LA, Bay Area, San Diego, Sacramento |
| New York / New Jersey | $1,700 – $3,000 | $3,200 – $6,200 | NYC metro, Long Island, NJ suburbs |
| Pacific Northwest | $1,600 – $2,800 | $3,000 – $5,800 | Seattle, Portland, Tacoma |
| Florida | $1,300 – $2,300 | $2,400 – $4,800 | Miami, Orlando, Tampa, Jacksonville |
| Texas | $1,100 – $2,000 | $2,000 – $4,500 | Dallas, Houston, Austin, San Antonio |
| Illinois / Midwest Urban | $1,300 – $2,200 | $2,400 – $4,800 | Chicago, Minneapolis, Milwaukee |
| Arizona | $1,200 – $2,100 | $2,200 – $4,600 | Phoenix, Tucson, Scottsdale |
| Georgia / Southeast | $1,000 – $1,900 | $1,900 – $4,200 | Atlanta, Charlotte, Nashville, Raleigh |
| Midwest Rural | $800 – $1,600 | $1,600 – $3,600 | OH, IN, IA, MO, KS, WI, MI |
For project-specific estimates in your state, use the dedicated cost calculators: California, Texas, Florida, New York, Ohio, Georgia, and Arizona.
What Drives the Cost Up or Down
Beyond size, finish, and location, these project-specific factors are the ones that most often push real quotes above or below the typical range.
- Site access and pump truck need. If the ready-mix truck can back within 5 feet of the pour site, no pump is needed. If the yard is gated, fenced, has overhead lines, or has a narrow side-yard access, a concrete pump adds $300 to $800. On a 10×20 pour, this effectively doubles the baseline project cost. Always walk the access path with a measuring tape before getting quotes and note it explicitly when requesting bids. Use the Concrete Pumping Cost Calculator to estimate this separately.
- Old slab demolition. If you are replacing an existing concrete or brick patio, demolition and haul-off adds $1 to $3 per square foot — $200 to $600 for a 10×20. Always get this quoted separately and confirmed in writing before signing a contract. Use the Concrete Removal Cost Calculator for a demo-specific estimate.
- Contractor minimum project charge. Many concrete contractors have a minimum mobilization and job charge of $800 to $1,500 regardless of project size. On a 10×20 patio ($800 to $2,400 average), this minimum can push the effective per-square-foot rate significantly above market averages. Getting multiple quotes is especially important at this size to find a contractor without an inflated minimum.
- Sloped or problematic grade. A flat, accessible site is the best-case scenario. A sloped site requiring grading, fill, or form staking on a hillside adds $200 to $1,000 in site preparation cost. Expansive clay or sandy soils may require deeper excavation, more gravel base, or soil stabilization treatments.
- Season and weather. Spring and summer are peak season for concrete work in most US markets — expect to pay 5 to 15% more than fall scheduling. Winter pours in northern states require heated water, insulating curing blankets, and potentially accelerating admixtures, adding $1 to $3 per square foot.
- Decorative upgrades. A contrasting colored border strip adds $5 to $10 per linear foot. A single step at a doorway adds $300 to $700. An integrated planter curb or built-in bench adds $100 to $300 per linear foot. Each is priced as an add-on above the base pour cost.
Popular Add-Ons and Their Costs
Many homeowners get quotes for the base patio and then discover the add-ons they want are quoted separately. Here is what the most common 10×20 patio additions cost in 2026.
| Add-On | Typical Cost | Notes |
|---|---|---|
| Decorative border (contrasting stamp or color) | $300 – $600 | $5–$10/lf x 60 lf perimeter; significant visual upgrade |
| Single concrete step (at door) | $300 – $700 | Price varies with width and whether stamped to match |
| Two concrete steps | $600 – $1,400 | Use the Concrete Steps Calculator for volume |
| Curved or freeform edges | $120 – $300 | $2–$5/lf; bender board forming; modest cost, big visual change |
| Exposed aggregate border (12-inch band) | $150 – $350 | Washed border around stamped or plain interior; premium look |
| Integral color upgrade | $45 – $120 | $15–$40/yard x 2.75 yards; low cost, high visual impact |
| Connecting walkway (3 ft wide x 20 ft) | $360 – $720 | Poured same day; saves second mobilization fee |
| Sealer (professional application) | $100 – $300 | $0.50–$1.50/sq ft applied; DIY costs $35–$75 in materials |
| Fire pit pad (8×8 separate pour) | $400 – $900 | Round or square; same-day pour saves delivery and mobilization |
The best value add-on for a 10×20 patio is integral color at $45 to $120. It delivers a dramatic visual change — transforming a plain gray slab into a rich buff, tan, or charcoal surface — at a cost that is almost invisible in the overall project budget. The second best value is a decorative border at $300 to $600, which frames the patio and makes it look professionally designed rather than utilitarian.
How to Save Money on a 10×20 Concrete Patio
- Do your own site prep. Excavating 4 to 6 inches across 200 square feet and placing a compacted gravel sub-base is the most accessible DIY contribution to a professionally poured patio. Renting a plate compactor costs $60 to $100 per day. Doing this work yourself saves $200 to $500 in contractor prep labor and ensures you are confident in the base quality under your slab.
- Combine pours to eliminate the short-load fee. The short-load surcharge of $75 to $150 is levied because your 10×20 patio is below full-truckload volume. If you need a front walkway, a side path, step repairs, or a small shed pad poured in the same season, schedule them on the same day. Adding another small pour to reach 5+ cubic yards typically eliminates the short-load fee and spreads mobilization cost over a larger project area.
- Get at least three itemized quotes. Contractor pricing on a 10×20 patio can vary by $500 to $1,200 for the same spec in the same market. Request quotes that list concrete, labor, base prep, reinforcement, and sealer separately. A lower total may reflect a contractor with no minimum charge rather than inferior work — or it may reflect thinner concrete and no sealer. You can only tell if the quote is itemized.
- Pour it yourself. As shown in the DIY section, a 10×20 pour saves $650 to $2,045 compared to hiring a contractor. At 2.5 to 3 yards, it is a very manageable pour for a motivated homeowner with 2 helpers, proper prep, and the right tools. Use the 10×20 Concrete Slab Calculator to confirm your order and the Concrete Labor Cost Calculator to understand the value of professional labor before deciding.
- Schedule for fall. Booking a 10×20 patio pour in September through November earns you off-peak pricing from most contractors — typically 5 to 15% less than the spring and summer peak rate. Fall temperatures are also better for concrete curing, reducing the risk of rapid evaporation cracking on the surface.
- Seal it yourself. All future sealer applications after the contractor’s first coat can be DIY at $35 to $75 in materials versus $100 to $300 charged by a contractor. A 200 sq ft patio takes 30 to 45 minutes to seal with a pump sprayer. Sealing every two years saves $130 to $450 per application — $1,300 to $4,500 over 20 years of biennial maintenance.
Build Your Complete 10×20 Patio Budget in Minutes
Use these tools before calling a single contractor:
- 10×20 Concrete Slab Calculator — Exact cubic yards at any thickness
- Concrete Patio Cost Calculator — Full installed cost by size and finish
- Stamped Concrete Cost Calculator — Decorative finish estimate
- Concrete Slab Thickness Calculator — Correct thickness for your use and climate
- Concrete Bag Calculator — Bags vs. ready-mix cost comparison
- Concrete Wire Mesh Calculator — Mesh quantity for 200 sq ft
- Subbase Calculator — Gravel base volume and cost
- Concrete Delivery Cost Calculator — Delivery + short-load fee estimate
- Concrete Removal Cost Calculator — Old slab demo and haul-off
- Concrete Pumping Cost Calculator — Pump truck cost if access is limited
- Concrete Sealer Calculator — How much sealer to buy
- Concrete Labor Cost Calculator — Labor cost by region and project