How to Pour a Concrete Slab: Step by Step DIY Guide 2026
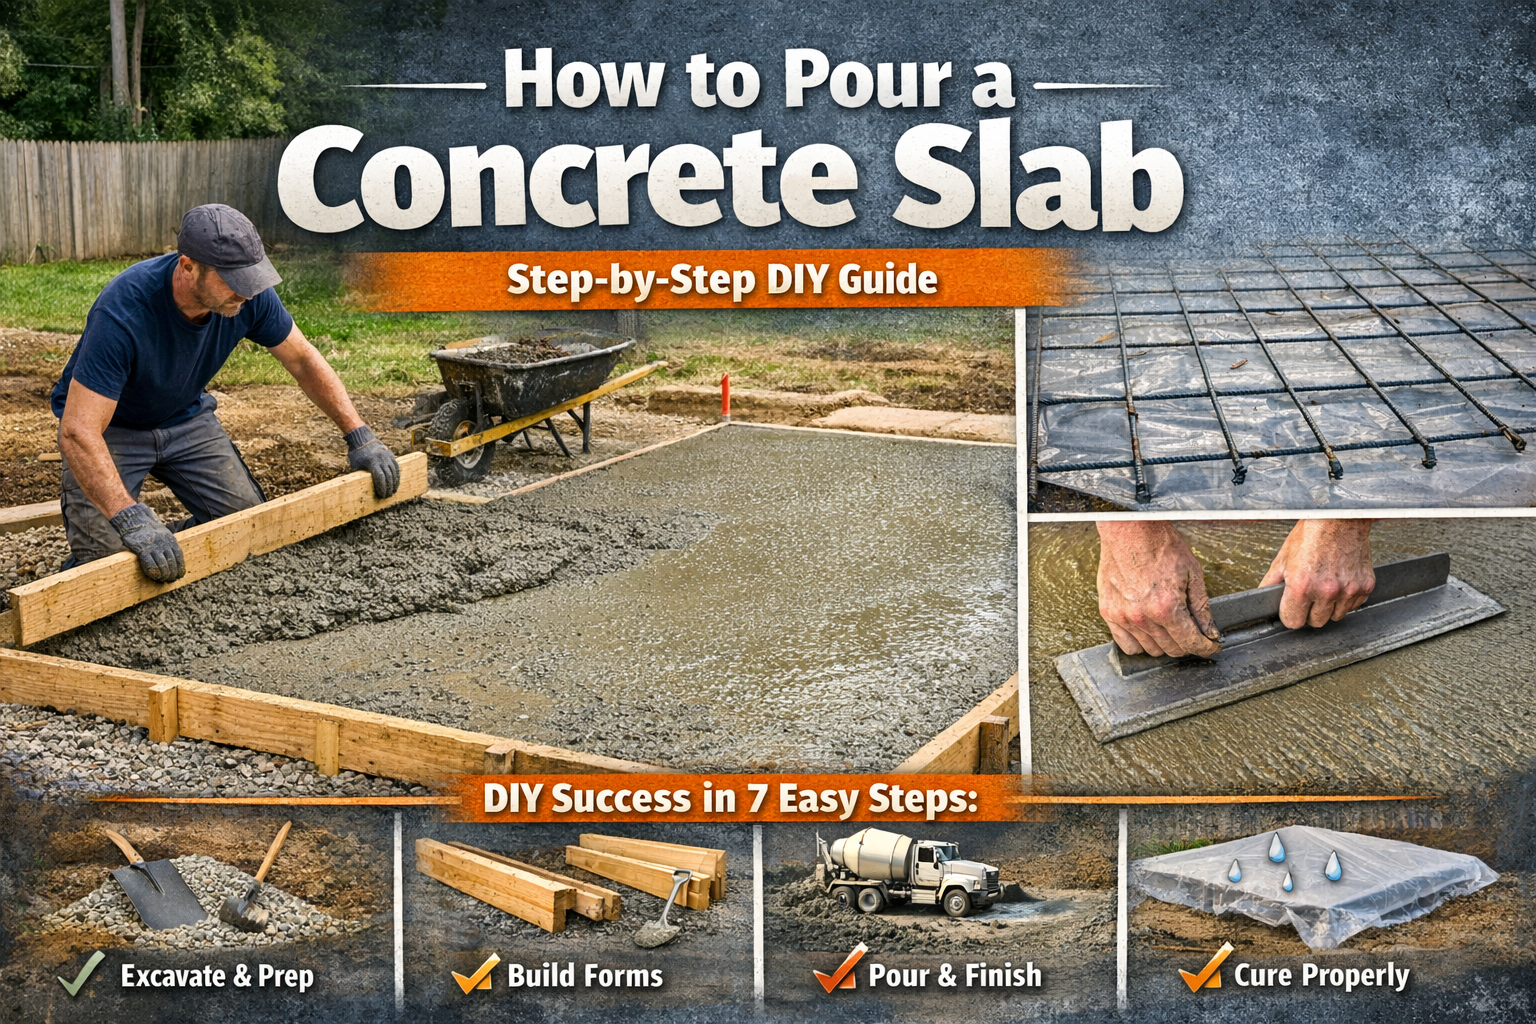
Pouring your own concrete slab saves $4-$8 per square foot compared to hiring contractors. For a 12×16 ft patio, that’s $768-$1,536 in your pocket. But concrete is unforgiving. You get one shot to pour, finish, and cure it properly. Make mistakes and you’re stuck with a cracked, uneven slab for decades. This guide walks you through every step from excavation to finishing, with professional techniques that ensure your DIY concrete slab looks great and lasts 30+ years.
Before You Start: Planning and Prep
Successful concrete pours start days before the truck arrives. Poor planning leads to rushed work, mistakes, and permanent problems.
Can You Really DIY This Project?
Yes, if your slab is under 200 square feet (12×16 ft or smaller), you have 1-2 helpers, and you’re reasonably fit. Concrete work is physically demanding and time-sensitive.
Consider professionals if your slab exceeds 200 square feet, has complex drainage requirements, needs structural footings, or you’re building a garage floor with specific code requirements.
Calculate Concrete Quantity
Use a concrete slab calculator to determine exact volume needed. For manual calculation:
- Length (ft) × Width (ft) × Thickness (ft) = Cubic Feet
- Cubic Feet ÷ 27 = Cubic Yards
- Add 10% for waste and spillage
Example: 12 ft × 16 ft × 0.33 ft (4 inches) = 63.4 cu ft ÷ 27 = 2.35 cu yds × 1.10 = 2.6 cubic yards. Order 3 yards minimum.
For projects under 1 cubic yard, consider bags instead of ready-mix truck delivery. Use a yards to bags calculator to convert.
Check Local Building Codes and Permits
Most jurisdictions require permits for slabs over 120-200 square feet or any structural work. Call your building department 2-3 weeks before starting. Permits typically cost $50-$200 and require inspection before and after pour.
Call 811 at least 2-3 days before digging to mark underground utilities. This free service prevents hitting gas, electric, water, or telecom lines.
Weather Timing
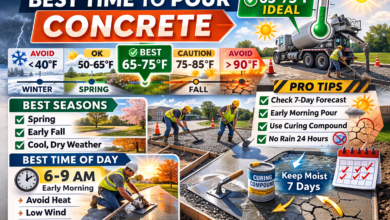
Ideal conditions: 50-80°F, low humidity, no rain forecast for 3 days. Avoid pouring when temperature will drop below 40°F within 24 hours or exceed 90°F during pouring. Early morning pours (6-9 AM) work best in summer heat.
Once concrete is poured, you have 90-120 minutes before it starts setting in warm weather, less in hot weather. You MUST finish screeding, floating, edging, and texturing within this window. There are no do-overs. If you’re not confident you can finish in time, hire professionals or pour a smaller section. A half-finished slab is ruined permanently.
Essential Tools and Materials
Having every tool ready before pour day is non-negotiable. Stopping mid-pour to buy a missing tool means ruined concrete.
Required Tools
| Tool | Purpose | Cost | Can’t Substitute |
|---|---|---|---|
| Shovel and rake | Excavation, spreading concrete | $25-$50 | ✓ |
| Wheelbarrow | Moving concrete, gravel | $60-$120 | ✓ |
| Tamper or plate compactor | Compacting base | $40-$150 (rent $50/day) | ✓ |
| Level (4 ft) | Leveling forms | $20-$50 | ✓ |
| Circular saw | Cutting lumber for forms | $80-$150 | ✓ |
| Screed board (2×4, 12-18″) | Leveling freshly poured concrete | $8-$15 | ✓ |
| Bull float | Initial smoothing | $30-$80 | ✓ |
| Magnesium hand float | Smoothing surface | $15-$35 | ✓ |
| Edger tool | Rounding edges | $12-$25 | ✓ |
| Concrete broom | Non-slip texture | $15-$30 | For outdoor slabs |
| Groover/jointer | Cutting control joints | $12-$25 | ✓ |
| Rubber boots | Standing in wet concrete | $25-$50 | ✓ |
| Knee boards | Kneeling on concrete for finishing | $20-$40 (or DIY from plywood) | For large slabs |
Required Materials
- Concrete: 3000 PSI minimum for patios and shed bases, 3500-4000 PSI for driveways
- Gravel base: 4-6 inches of 3/4″ crushed stone, calculate with gravel calculator
- Form lumber: 2×4 for 4″ slabs, 2×6 for 6″ slabs (straight, not warped)
- Stakes: 2×2 or 1×2 wooden stakes every 3-4 feet
- Screws or nails: 3″ deck screws or duplex nails for easy form removal
- Rebar or wire mesh: #3 or #4 rebar in 18-24″ grid OR 6×6″ W1.4×W1.4 welded wire mesh
- Rebar chairs or dobies: Support reinforcement at proper height
- Vapor barrier: 6 mil polyethylene plastic sheeting (if needed)
- Release agent: Oil or commercial form release for easy stripping
For one-time projects, rent: plate compactor ($50-$80/day), power screed ($60-$100/day), concrete mixer if mixing yourself ($40-$60/day). Buy: all hand tools (you’ll use them for repairs and future projects). Total tool investment for DIY: $300-$500 purchase + $50-$150 rental. Still cheaper than paying contractors $800-$1,500 in labor.
Step 1: Excavation and Site Preparation
The foundation of good concrete is what’s under it. Rush this step and your slab will crack or settle within 2-3 years.
Mark Out the Area
Using stakes and mason’s string, mark the exact slab location. Measure diagonals corner to corner. They must be equal within 1/2 inch or your slab isn’t square. Adjust stakes until diagonals match.
Add 6 inches beyond final slab size to allow room for forms and compaction.
Excavate to Proper Depth
Remove sod and soil to depth of: concrete thickness + base thickness + 1-2 inches. For 4-inch concrete with 4-inch base, dig 9-10 inches deep.
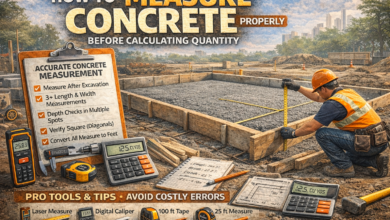
Check depth at multiple points using a tape measure from string line down to excavated soil. The base must be consistent depth throughout.
Pro tip: Rent a sod cutter ($80-$100/day) for easier turf removal on large slabs. Manual removal with a flat shovel works for small areas but is exhausting.
Grade for Drainage
Slabs must slope minimum 2% (1/4 inch per foot) away from buildings for water runoff. For a 12 ft wide slab against a house, the far edge should be 3 inches lower than the house edge.
Use stakes and string lines to establish proper slope. Measure from level string line down to soil at multiple points to verify grade.
🏗️ Real Project Example: 10×12 Shed Base
Excavation depth calculation:
• Concrete: 4 inches
• Gravel base: 4 inches
• Extra depth for compaction: 1 inch
Total dig: 9 inches deep
Area: 10 ft × 12 ft = 120 sq ft
Time to dig by hand: 4-6 hours for 2 people
Gravel needed: 120 sq ft × 0.33 ft = 40 cu ft ÷ 27 = 1.5 cu yds
Concrete needed: 120 sq ft × 0.33 ft = 40 cu ft ÷ 27 = 1.5 cu yds × 1.10 waste = 1.65, order 2 yards
Remove Organic Material
Dig out any roots, stumps, topsoil rich in organics, or soft mucky soil. These decompose over time, creating voids that cause settlement and cracking. Replace with compacted gravel.
Never pour concrete over topsoil, sod, or within 10 feet of large tree roots.
Step 2: Building the Form
Forms define your slab edges and hold concrete at proper height while it cures. Sloppy forms create wavy, uneven slabs that look unprofessional.
Select Proper Lumber
Use 2×4 lumber for 4-inch slabs, 2×6 for 6-inch slabs. Choose straight boards (sight down the length, reject warped pieces). Treated lumber is unnecessary since forms are temporary, but use it if you want to reuse boards for outdoor projects.
Calculate how much lumber needed: measure perimeter + 10% for waste and bracing.
Install Forms Level and Square
- Position first board: Place longest straight section first, typically along building edge or property line
- Drive stakes: Place 2×2 stakes every 3-4 feet on outside of form boards. Drive 12-18 inches into ground
- Level boards: Use 4 ft level to check level side-to-side and establish slope if needed for drainage
- Attach stakes to boards: Screw or nail stakes to outside of form boards. NEVER nail through boards into stakes (makes removal harder)
- Add remaining sides: Work your way around perimeter, checking level and square as you go
- Verify square: Measure diagonals again after all forms installed. Adjust if needed
- Brace corners: Add extra stakes at corners to prevent bowing during pour
Top of form boards represents finished concrete height. Double-check form height at multiple points matches your excavation depth calculations.
• Oil inside face of forms with vegetable oil or commercial release agent for easy removal
• Drive stakes slightly below top of forms so they don’t interfere with screeding
• Use duplex nails (double-headed) for easiest form removal
• On long runs over 10 ft, add mid-span stakes to prevent bowing from concrete pressure
• Check level every 3-4 feet even if boards look straight
Install Expansion Joints
Where new slab meets existing concrete (house foundation, driveway, walkway), install 1/2 inch expansion joint material. This allows independent movement preventing cracks.
Cut fiber expansion joint material to slab depth and secure vertically against existing concrete before pouring.
Step 3: Installing Base and Vapor Barrier
The base prevents settlement and wicking of ground moisture into concrete. This step separates DIY slabs that last 30 years from those that crack in 3 years.
Install and Compact Gravel Base
Pour 4-6 inches of 3/4 inch crushed stone or gravel into excavated area. Spread evenly with rake.
Compaction is critical: Compact in 2-inch lifts maximum. Don’t dump 6 inches and try to compact at once. This leaves soft spots that cause settlement.
- Spread 2 inches of gravel
- Compact with plate compactor or hand tamper (make 3-4 passes over entire area)
- Spread next 2 inches
- Compact again
- Repeat until full depth achieved
Properly compacted base shouldn’t show footprints when you walk on it. If it moves or shifts, it’s not compact enough.
Final base depth should be consistent throughout. Measure from top of forms down to base at multiple points. All measurements should be within 1/4 inch of each other.
Install Vapor Barrier (If Needed)
Install 6 mil polyethylene plastic sheeting if:
- Building interior slab where moisture control matters (garage, shed floor)
- Soil has high clay content or poor drainage
- Area has high water table
- Local code requires it
Overlap plastic sheets 12-18 inches and tape seams. Run plastic up forms 3-4 inches and trim after pour. Cover with 1-2 inches of sand to protect during reinforcement installation and pouring.
For outdoor patios and walkways, vapor barrier is typically unnecessary and can actually cause issues by trapping bleed water.
🧮 Calculate Your Materials
Know exactly how much concrete, gravel, and reinforcement you need before ordering. Our calculators handle all the math and add proper waste factors.
Calculate Now →Step 4: Adding Reinforcement
Reinforcement doesn’t prevent cracks but holds concrete together after cracks form, maintaining structural integrity. It’s essential for any slab larger than 8×8 feet.
Rebar Installation
Use #3 or #4 rebar in 18-24 inch grid pattern for slabs over 6 inches thick or heavy-use applications.
- Cut rebar to length (3-4 inches shorter than forms to maintain edge cover)
- Lay out grid pattern on base
- Tie intersections with rebar tie wire
- Support rebar at mid-depth of slab using chairs or dobies (small concrete blocks with wire supports)
- Verify rebar is 2 inches above base and 2 inches below finished surface
Common mistake: Laying rebar flat on ground. Concrete poured over rebar touching ground provides ZERO reinforcement benefit. Rebar must be suspended at mid-depth.
Wire Mesh Installation
For standard 4-5 inch residential slabs, 6×6 inch W1.4×W1.4 welded wire mesh is adequate and easier to work with than rebar.
- Roll out mesh across entire slab area
- Overlap sheets 6 inches and tie with wire
- Keep mesh 3 inches from all edges
- Support on chairs to position in upper third of slab (not at mid-depth like rebar)
Wire mesh comes in rolls. Unroll and let sit in sun for an hour to flatten out curls, making installation easier.
Fiber Reinforcement
Synthetic polypropylene fibers added to concrete mix reduce plastic shrinkage cracking by 70-90%. Cost: $3-$8 per cubic yard extra. Request fiber reinforcement when ordering ready-mix for outdoor slabs.
Fiber doesn’t replace rebar or mesh for structural reinforcement but provides excellent crack control during curing.
Reinforcement on the ground = useless. Concrete is strong in compression but weak in tension. When slab bends under load, bottom is in tension (pulling apart). Reinforcement must be positioned in tension zone (lower half for slabs on ground) to work. Use proper chairs or dobies. Don’t skimp on $20 worth of supports.
Step 5: Pouring the Concrete
Pour day is game day. Everything must go perfectly because there are no do-overs. Line up helpers, have all tools ready, and schedule pour for morning if possible.
Before the Truck Arrives
- Verify easy truck access (within 150 feet of pour, chute can’t reach farther)
- Lay out all tools within arm’s reach
- Have wheelbarrows and shovels ready if truck can’t reach
- Assign specific jobs to each helper (one person on rake, one on screed, one on float)
- Mist forms and base with water (helps prevent concrete from sticking and absorbs less water from mix)
- Review finishing sequence with helpers
Ordering Ready-Mix Concrete
Call ready-mix supplier 3-7 days ahead. Specify:
- Quantity: Cubic yards + 10% (order extra, not less)
- Strength: 3000 PSI for patios, 3500-4000 PSI for driveways
- Slump: 4-5 inch slump for most applications
- Add-ins: Fiber reinforcement, air entrainment (for freeze-thaw climates)
- Delivery time: Early morning preferred (6-8 AM in summer)
Many suppliers charge $15-$25 per yard for orders under 5 yards (short load fee). Factor this into cost calculations.
Use a ready-mix truck calculator to estimate delivery costs and timing.
Pouring Technique
Start at far corner: Pour in corner farthest from truck access. Work toward truck so you’re not walking through wet concrete.
Pour in sections: Don’t dump entire load in one spot. Move truck chute along forms, pouring in 3-4 foot sections. Overfill forms slightly (1/2 inch above form top).
Spread immediately: Use rakes and shovels to spread concrete into corners and edges. Push, don’t pull (pulling can displace reinforcement). Work concrete around rebar or mesh.
Eliminate voids: Tap forms with hammer as you fill to vibrate out air pockets along edges. Push shovel into concrete vertically and pull back out to eliminate trapped air.
Don’t add water: If concrete seems too stiff, resist urge to add water. This catastrophically weakens concrete. Work it harder with your tools instead.
💡 Real Pour Scenario
A DIYer ordered 3 yards for a 12×16 patio. Truck arrived at 2 PM on 95°F day. By the time they finished spreading concrete, it began setting before they could screed properly. The finished slab had waves, low spots, and rough texture.
Mistake: Afternoon pour in extreme heat cut working time from 90 minutes to 45 minutes.
Fix: Schedule morning pours (6-8 AM) in hot weather. Working time matters more than convenience.
Step 6: Screeding and Finishing
Finishing determines your slab’s final appearance and durability. This is where DIY pours succeed or fail.
Screeding (Leveling)
Screeding removes excess concrete and levels surface to form height.
- Position screed board: Use straight 2×4 long enough to span forms with 12-18 inch overhang each side
- Two-person operation: One person on each end of screed board
- Sawing motion: Rest board on top of forms. Using sawing side-to-side motion, pull board toward you. The sawing action levels concrete while pulling moves you forward
- Fill low spots: If screed reveals low areas, shovel more concrete into them immediately and screed again
- Remove excess: Screed pushes excess concrete ahead. Remove this excess with shovel to reduce weight on board
- Make multiple passes: Screed same area 2-3 times for smooth finish
Screeding must be completed within 30-45 minutes of pour completion. Work quickly but carefully.
Bull Floating
Bull floating smooths the surface after screeding and brings cream (cement paste) to top.
Wait 5-15 minutes after screeding (until surface water/sheen disappears). If you float too early while surface water is present, you’ll weaken the surface.
Technique: Push bull float away from you with handle tilted up slightly (raises far edge). Pull back with handle tilted down (raises near edge). Make overlapping passes until entire surface is smooth with no lumps or ridges.
Bull float fills small holes and ridges left by screeding, creating uniform surface for final finishing.
Edging
Once surface water disappears (15-30 minutes after floating), run edger tool along all form edges.
Technique: Slide edger along form edge, applying light pressure. The rounded edge prevents chipping and gives professional appearance. Make 2-3 passes until edge is smooth and rounded.
Control Joints (Grooves)
Cut control joints while concrete is still workable but firm enough that groover doesn’t tear surface (usually 30-60 minutes after edging).
Joint spacing: Every 8-10 feet in both directions. Rule: joint spacing in feet = 2-3× slab thickness in inches. For 4 inch slab, joints every 8-12 feet.
Technique: Use straight board as guide. Run groover along board to create straight joint. Press groover to 1/4 slab depth (1 inch deep for 4 inch slab). Joints are intentional weak points where cracks will form in controlled, straight lines instead of random zigzags.
Final Finishing: Float or Broom
Hand floating: For smooth finish (garage floors, indoor slabs), use magnesium hand float in sweeping arcs across surface. This creates medium-smooth finish. For very smooth finish, follow with steel trowel in circular motions.
Broom finish: For outdoor slabs needing slip-resistance (walkways, patios, driveways), drag stiff concrete broom across surface in straight lines. Broom when concrete is firm enough that bristles leave 1/8 inch grooves without tearing surface (typically 1-2 hours after pour).
For large slabs, use knee boards to access middle without walking on concrete. Kneel on 2 ft × 2 ft plywood squares that distribute your weight.
| Finishing Step | Timing After Pour | Tool Used | Purpose |
|---|---|---|---|
| Screeding | Immediately (0-30 min) | 2×4 board | Level surface to form height |
| Bull floating | 5-15 minutes | Bull float | Smooth and embed aggregate |
| Edging | 15-30 minutes | Edger tool | Round and finish edges |
| Control joints | 30-60 minutes | Groover | Control crack location |
| Hand floating | 45-90 minutes | Magnesium float | Smooth finish |
| Broom finish | 1-2 hours | Concrete broom | Non-slip texture |
Too early = surface water weakens finish, too late = concrete too hard to work. Watch the sheen. When surface water evaporates and sheen disappears, begin bull floating. If you press float down and water seeps up around it, wait longer. Timing varies with temperature: 15-30 minutes in 80°F weather, 45-60 minutes in 60°F weather.
Step 7: Curing and Form Removal
Curing is the most neglected step in DIY concrete work, yet it determines final strength and durability. Proper curing increases strength by 30-50%.
Why Curing Matters
Concrete hardens through hydration (chemical reaction between cement and water), not by drying out. Hydration requires moisture and takes 28 days to complete. If concrete dries too fast, hydration stops, leaving weak, porous concrete prone to cracking.
Curing Methods
Plastic sheeting (best for DIY): Cover entire slab with 6 mil plastic sheeting within 2-4 hours of finishing. Weight edges with boards or bricks. Leave in place 7 days minimum. This traps moisture, maintaining ideal curing environment.
Wet curing: Keep concrete continuously wet by misting with garden hose or sprinkler 3-4 times daily for 7 days. Cover with wet burlap between mistings. Labor-intensive but produces strongest concrete.
Curing compound: Spray liquid membrane-forming curing compound immediately after finishing. This seals surface, preventing water evaporation. Reapply if compound gets scraped off. Good for driveways and walkways where plastic sheeting is impractical.
Water ponding: For very flat slabs, build small berm around perimeter and flood surface with 1-2 inches of water. Maintain water depth for 7 days. Most effective method but only works on perfectly level slabs.
Minimum Curing Time
- Walk on: 24-48 hours (light foot traffic only)
- Remove forms: 24-48 hours (carefully)
- Light use: 7 days minimum
- Vehicle traffic: 7-10 days (longer in cold weather)
- Full strength: 28 days
Cold weather (below 50°F) significantly slows curing. Insulate with blankets and extend curing time to 10-14 days.
Form Removal
Remove forms after 24-48 hours. Concrete should be hard enough that form boards don’t mar edges when pried off.
- Remove nails or screws from stakes
- Tap stakes sideways with hammer to loosen
- Pry forms away from concrete gently using flat pry bar
- Fill any edge voids or honeycomb spots with cement paste immediately
- Continue curing exposed edges (mist or cover with plastic) for remaining 5-6 days
Final Protection
After 28 days curing, apply penetrating concrete sealer to all exterior slabs. Sealer reduces water absorption by 70-95%, preventing freeze-thaw damage, staining, and wear. Reapply sealer every 2-3 years.
Use a sealer calculator to estimate product needs.
Common Mistakes to Avoid
Learn from others’ expensive errors. Here are the costliest DIY concrete mistakes.
1. Inadequate Base Preparation
Mistake: Pouring concrete directly on clay soil without compacted gravel base, or skimping on base thickness.
Result: Settlement cracks within 1-3 years as soil compresses or washes away.
Fix: Always install minimum 4 inches of compacted gravel, 6 inches in poor soils. Compact properly in 2-inch lifts.
2. Adding Water at Job Site
Mistake: Concrete seems too stiff, so adding water from hose to make it “more workable.”
Result: Every gallon of extra water per cubic yard reduces strength by 200-300 PSI and increases shrinkage cracking 10-15%. Weak, crack-prone concrete.
Fix: Never add water. Work the concrete harder with your tools. If absolutely necessary, use plasticizer admixture, not water.
3. Skipping Reinforcement
Mistake: “It’s just a small slab, I don’t need rebar or mesh.”
Result: Cracks open wide, sections separate, slab fails prematurely.
Fix: Use wire mesh minimum for any slab over 8×8 feet. Cost is $30-$80, replacement is $800-$1,500.
4. No Control Joints
Mistake: Forgetting to cut control joints or spacing them too far apart.
Result: Random cracks across slab instead of straight lines at joints.
Fix: Cut joints every 8-10 feet while concrete is still workable. Mark joint locations on forms before pouring so you don’t forget in the rush.
5. Poor Weather Planning
Mistake: Pouring in afternoon heat (95°F+) or when rain threatens.
Result: Concrete sets too fast to finish properly, or rain damages surface before it’s hard.
Fix: Check 3-day forecast. Pour early morning in hot weather. Reschedule if rain expected within 24 hours.
6. Inadequate Helpers
Mistake: Attempting to pour and finish alone or with one inexperienced helper.
Result: Can’t finish before concrete sets. Rushed, sloppy work. Ruined slab.
Fix: Minimum 2 people for small slabs (under 100 sq ft), 3-4 people for anything larger. Brief everyone on their specific jobs before pour starts.
7. Neglecting Curing
Mistake: “It’s hard, we’re done” mentality. Walking on concrete next day, no curing measures.
Result: Weak surface prone to dusting, scaling, cracking. Loses 30-50% of potential strength.
Fix: Cover with plastic sheeting immediately. Keep covered 7 days minimum. Avoid traffic 7-10 days.
🎯 Key Takeaways
- Plan ahead: Calculate concrete needs accurately, order 10% extra, line up 2-4 helpers, check weather forecast
- Proper base is non-negotiable: 4-6 inches compacted gravel prevents 80% of settlement cracks
- Level, square forms: Take time building forms right. They determine final slab appearance
- Reinforce everything: Wire mesh or rebar in all slabs over 8×8 feet. Position at proper depth using chairs
- Never add water: Adding water at job site is the fastest way to ruin concrete permanently
- Work fast but carefully: You have 90-120 minutes to spread, screed, float, edge, and texture before concrete sets
- Finishing sequence matters: Screed → bull float → edge → control joints → final finish (float or broom)
- Wait for bleed water: Don’t finish while surface water is present or you’ll weaken the surface
- Control joints every 8-10 ft: Cut to 1/4 slab depth to control where cracks form
- Cure for 7 days minimum: Cover with plastic, keep moist. This step determines final strength and longevity
Frequently Asked Questions
You can pour slabs up to 12×12 feet (144 sq ft) yourself with 1-2 helpers if you’re reasonably fit and follow proper techniques. Larger projects over 200 square feet are manageable but require ready-mix delivery and 3-4 people to finish before concrete sets (90-120 minutes). Key skills needed: basic carpentry for building forms, ability to work quickly for 2-4 hours straight, and understanding of screeding and finishing techniques. First-timers should start with small projects like shed pads or walkway sections before attempting garage floors or large patios. Hire professionals for structural work, slabs over 400 sq ft, or projects with complex drainage requirements.
Slab thickness depends on intended use: 3-4 inches for walkways and light foot traffic only, 4 inches for standard patios and shed bases, 4-5 inches for residential driveways with cars and SUVs, 6-8 inches for heavy vehicle traffic, RVs, or garage floors. Thicker slabs resist cracking and support heavier loads better. Never pour thinner than 3.5 inches for any application. Proper gravel base and reinforcement are equally important as thickness. Use a thickness calculator to determine exact specifications for your specific use case and soil conditions.
Concrete reaches walk-on strength in 24-48 hours for light foot traffic only. Wait minimum 7 days before driving vehicles on driveways. Full strength takes 28 days. Keep concrete moist during entire 7-day curing period by covering with plastic sheeting or misting regularly. Longer curing produces stronger, more durable concrete. High temperatures (80°F+) accelerate curing slightly, cold weather (below 50°F) significantly slows it, requiring 10-14 days. Never allow vehicle traffic before 7 days or you risk permanent surface damage, rutting, and cracking. For structural slabs bearing building weight, wait full 28 days before loading.
Use 80 lb bags for projects under 0.5 cubic yards (about 50 square feet at 4 inches thick). Beyond this, ready-mix truck delivery is cheaper and easier despite short-load fees. Example: 12×16 ft slab (4 inches thick) = 2.4 cu yds = 81 bags × $7 = $567 + labor to mix vs ready-mix $350-$450 delivered. Bags make sense for small projects like post holes, small pads, or repairs. Use a yards to bags calculator to compare costs. Ready-mix provides consistent quality, proper mix ratios, and eliminates exhausting mixing labor.
Yes, for any slab larger than 8×8 feet. Use welded wire mesh (6×6 W1.4×W1.4) for standard 4-5 inch residential slabs. Use rebar (#3 or #4 in 18-24 inch grid) for slabs over 6 inches thick or heavy-use applications. Reinforcement doesn’t prevent cracks but holds concrete together after cracks form, preventing slab sections from separating. Position reinforcement properly using chairs or dobies: wire mesh in upper third of slab, rebar at mid-depth. Cost: $30-$80 for materials. Replacement cost if slab fails: $800-$1,500+. It’s cheap insurance.
Spring and fall offer ideal conditions: 50-75°F temperatures, moderate humidity, stable weather. Avoid summer heat (90°F+) which causes rapid evaporation and plastic shrinkage cracking unless you pour early morning (