
Concrete Mixing Instructions: Ratios, Steps and Pro Tips 2026
Mix concrete wrong and you’ve created expensive rubble, not construction material. A DIYer once mixed his concrete “by eye” without measuring ratios, added too much water, and ended up with a driveway that crumbled within 18 months. The $3,200 removal and replacement taught him what a $15 measuring bucket could have prevented. Proper concrete mixing isn’t guesswork. It’s precise chemistry where cement, sand, aggregate, and water must combine in exact proportions to create a material that hardens into artificial stone. Get the ratios right and your concrete will last 50+ years. Get them wrong and it fails within months.
Understanding Concrete Mix Components
Concrete isn’t a single material. It’s a carefully engineered combination of four basic components, each serving a specific purpose. Understanding what each ingredient does helps you mix better concrete and troubleshoot problems.
The Four Essential Ingredients
Portland Cement (The Binder): Cement is the active ingredient that hardens when mixed with water through a chemical process called hydration. It typically makes up 10-15% of the total concrete volume. Think of cement as the glue holding everything together. Type I Portland cement works for most DIY projects. Type III (high early strength) is used when you need concrete to set faster.
Sand (Fine Aggregate): Sand fills the spaces between larger gravel pieces and creates workable consistency. Use clean, sharp sand (coarse sand), not play sand or beach sand which contains salt, silt, and organic matter. Sand makes up 25-30% of concrete volume. Dirty sand weakens concrete by preventing proper cement bonding.
Gravel or Stone (Coarse Aggregate): Gravel provides concrete’s bulk and structural strength. Use 3/8 to 3/4 inch crushed stone for most projects. Stone makes up 40-45% of total volume. Larger aggregate (up to 1.5 inches) works for thick foundations, but 3/4 inch is standard for slabs and walkways.
Water (The Activator): Water triggers cement hydration and makes concrete workable. Use clean, potable water. Never use saltwater, heavily chlorinated water, or water with visible contamination. Water makes up 15-18% of total volume, but getting this ratio exactly right is what separates strong concrete from weak concrete.
Each component has an irreplaceable role. Cement provides strength, sand fills voids and improves workability, gravel adds bulk and structural integrity, water enables chemical reaction and allows placement. Substituting materials (using dirt instead of sand, for example) destroys concrete properties. Always use proper construction-grade materials, never improvise.
Optional Admixtures and Additives
Beyond the four basics, modern concrete often includes chemical admixtures:
- Air-entraining agents: Create tiny air bubbles that improve freeze-thaw resistance in cold climates, essential for northern USA states
- Plasticizers/water reducers: Improve workability without adding water, allowing lower water-cement ratios for stronger concrete
- Accelerators: Speed up setting time for cold weather work or quick turnaround projects
- Retarders: Slow setting time in hot weather to prevent premature hardening
- Fiber reinforcement: Synthetic or steel fibers reduce plastic shrinkage cracking by 70-90%
- Color pigments: Integral color for stamped concrete or decorative applications
Most residential DIY projects don’t need admixtures, but air entrainment is critical if you live where winter temperatures drop below freezing.
Standard Mixing Ratios by Application
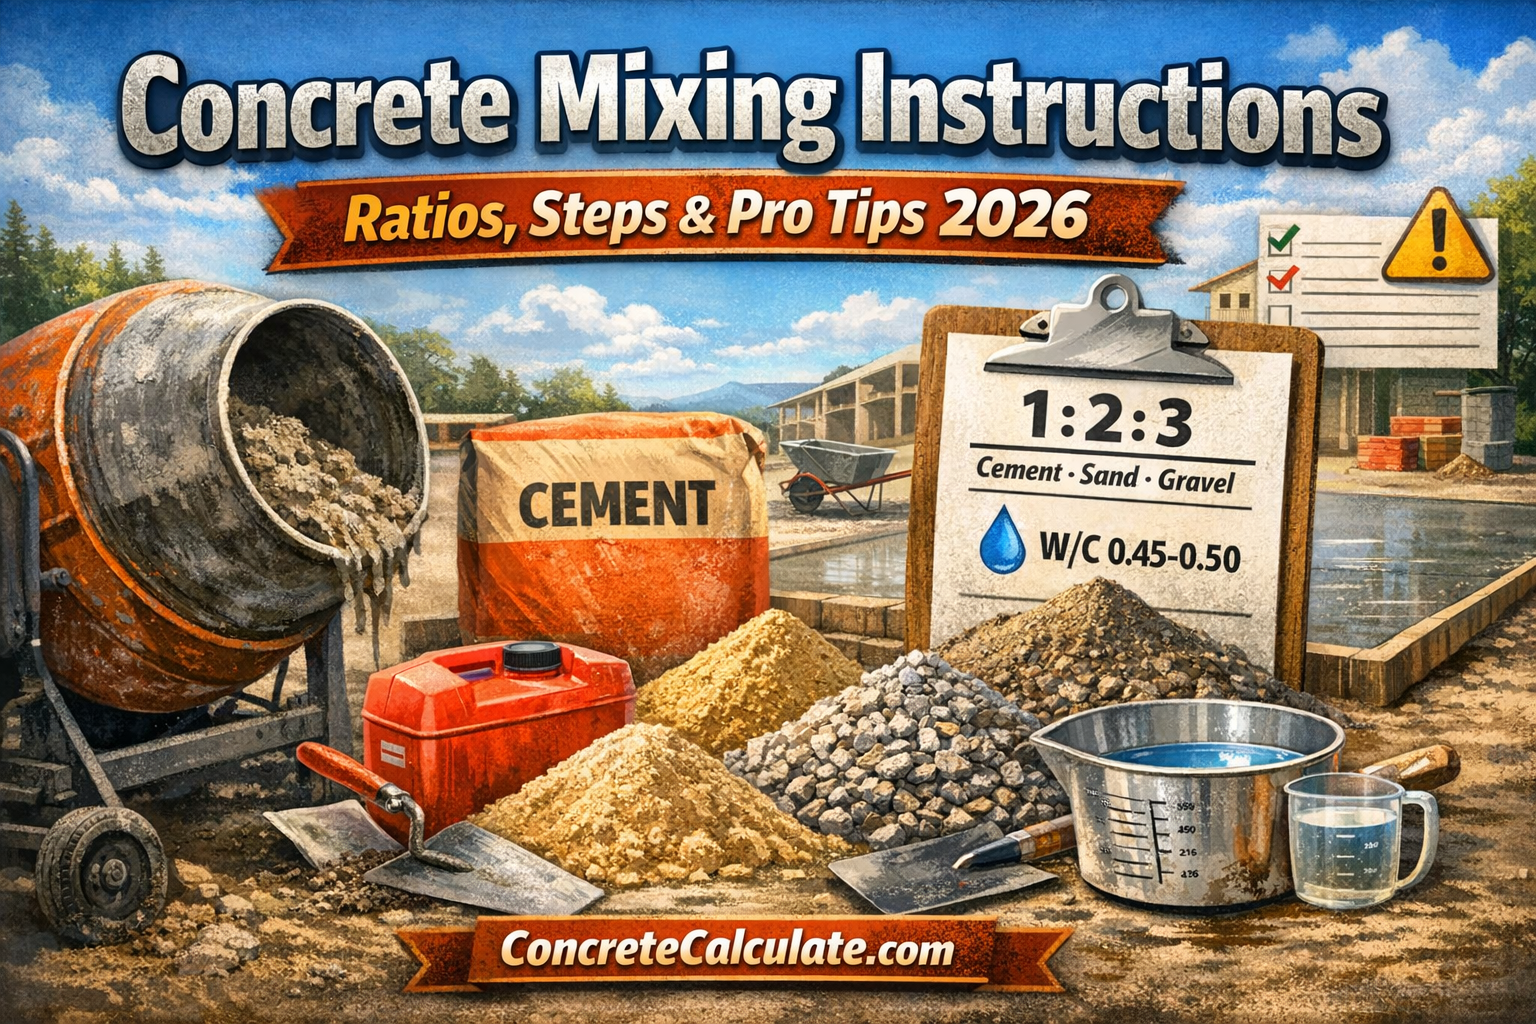
Concrete mixing ratios are expressed as cement:sand:gravel proportions. A 1:2:3 ratio means 1 part cement, 2 parts sand, 3 parts gravel. The ratio you choose determines final concrete strength measured in PSI (pounds per square inch).
Common Concrete Mix Ratios
| Mix Ratio | Strength (PSI) | Best For | Water-Cement Ratio |
|---|---|---|---|
| 1:2:3 | 4000-4500 PSI | Driveways, garage floors, heavy-use areas, load-bearing structures | 0.45-0.48 |
| 1:2.5:3.5 | 3500-4000 PSI | General construction, residential foundations, commercial work | 0.48-0.50 |
| 1:3:3 | 3000-3500 PSI | Patios, sidewalks, shed pads, standard residential slabs | 0.50-0.55 |
| 1:2:4 | 2500-3000 PSI | Walkways, garden paths, light-duty applications | 0.50-0.55 |
| 1:3:4 | 2000-2500 PSI | Mass concrete, backfill, non-structural applications | 0.55-0.60 |
💡 Choosing the Right Ratio for Your Project
For driveways: Use 1:2:3 ratio (4000+ PSI) to withstand vehicle weight and freeze-thaw cycles
For patios and walkways: Use 1:3:3 ratio (3000 PSI) provides adequate strength for foot traffic
For footings and foundations: Use 1:2:3 or 1:2.5:3.5 (3500-4000 PSI) for structural loads
For post holes and fence posts: Use 1:2:4 ratio is sufficient for most fence applications
How to Read and Apply Mix Ratios
Understanding ratios is simple once you grasp the concept. The numbers represent parts, not specific amounts:
- 1:2:3 ratio means if you use 1 shovel of cement, use 2 shovels of sand and 3 shovels of gravel
- Same ratio works with buckets, wheelbarrows, or any consistent measuring container
- Scale up proportionally: 1:2:3 could be 2:4:6 or 5:10:15, the proportions stay the same
- Never mix ratios: Don’t combine 1 bucket cement + 2.5 buckets sand + 3 buckets gravel unless your target ratio is 1:2.5:3
🏗️ Real Example: Mixing for a 12×16 Patio
For a patio calculator shows you need 2.4 cubic yards. Using 1:3:3 ratio (3000 PSI):
Using 5-gallon buckets as measuring units:
• 1 bucket Portland cement
• 3 buckets sand
• 3 buckets gravel
• Approximately 0.5 buckets water (adjusted for consistency)
This makes one batch. For 2.4 cubic yards, you’d mix approximately 18-20 batches in a standard mixer. Use a concrete mix calculator to determine exact material quantities.
Pre-Mixed Concrete Bags
For small projects under 1 cubic yard, pre-mixed bags offer convenience but cost 3-4 times more than mixing from scratch. Common bag sizes:
- 40 lb bags: Yields 0.3 cubic feet, easiest to handle, best for repairs and small posts
- 60 lb bags: Yields 0.45 cubic feet, balanced between weight and quantity
- 80 lb bags: Yields 0.6 cubic feet, most economical per cubic foot but heavy
Pre-mixed bags come in different strength formulas. Read labels carefully. “High-strength” typically means 4000-5000 PSI, “crack-resistant” usually includes fiber reinforcement. Use a concrete bag calculator to determine how many bags you need.
Water-Cement Ratio: The Critical Factor
Water-cement ratio (w/c ratio) is the single most important factor affecting concrete strength and durability. Get this wrong and nothing else matters.
What is Water-Cement Ratio?
Water-cement ratio is the weight of water divided by the weight of cement in your mix. A 0.50 w/c ratio means 0.50 pounds of water for every pound of cement.
Water-Cement Ratio Formula
Example: 25 lbs water ÷ 50 lbs cement = 0.50 w/c ratio
Why Water-Cement Ratio Matters So Much
Too much water (over 0.60 ratio): Every extra gallon of water per cubic yard reduces strength by 200-300 PSI. High w/c ratios create porous concrete that absorbs water, leading to freeze-thaw damage, scaling, and premature failure. Concrete with 0.70 w/c ratio can lose 50% of its potential strength.
Too little water (under 0.40 ratio): Concrete won’t hydrate fully, becomes difficult to work with, won’t flow into forms properly, and contains dry pockets that create weak spots. Under-watered concrete may not mix completely or finish smoothly.
The sweet spot (0.45-0.50): This range provides optimal balance between strength, workability, and durability for most applications. Professional contractors rarely exceed 0.50 w/c ratio unless using plasticizers.
How to Calculate Water Quantity
For a 1:2:3 mix using 94 lb bag of cement (standard bag size):
🧮 Water Calculation Example
Target w/c ratio: 0.50
Cement weight: 94 lbs (one bag)
Water needed: 94 × 0.50 = 47 lbs of water
Convert to gallons: Water weighs 8.33 lbs per gallon
47 lbs ÷ 8.33 = 5.6 gallons
For practical mixing, start with 4.5 gallons, mix thoroughly, then add remaining water gradually to reach proper consistency.
The #1 concrete mixing mistake is adding water until “it looks right.” This typically results in 0.60-0.75 w/c ratios, creating weak concrete that cracks and fails prematurely. Measure water precisely using marked buckets. If concrete seems too stiff, work it longer before adding more water. Resist the temptation to make concrete soupy for easier placement.
Adjusting for Aggregate Moisture
Sand and gravel often contain moisture from rain or storage. This “free water” counts toward your w/c ratio:
- Dry aggregates: Less than 2% moisture, use full calculated water
- Damp aggregates: 5-10% moisture (feels wet, doesn’t drip), reduce water by 10-15%
- Wet aggregates: 10-15% moisture (visibly wet, drips when squeezed), reduce water by 15-20%
- Saturated aggregates: 15%+ moisture (soaking wet, puddles in pile), reduce water by 20-25%
Start with 75% of calculated water, mix, then add remaining water slowly while monitoring consistency.
How to Measure Materials Accurately
Accurate measuring is essential for consistent, quality concrete. Never guess quantities.
Measuring by Volume (Most Common)
For DIY mixing, volume measurement using buckets or shovels works well if you’re consistent:
- Use same container for all materials: If using 5-gallon bucket for cement, use same bucket for sand and gravel
- Level off each scoop: Strike excess material level with top of container, don’t heap or pack
- Account for voids: Loose-poured materials contain air spaces. Actual concrete yield will be 60-70% of combined dry material volumes
- Mark containers: Paint or tape lines on buckets at specific volumes for repeat batches
Professional approach: Use three color-coded 5-gallon buckets (red for cement, yellow for sand, blue for gravel). Mark each at 1-gallon increments. For 1:3:3 mix, fill red bucket to 1 gallon mark, yellow bucket to 3 gallon mark, blue bucket to 3 gallon mark. This eliminates counting scoops and ensures consistency across batches.
Measuring by Weight (Most Accurate)
Professional batch plants measure by weight for maximum accuracy. For critical projects:
- Use bathroom or contractor scale: Weigh each component separately
- Follow weight-based mix designs: Typical 1:2:3 mix uses 94 lbs cement, 188 lbs sand, 282 lbs gravel, 47 lbs water
- Account for moisture: Wet sand weighs more than dry sand, adjust water accordingly
Weight measuring takes longer but produces identical results batch after batch, critical for large projects requiring multiple mixes.
Pre-Mixed Bag Measuring
When using concrete bags, measuring is simple:
- One bag = one batch: Empty entire bag into mixer, don’t split bags
- Add water per label instructions: Typically 3-4 quarts per 80 lb bag
- Mix multiple bags separately: Don’t try mixing 3-4 bags at once unless you have large commercial mixer
Mixing Methods: Hand vs Machine
How you mix concrete affects quality as much as what you mix. Choose the right method for your project size.
Hand Mixing (For Small Projects)
Best for: Less than 0.25 cubic yards (about 2 cubic feet), fence posts, small repairs, single steps
Equipment needed: Large mortar pan or wheelbarrow, square-end shovel or hoe, 5-gallon buckets for measuring, gloves and safety glasses
Advantages: No equipment rental costs, works anywhere, quiet, complete control over consistency
Disadvantages: Physically exhausting, time-consuming (10-15 minutes per batch), inconsistent mixing, limited to very small quantities
Hand mixing concrete is brutally hard work. Mixing 4 cubic feet (two 80 lb bags) takes 15-20 minutes of continuous shoveling and requires good physical fitness. Plan on mixing no more than 0.5 cubic yards per day by hand unless you’re in excellent shape. For anything over 1 cubic yard, rent a mixer or order ready-mix delivery.
Portable Electric Mixer (Best for DIY)
Best for: 0.25 to 3 cubic yards, driveways, patios, shed foundations, any residential project
Equipment options: Rent 3-6 cubic foot electric mixer ($40-$60/day) or buy small 2.5 cubic foot mixer ($250-$400) for multiple projects
Mixing capacity: Standard 3.5 cubic foot mixer produces about 2-3 cubic feet of finished concrete per batch (roughly equivalent to 4-5 80 lb bags)
Advantages: Consistent mixing, much faster than hand mixing (3-5 minutes per batch), handles moderate projects easily, readily available at rental centers
Disadvantages: Requires electricity, rental cost ($40-$80/day), cleanup takes 15-20 minutes, need vehicle to transport
Gas-Powered Mixer (For Larger Projects)
Best for: 2-5 cubic yards, remote sites without electricity, commercial work, multiple large pours
Advantages: No electrical requirements, larger capacity (up to 9 cubic feet), more powerful mixing action, portable to any site
Disadvantages: Higher rental cost ($60-$100/day), noisy, requires gas/oil, heavier and harder to transport
Ready-Mix Delivery (For Large Projects)
Best for: Over 2 cubic yards, large slabs, foundations, any project where quality and time matter more than cost
Advantages: Professional mixing ensures consistent quality, massive time savings, precise PSI specifications, no cleanup of mixing equipment
Disadvantages: Expensive for small quantities (minimum charges apply), requires truck access, must work fast (90-120 minutes before hardening), can’t stop mid-pour
calculators/concrete-ready-mix-truck-calculator/”>ready-mix truck calculator to determine if delivery makes economic sense for your project size.🧮 Calculate Your Concrete Needs
Before mixing or ordering, know exactly how much concrete you need. Our free calculators handle any project shape and provide precise quantities.
Calculate Concrete Quantity →Step-by-Step Mixing Instructions
Follow these professional mixing procedures whether working by hand or with a machine mixer.
Method 1: Machine Mixing (Recommended)
Professional Machine Mixing Procedure
- Position mixer near work area: Place on level ground within 20-30 feet of pour location. Tilt drum to loading position (about 45 degrees).
- Add coarse aggregate first: Pour half the measured gravel into rotating drum. This prevents cement from sticking to drum walls.
- Add half the water: Add approximately 50% of calculated water to wet down aggregate and start mixing action.
- Add all cement: Pour entire measured cement quantity into drum while mixer runs. Never dump dry cement into dry aggregate.
- Add all sand: Add full measured sand quantity. Mix for 30-60 seconds until color becomes uniform.
- Add remaining aggregate: Add second half of gravel. Mix for another 30 seconds.
- Add water gradually: Slowly add remaining water while observing consistency. Stop adding water when proper consistency is reached (may not need all calculated water).
- Mix thoroughly: Continue mixing for minimum 3 minutes after last water addition. Scrape any dry material from drum sides back into mix.
- Test consistency: Stop mixer, take sample, perform slump test (described below). Adjust if needed.
- Discharge and use: Tilt mixer to discharge position. Pour concrete into wheelbarrow or directly into forms. Use within 90 minutes.
⏱️ Timing Example: 3 Cubic Foot Mixer
Batch size: 1:3:3 mix producing approximately 2 cubic feet finished concrete
Materials per batch:
• 1 bucket (5 gal) Portland cement (47 lbs)
• 3 buckets sand (150 lbs)
• 3 buckets gravel (165 lbs)
• 2.5 gallons water
Time breakdown:
• Loading materials: 2 minutes
• Mixing time: 3-4 minutes
• Discharge and clean: 1 minute
• Total per batch: 6-7 minutes
For a 12×16 patio requiring 2.4 cubic yards, you’d need approximately 18 batches = 2-2.5 hours of mixing time.
Method 2: Hand Mixing
Hand Mixing Procedure
- Prepare mixing container: Use large mortar pan or wheelbarrow. Place on flat, stable surface.
- Measure and combine dry materials: Add cement, sand, and gravel to container. Don’t add water yet.
- Blend dry ingredients thoroughly: Using hoe or shovel, mix dry materials for 2-3 minutes until color is completely uniform with no streaks or clumps.
- Form a crater: Push dry mix to edges of container, creating depression in center like a volcano.
- Add 75% of water to crater: Pour water into center depression. Let it soak in for 10-15 seconds.
- Pull dry mix into water: Use hoe to gradually pull dry material from edges into water. Work in circular motion, mixing thoroughly.
- Mix vigorously for 5 minutes: Turn and fold concrete repeatedly. Scrape bottom and sides to incorporate all material. This is hard physical work.
- Add remaining water gradually: Sprinkle small amounts of water on any dry spots. Mix another 3-5 minutes until completely uniform.
- Test consistency: Squeeze handful. Should hold shape but release water film on surface. Adjust if needed.
- Use immediately: Hand-mixed concrete begins setting faster due to incomplete mixing. Use within 60 minutes.
Hand mixing rarely achieves the uniform consistency of machine mixing. Expect 10-15% lower strength than properly machine-mixed concrete of the same ratio. Hand-mixed concrete is acceptable for non-structural applications like fence posts, garden borders, and small repairs. Never use hand-mixed concrete for foundations, structural slabs, or any load-bearing application.
Testing Concrete Consistency
Proper consistency means concrete is workable enough to place and finish, but not so wet it’s weak. Here’s how to test and adjust.
The Slump Test (Standard Method)
Professional concrete testing uses a slump cone, but you can approximate results with simple observation:
- Take sample: Fill a 5-gallon bucket about 2/3 full with fresh concrete
- Tap sides: Strike bucket sides 10-15 times to settle concrete and release air bubbles
- Dump and observe: Turn bucket upside down on flat surface, lift bucket straight up
- Measure slump: Note how much concrete pile settles from bucket height
| Slump Range | Description | Best For | W/C Ratio |
|---|---|---|---|
| 0-2 inches | Very stiff, maintains shape, crumbly | Precast work, road base (too dry for most DIY) | Under 0.40 |
| 3-4 inches | Stiff but workable, holds ridges | Driveways, heavy-duty slabs, foundations | 0.40-0.45 |
| 4-6 inches | Good workability, settles slowly | Slabs, patios, walkways (ideal for most DIY) | 0.45-0.50 |
| 6-8 inches | Very fluid, flows easily, some separation | Heavily reinforced sections, pump trucks | 0.50-0.55 |
| Over 8 inches | Soupy, segregates, weak (too wet) | Nothing (unacceptable) | Over 0.60 |
Simple Field Tests
Squeeze test: Grab handful of concrete and squeeze. Should form a firm ball that holds shape but releases a thin water film on surface. If it crumbles, too dry. If water runs freely, too wet.
Shovel test: Load shovel with concrete and turn 90 degrees. Concrete should slide off slowly, not stick to shovel or run off like soup. Should maintain form for 2-3 seconds before settling.
Ridge test: Use trowel or shovel edge to make ridges in concrete surface. Ridges should hold distinct shape for 5-10 seconds before slowly settling. If ridges collapse immediately, too wet. If ridges stay sharp indefinitely, too dry.
Ideal concrete looks like thick oatmeal or wet brownie batter. It flows smoothly when poured but doesn’t run. You can easily make an impression with your hand, but the impression doesn’t fill with water. When troweled, surface becomes smooth and shiny with minimal effort. This consistency indicates proper w/c ratio and good workability.
Adjusting Consistency
If too dry (stiff, crumbly, hard to work): Add water in VERY small amounts (1/4 cup at a time). Mix thoroughly for 2 minutes between additions. Never add more than 10% additional water or you’ll weaken concrete significantly.
If too wet (soupy, runny, segregating): You cannot fix overly wet concrete by adding dry materials (this changes your ratio). Either use the wet concrete immediately and accept lower strength, or discard the batch and start over. This is why adding water gradually is so critical.
Common Mixing Mistakes to Avoid
These errors ruin more DIY concrete than any other factors. Learn from others’ expensive mistakes.
Mistake #1: Adding Too Much Water
What happens: Extra water makes mixing easier but reduces strength by 200-300 PSI per extra gallon. Concrete becomes porous, weak, and prone to cracking.
Why people do it: Wet concrete is easier to shovel, spreads easier, finishes smoother initially. The damage isn’t visible for months.
How to avoid: Measure water precisely. Start with 75% of calculated amount. Add remaining water gradually. If concrete seems stiff, mix longer before adding more water. Use plasticizer admixture if you need better flow without adding water.
Mistake #2: Inconsistent Measuring
What happens: One batch has 1:2:3 ratio, next batch is 1:2.5:4, third batch is 1:3:2.5. Each hardens at different rates, achieves different strength, creates weak spots.
Why people do it: Trying to speed up by eyeballing quantities instead of measuring carefully.
How to avoid: Use same container for all materials. Mark containers at specific volumes. Count scoops carefully. For large projects, write down your batch recipe and follow it exactly for every mix.
Mistake #3: Under-Mixing
What happens: Dry pockets remain in concrete. These don’t hydrate, creating weak spots that crumble when loaded.
Why people do it: Rushing to pour before concrete sets, stopping mixing as soon as it “looks good enough.”
How to avoid: Mix for full 3-5 minutes after last water addition. Scrape drum or container sides to incorporate all material. Continue until color is absolutely uniform with no streaks or dry spots.
Mistake #4: Using Dirty or Contaminated Materials
What happens: Silt, clay, organic matter, or salt in sand/gravel prevents cement bonding. Strength drops 30-50%. Concrete may never properly harden.
Why people do it: Using “free” sand from riverbanks, beaches, or jobsites. Storing materials on bare ground where they absorb contamination.
How to avoid: Buy clean, washed sand and gravel from concrete suppliers. Store materials on pallets or tarps, covered from rain and contamination. Use potable water only.
Mistake #5: Mixing Too Large a Batch
What happens: Concrete begins setting before you can place it all. Partially-set concrete doesn’t consolidate properly, creating voids and weak sections.
Why people do it: Trying to save time by mixing huge batches, or overestimating how fast they can work.
How to avoid: Mix only what you can place and finish in 45-60 minutes. For large pours, have helpers ready. Don’t start next batch until previous batch is placed. Better to work slowly with fresh concrete than rush with hardening concrete.
💡 Professional Secret
Commercial concrete plants test every batch multiple times daily to ensure consistency. They adjust mix designs based on aggregate moisture, temperature, humidity, and other factors. Your mix quality won’t match theirs, but you CAN achieve good results by measuring carefully, mixing thoroughly, and never compromising on water content. The difference between DIY concrete that lasts 5 years versus 50 years is discipline in following proper procedures.
Troubleshooting Mix Problems
When concrete doesn’t look or behave right, here’s how to diagnose and fix common problems.
Problem: Concrete Is Crumbly and Won’t Hold Together
Causes: Too little water (under 0.40 w/c ratio), insufficient cement in mix, materials not mixed thoroughly, cement has gotten damp and pre-hydrated
Solutions: Add small amounts of water (1/4 cup at a time), mix for longer duration, verify you’re using correct ratio, check cement hasn’t hardened in bag (squeeze bag, should feel powdery, not lumpy)
Problem: Concrete Bleeds Excessive Water to Surface
Causes: Too much water (over 0.55 w/c ratio), too much fine sand, inadequate mixing causing segregation, placing concrete on hot surface
Solutions: Don’t add more water to future batches, improve mixing time, let bleed water evaporate before finishing (do NOT work it back into surface), pre-wet subgrade to reduce suction
Problem: Concrete Hardens in Mixer or Wheelbarrow
Causes: Worked too slowly, temperature too hot (over 85°F), cement was old or contaminated, forgot to keep drum rotating
Solutions: Mix smaller batches you can place faster, work in morning/evening during hot weather, add ice to mixing water in hot weather, use retarder admixture, keep mixer running slowly between batches
Problem: Concrete Has Dry Pockets When Breaking Apart Sample
Causes: Under-mixing, materials added in wrong order, mixer drum not rotating during loading, batch too large for mixer capacity
Solutions: Mix longer (minimum 3 minutes after last water), follow proper material addition sequence, reduce batch size, scrape sides of mixer during mixing
Problem: Sand and Gravel Separate from Cement Paste
Causes: Too much water (over 0.60 w/c ratio), excessive vibration during placement, dropping concrete from heights over 3 feet
Solutions: Reduce water in next batch, place concrete carefully without dropping, don’t over-vibrate during consolidation, use lower slump mix (4-5 inches)
🧮 Plan Your Mix Quantities
Calculate exact material quantities for your project size. Our mix calculator factors in your chosen ratio and tells you precisely how much cement, sand, gravel, and water you need.
Calculate Mix Quantities →🎯 Key Takeaways
- Mix ratios determine strength: Use 1:2:3 for 4000+ PSI (driveways, structural), 1:3:3 for 3000 PSI (patios, walkways), never weaker than 1:3:4
- Water-cement ratio is critical: Maintain 0.45-0.50 w/c ratio for optimal strength and durability, never exceed 0.60
- Measure precisely: Use consistent containers, level off scoops, count carefully, write down batch recipes
- Add water gradually: Start with 75% of calculated water, add remainder slowly while testing consistency
- Mix thoroughly: Minimum 3-5 minutes machine mixing or 8-10 minutes hand mixing until completely uniform
- Test consistency: Aim for 4-6 inch slump (thick oatmeal consistency) for most DIY projects
- Work within time limits: Mix only what you can place in 60-90 minutes, concrete begins setting after 90 minutes
- Use clean materials: Only construction-grade cement, sand, gravel, never contaminated or dirty materials
- Machine mixing preferred: Produces more consistent, stronger concrete than hand mixing
- When in doubt, order ready-mix: For projects over 2 cubic yards, professional delivery ensures quality and saves time
Frequently Asked Questions
The most common concrete mixing ratios are 1:2:3 (cement:sand:gravel) for high-strength applications requiring 4000+ PSI, and 1:3:3 for standard 3000 PSI concrete used in patios and sidewalks. A 1:2:3 ratio means if you use 1 shovel of cement, add 2 shovels of sand and 3 shovels of gravel. Always maintain water-cement ratio between 0.45-0.50 for optimal strength. Use a mix ratio calculator to determine exact quantities for your project size.
The ideal water-cement ratio is 0.45-0.50 for most applications, meaning 0.45-0.50 pounds of water per pound of cement. For a 94 lb bag of cement, this equals approximately 5-6 gallons of water. A 0.45 ratio produces about 4500 PSI strength, while 0.50 ratio yields 4000 PSI. Never exceed 0.60 water-cement ratio as strength drops dramatically and concrete becomes porous. Lower ratios produce stronger concrete but are harder to work with. Start with 75% of calculated water, then add remainder gradually while monitoring consistency.
Mix concrete for minimum 3-5 minutes in a mechanical mixer after all water is added. Hand mixing requires 5-10 minutes of vigorous work. Mix until consistency is completely uniform with no dry pockets, streaks, or color variations. Under-mixing by even 30 seconds creates weak spots and inconsistent strength. Continue mixing if you see any unmixed material on mixer sides or bottom. Over-mixing (beyond 10 minutes) won’t harm concrete but wastes time and energy.
You can add small amounts of water but only BEFORE placing concrete and only if you haven’t exceeded 0.55 w/c ratio. Add water in tiny increments (1/4 cup at a time), mix thoroughly for 2 minutes between additions. Every extra gallon reduces strength by 200-300 PSI. If concrete seems stiff but w/c ratio is correct, mix longer rather than adding water. Stiff concrete that’s properly mixed is much better than soupy concrete. Never add water after concrete has been placed or started to set.
One 80 lb bag of pre-mixed concrete produces approximately 0.6 cubic feet of finished concrete. You need 45 bags to make 1 cubic yard (27 cubic feet). For a small walkway 10 ft × 3 ft × 4 inches thick, you’d need about 17-18 bags. At $6-$7 per bag, that’s $102-$126. Use a bag calculator to determine exact quantities. Each bag requires about 3 quarts (0.75 gallons) of water when mixed.
Machine mixing is always better for quality and consistency. Portable electric mixers cost $40-$60/day to rent and produce uniform concrete with 10-15% higher strength than hand mixing. Hand mixing works for very small projects (under 2 cubic feet) like fence posts or repairs, but is physically exhausting and rarely achieves complete uniformity. For any slab, driveway, or structural application, use a mixer or order ready-mix delivery.
Excess sand (wrong ratio like 1:4:2 instead of 1:3:3) makes concrete weak, prone to cracking, and creates sandy surface that dusts and erodes. Sand should be 25-30% of mix volume. Too much sand means insufficient coarse aggregate, reducing structural strength by 30-50%. It also increases water demand and shrinkage cracking. Always follow proper ratios. If you accidentally added too much sand, add proportional amounts of cement and gravel to restore correct ratio.
Concrete should be mixed to thick oatmeal consistency – not soupy (too wet) or crumbly (too dry). Proper consistency holds shape when squeezed but releases thin water film on surface. It should flow smoothly off shovel without being runny. This typically corresponds to 4-6 inch slump and 0.45-0.50 w/c ratio. When in doubt, err on the side of slightly too dry rather than too wet. You can work stiff concrete harder, but you cannot strengthen weak, wet concrete.
🧮 Ready to Start Your Concrete Project?
Calculate quantities, estimate costs, and plan your project with our free tools. Get accurate results for any concrete project from small repairs to large slabs.
Explore All Calculators →🔗 Related Resources
- → Concrete Formula Calculation Guide – Volume equations and mix ratio formulas
- → How to Measure Concrete Properly – Accurate measurement techniques
- → Why Is My Concrete Cracking? – Causes, prevention, and repair tips
- → Rebar Calculator – Calculate reinforcement for strength
- → Wire Mesh Calculator – Determine mesh reinforcement quantities
- → Gravel Calculator – Calculate base material under concrete
- → Sand Calculator – Determine sand quantities for mixing
- → Concrete Cost Calculator – Estimate total project costs with 2026 pricing


2 Comments