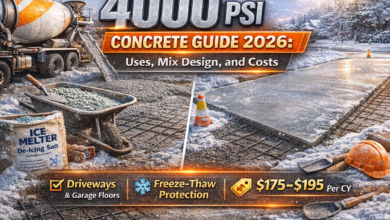
Concrete Delivery Cost 2026: Full Breakdown by Load, Distance and Project
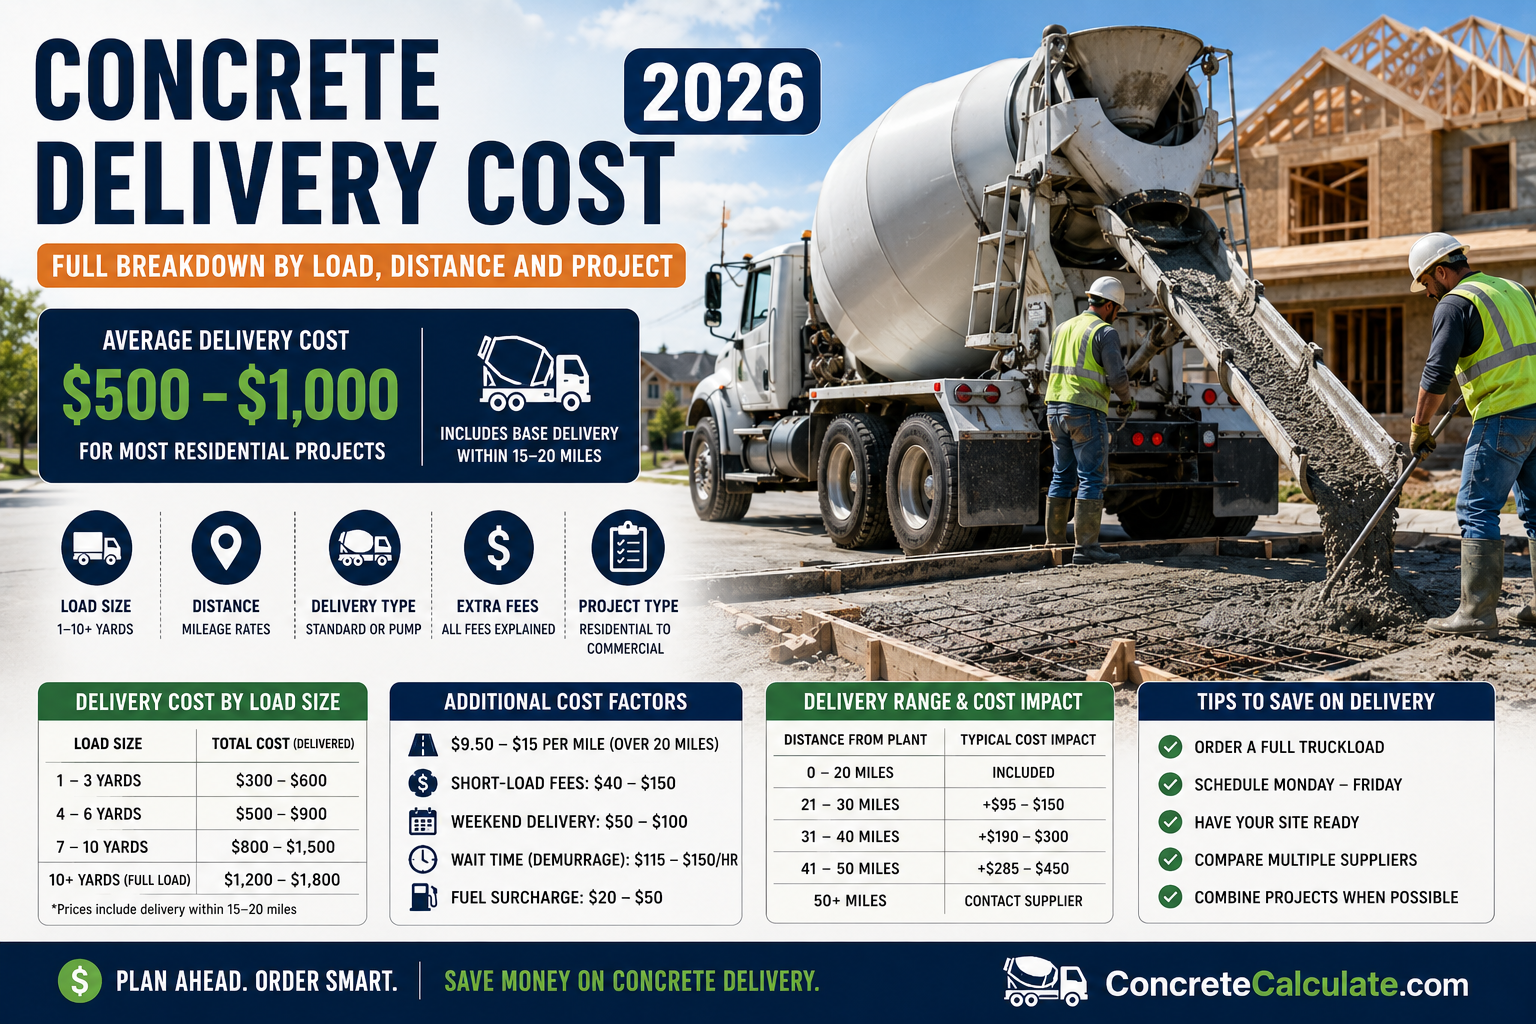
Concrete delivery costs $500 to $1,000 on average for a standard residential order in 2026 – but that number alone tells you almost nothing about what you will actually pay. The real cost depends on how many yards you order, how far you are from the plant, whether your job falls under the short-load threshold, what day you schedule delivery, and half a dozen other fees that most quotes don’t spell out upfront. This guide breaks every one of those costs down so you know exactly what to expect before you call a supplier.
Concrete Delivery Cost at a Glance
Here are the most important numbers to know before you start getting quotes.
Average Delivery Order
5-8 yards delivered within 20 miles, weekday
Full Truckload (10 yds)
Best cost per yard, fewest surcharges
Short Load (1-3 yds)
Includes short-load surcharge, high cost per yard
Cost Per Cubic Yard
Full load: $119-$147 | Short load: ~$172
These ranges cover material plus standard delivery within 20 miles. They do not include labor, finishing, pump truck, or any special mix premiums. In high-cost markets like Los Angeles, San Francisco, or New York City, add 20-40% to these figures. In the Midwest and Southeast, prices sit at the lower end or below.
Before you get into delivery pricing, you need to know your exact cubic yard requirement. Use the Concrete Volume Calculator or the Concrete Cubic Yard Calculator to nail your volume. Getting this number wrong before you call a supplier leads to over-ordering, wasted short-load fees, or a mid-pour shortfall that causes cold joints.
Cost by Load Size
Load size is the single biggest factor in your per-yard delivery cost. Ready-mix suppliers have fixed costs for dispatching a truck – driver wages, fuel, truck depreciation, and plant overhead – that apply regardless of how much concrete is on board. A truck delivering 2 yards costs the supplier almost as much to dispatch as a truck delivering 10 yards. That fixed cost gets spread across your order, so small orders carry a much higher per-yard rate.
| Order Size | Load Type | Price Per Cubic Yard | Estimated Total Cost | Short-Load Fee |
|---|---|---|---|---|
| 1 yard | Short load | $172 – $220 | $250 – $350 | $75 – $150 |
| 2 yards | Short load | $160 – $200 | $380 – $500 | $60 – $120 |
| 3 yards | Short load | $155 – $185 | $500 – $650 | $50 – $100 |
| 5 yards | Short load | $145 – $175 | $750 – $950 | $40 – $80 |
| 7 yards | Near full load | $135 – $165 | $950 – $1,200 | Varies or none |
| 10 yards (full) | Full load | $119 – $150 | $1,200 – $1,600 | None |
For small jobs where you need under 2 cubic yards, compare the total delivered cost against buying bagged concrete. At $8-$10 per 80 lb bag from Home Depot, Lowe’s, or Menards, bagged concrete runs $300 to $450 per yard in material cost – expensive, but it avoids delivery fees and scheduling entirely. Use the Concrete Bag Calculator to run both options before you decide.
Cost by Delivery Distance
Most US ready-mix plants include delivery within 15 to 20 miles of their plant in the base per-yard price. Beyond that, you pay a per-mile overage charge on top of the material cost. The farther you are from a plant, the more your effective delivery cost per yard climbs.
| Distance from Plant | Extra Delivery Charge | Added Cost (Full Load) | Notes |
|---|---|---|---|
| 0 – 15 miles | $0 (included) | $0 | Free zone for most suppliers |
| 16 – 20 miles | $0 – $50 | $0 – $50 | Edge of free zone |
| 21 – 30 miles | $9.50 – $15/mile | $95 – $150 | Per mile beyond free zone |
| 31 – 40 miles | $9.50 – $15/mile | $190 – $300 | Significant add-on |
| 41 – 50 miles | $9.50 – $15/mile | $285 – $450 | Consider closer plant |
| 50+ miles | Negotiated flat rate | $400 – $600+ | Often not offered; find closer plant |
If you are in a rural area more than 25 miles from the nearest ready-mix plant, call two or three plants and compare their free delivery radius and per-mile rates. A plant that is 5 miles farther away but charges $10 per mile instead of $15 will save money on a long delivery. The Concrete Delivery Cost Calculator lets you plug in your distance and order size to get a quick estimate before you start calling.
Types of Concrete Delivery
Not all concrete deliveries work the same way. The delivery method affects price, flexibility, and minimum order size.
Standard Ready-Mix Truck (Drum Mixer)
This is the standard option for 95% of US residential and commercial projects. The plant batches the concrete and loads it into a rotating drum truck. The concrete arrives mixed and ready to pour. Trucks typically carry 8 to 10 cubic yards. This is the most cost-effective delivery method for orders of 3 yards and up. Transit time from plant to jobsite is typically 60-90 minutes maximum – after that, the concrete starts to stiffen and the driver will begin discharging whether you are ready or not.
Volumetric Mixer Truck
A volumetric mixer carries dry cement, aggregate, water, and admixtures in separate compartments and mixes the concrete on site at the point of discharge. You only pay for what you pour – there is no waste and no short-load fee in the traditional sense. Volumetric mixing costs $20 to $30 per yard more than standard ready-mix, but for orders under 2 cubic yards, this premium often costs less than a standard delivery plus short-load surcharge combined. It is also useful when you need multiple mix designs on one job.
Mini Mix Truck
Some suppliers operate smaller trucks carrying 1 to 4 cubic yards for residential jobs with tight access. Mini mix trucks can reach areas where a full-size truck would damage a lawn, driveway, or narrow gate. They cost more per yard – typically $20 to $40 per yard premium over standard delivery – but they solve access problems that would otherwise require expensive pump equipment.
Concrete Pump Truck (Separate Service)
A pump truck is not a delivery method on its own – it works alongside a standard ready-mix truck to move concrete from the truck to the pour location through a hose. Boom pumps cover distances up to 150 feet and reach second-floor or backyard pours. Line (trailer) pumps work for longer horizontal runs at ground level. Pump trucks are a separate rental, not included in the concrete delivery price. See the Concrete Pumping Cost Calculator for a full breakdown.
| Delivery Type | Minimum Order | Cost vs. Standard | Best For |
|---|---|---|---|
| Standard drum truck | 1 yard (short-load fees apply) | Base price | Most jobs over 3 yards |
| Volumetric mixer | 0.5 yard | +$20 to $30/yard | Small jobs, multiple mixes, no waste |
| Mini mix truck | 0.5 – 1 yard | +$20 to $40/yard | Tight access, small residential jobs |
| Boom pump (add-on) | Usually 4+ yards | +$400 to $800/day | Elevated or hard-to-reach pours |
| Line pump (add-on) | Usually 2+ yards | +$150 to $350/day | Long horizontal runs, ground-level pours |
Every Fee You Could Be Charged
This is the section most people wish they had read before calling a supplier. These fees are real, common, and rarely mentioned in the headline per-yard price you see advertised.
Short-Load Fee
Charged on any order below the supplier’s full-load threshold, usually 8 to 10 cubic yards. Ranges from $40 to $150 per order as a flat charge, or $15 to $17 per cubic yard on the shortfall. If you order 5 yards and the threshold is 10, you might pay $15 per yard on the 5-yard shortfall – an extra $75 on top of the concrete price.
Fuel Surcharge
A monthly-adjusted surcharge tied to diesel prices. In 2026 this runs $20 to $50 per load for most US suppliers. It applies to every order regardless of size, so it hits small orders disproportionately. Some suppliers roll it into the per-yard price; others list it separately on the ticket.
Weekend and Holiday Delivery
Saturday delivery adds $50 to $100 per order. Sunday and holiday delivery costs more – $100 to $200 in some markets – and many plants simply don’t offer it. If you can pour Monday through Friday, you avoid this fee entirely. Book weekend deliveries at least 5 days in advance during spring and summer peak season.
Overtime and Demurrage (Wait-Time Fee)
The delivery ticket includes an allotted unloading time – typically 7 to 10 minutes per cubic yard. If your crew runs slow or there’s a delay getting the truck into position, the driver starts the clock. Wait-time charges run $1 to $3 per minute, which is $60 to $180 per hour. On a disorganized 10-yard pour that runs 45 minutes over time, this adds $45 to $135 to your bill. Have your entire crew, screeds, vibrator, and chute extensions ready before the truck arrives.
Environmental or Wash-Out Fee
Some suppliers charge $15 to $30 per load for drum wash-out disposal. This covers the cost of properly disposing of the wash water and residual concrete after the truck returns to the plant. It is becoming more common as environmental regulations tighten, especially in California and the Pacific Northwest.
Cancellation Fee
If you cancel a concrete order after batching has started – or with less than 24 hours notice during peak season – many suppliers charge a cancellation fee of $100 to $300. Some charge for the full batch at cost. Read your order confirmation carefully for cancellation terms.
Specialty Mix Premium
Any mix deviation from the plant’s standard offering adds to the base price:
- Air entrainment (freeze-thaw areas): $5 to $15 per yard
- Accelerating admixture: $10 to $20 per yard
- Plasticizer or superplasticizer: $5 to $20 per yard
- Fiber reinforcement: $15 to $30 per yard
- Integral color pigment: $15 to $40 per yard
Real-World Fee Example: 3-Yard Saturday Order in Chicago, IL
Concrete (3 yards x 4,000 PSI at $170/yard): $510
Short-load fee (under 10 yards): $100
Weekend delivery surcharge: $75
Fuel surcharge: $35
Air entrainment premium (Chicago winters): $30
Total delivered cost: $750
Effective cost per yard: $250 – vs. the advertised $170/yard base price
Delivery Cost by Project Type
Below are typical concrete volumes and total delivered costs for the most common residential projects. These figures include concrete material plus delivery within 20 miles, weekday scheduling, with no short-load fee where possible. They do not include labor, pump truck, or reinforcement.
| Project | Typical Size | Yards Needed | Delivered Cost | Load Type |
|---|---|---|---|---|
| Post holes (4 posts) | 10 in dia. x 36 in deep | ~0.3 yards | $200 – $300 | Short load or bags |
| Concrete walkway | 4×30 ft, 4 in thick | ~1.5 yards | $350 – $500 | Short load |
| Concrete patio | 12×16 ft, 4 in thick | ~2.4 yards | $450 – $650 | Short load |
| Garage floor (1-car) | 12×20 ft, 4 in thick | ~3 yards | $550 – $750 | Short load |
| Driveway (1-car) | 10×20 ft, 5 in thick | ~3.1 yards | $550 – $750 | Short load |
| Driveway (2-car) | 20×22 ft, 5 in thick | ~6.7 yards | $1,000 – $1,300 | Short or near-full |
| Garage floor (2-car) | 20×22 ft, 4 in thick | ~5.4 yards | $850 – $1,100 | Short load |
| Full basement floor | 30×40 ft, 4 in thick | ~15 yards | $1,800 – $2,400 | Full load x 1.5 |
| House foundation | 1,500 sq ft footprint | ~18 – 25 yards | $2,200 – $3,500 | Multiple loads |
For project-specific cost estimates with material, delivery, and labor combined, use these calculators:
- Concrete Driveway Cost Calculator
- Concrete Patio Cost Calculator
- Concrete Garage Floor Cost Calculator
- Concrete Sidewalk Cost Calculator
- Concrete Foundation Cost Calculator
- Concrete Slab Cost Calculator
- Concrete Pour Cost Calculator
Delivery Cost by Region
Concrete delivery pricing varies by region because fuel costs, labor rates, plant density, and aggregate availability all differ. The Northeast and West Coast are consistently the most expensive. The Midwest and Southeast are the cheapest.
| Region | Avg. Price Per Yard (Delivered) | Delivery Fee Range | Key States |
|---|---|---|---|
| Northeast | $155 – $210 | $35 – $70 | NY, MA, CT, NJ, PA |
| Mid-Atlantic | $145 – $195 | $30 – $65 | MD, VA, DC metro |
| Southeast | $130 – $165 | $25 – $55 | FL, GA, NC, SC, TN, AL |
| South Central | $130 – $160 | $25 – $55 | TX, OK, AR, LA |
| Midwest | $125 – $155 | $25 – $50 | OH, IN, IL, MI, WI, MN, IA, MO |
| Mountain West | $140 – $175 | $30 – $65 | CO, AZ, NV, UT, NM |
| Pacific Northwest | $165 – $200 | $40 – $75 | WA, OR |
| California | $185 – $245 | $45 – $85 | LA, SF Bay Area, San Diego |
For state-level pricing, use the dedicated calculators: California, Texas, Florida, New York, Ohio, Georgia, and Arizona.
What Drives Delivery Costs Up
Several factors specific to your project and location push the total delivery cost above the base figures.
Site Access Problems
A fully loaded ready-mix truck weighs 40,000 to 66,000 pounds. It needs a clear, firm path at least 10-12 feet wide with no overhead obstructions under 14 feet. If your site has a soft lawn, narrow gate, steep driveway, or low-hanging tree limbs, the truck may not be able to reach the pour location at all. In that case, you either need a mini mixer, a pump truck, or chute extensions – all of which add cost.
Long Wait Times
If your crew is not ready when the truck arrives, or if there is a problem with your forms that causes a delay, demurrage charges accumulate fast. Every 15 minutes over the allotted time adds $15 to $45 to your bill. Crews that are not pre-briefed on pour sequence, screed positions, and vibrator operation routinely cost their employers $100 or more in wait-time fees on residential jobs.
Peak Season Ordering
Spring and early summer bring the highest concrete demand. From late March through July, suppliers in busy markets fill up fast. You may pay a scheduling premium for same-week delivery during peak season, or you may not be able to get a truck at all on your preferred date. Book at least one week out during this period, and confirm two days before the pour.
Difficult Mix Requirements
Non-standard PSI grades, air entrainment, colored pigments, low water-cement ratio mixes, and specialty aggregates all require additional plant time and materials. These add $5 to $40 per yard depending on the modification. Always ask your supplier which mix designs are “standard stock” at their plant – standard mixes are always cheaper and faster to deliver than custom batches.
How to Cut Your Delivery Cost
Delivery cost is partly fixed, but there is real money to be saved with smart scheduling and ordering.
- Order a full truckload. If your job is 7 yards, round up to 10. The extra concrete can fill a sidewalk, a step repair, or a small pad. A full load eliminates the short-load fee and gets you the lowest per-yard price. This single move can save $75 to $150 on a mid-size job.
- Pour on a weekday. Skip Saturday and Sunday delivery fees. Scheduling from Monday to Friday saves $50 to $100 per order with zero change to the concrete itself.
- Combine jobs into one delivery. If you need a driveway and a backyard patio in the same season, pour them the same day. One delivery fee, one fuel surcharge, one truck, two jobs done.
- Get three quotes from nearby plants. Delivery pricing is not standardized. The same 3,000 PSI mix with delivery can vary by $20 to $40 per yard between plants in the same city. Always get at least three quotes, and ask each supplier for an itemized breakdown including all surcharges.
- Have your site completely ready. Every minute the truck sits waiting costs $1 to $3. Stake your forms the day before, have your crew briefed and in position, keep the access path clear, and have screed rails set at the correct height before the truck pulls in.
- Use volumetric mixing for small jobs under 2 yards. The per-yard premium on volumetric mixing ($20-$30/yard) is often less than the combination of a short-load fee and a standard delivery charge for very small orders.
- Open a contractor account. Suppliers typically give account customers $5 to $20 per yard off the retail walk-up price, as well as priority scheduling during peak season. If you pour more than 15-20 yards per year, setting up an account pays for itself quickly.
Calculate Your Order Before You Call
Know your cubic yard number, your required PSI, and your preferred delivery date before you contact a supplier. Suppliers give better attention and quicker quotes to buyers who know exactly what they need. Use these tools to prepare:
- Concrete Slab Calculator – Volume for any slab
- Concrete Driveway Calculator – Driveway volume and bags
- Concrete Footing Calculator – Strip and pad footings
- Ready-Mix Truck Calculator – How many truck loads you need
- Concrete Delivery Cost Calculator – Full delivery cost estimate
- Concrete Price Per Yard Calculator – Material cost by volume
- Concrete Cost Calculator – Total project material budget
How to Calculate Your Total Delivery Cost
Use this simple formula to estimate what you will pay before you call a supplier.
Total Concrete Delivery Cost Formula
+ Short-Load Fee (if under full load)
+ Distance Overage (miles beyond free zone x rate per mile)
+ Fuel Surcharge
+ Weekend Fee (if applicable)
+ Pump Truck (if needed)
+ Specialty Mix Premium (if applicable)
Example: 5-Yard Saturday Pour in Atlanta, GA – 25 Miles from Plant
Concrete (5 yards x 3,500 PSI at $148/yard): $740
Short-load fee (under 10 yards): $80
Distance overage (5 miles beyond 20-mile free zone x $12/mile): $60
Fuel surcharge: $30
Saturday delivery fee: $75
Total delivered cost: $985
Effective cost per yard: $197 – vs. $148 advertised base rate
This example shows how a $148/yard base price becomes $197/yard effective once all fees are added. That 33% gap is not unusual for small weekend orders with distance surcharges. Running the Concrete Delivery Cost Calculator with your real numbers will give you a tight estimate before you call.
For context on how delivery cost fits into your full project budget, also check the Concrete Labor Cost Calculator, Concrete Pour Cost Calculator, and the Concrete Cost Calculator. For a deeper look at how mix type affects what you pay per yard, read the Ready-Mix Concrete Prices guide and the Concrete PSI Guide.
Frequently Asked Questions
Related Articles
-
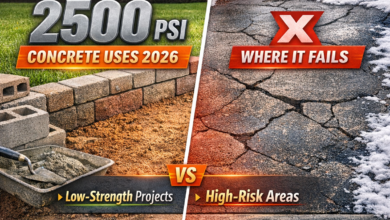
2500 PSI Concrete Uses 2026: Where It Works and Where It Doesn’tFebruary 22, 2026