Pouring Concrete in the Rain: 2026 Complete Guide
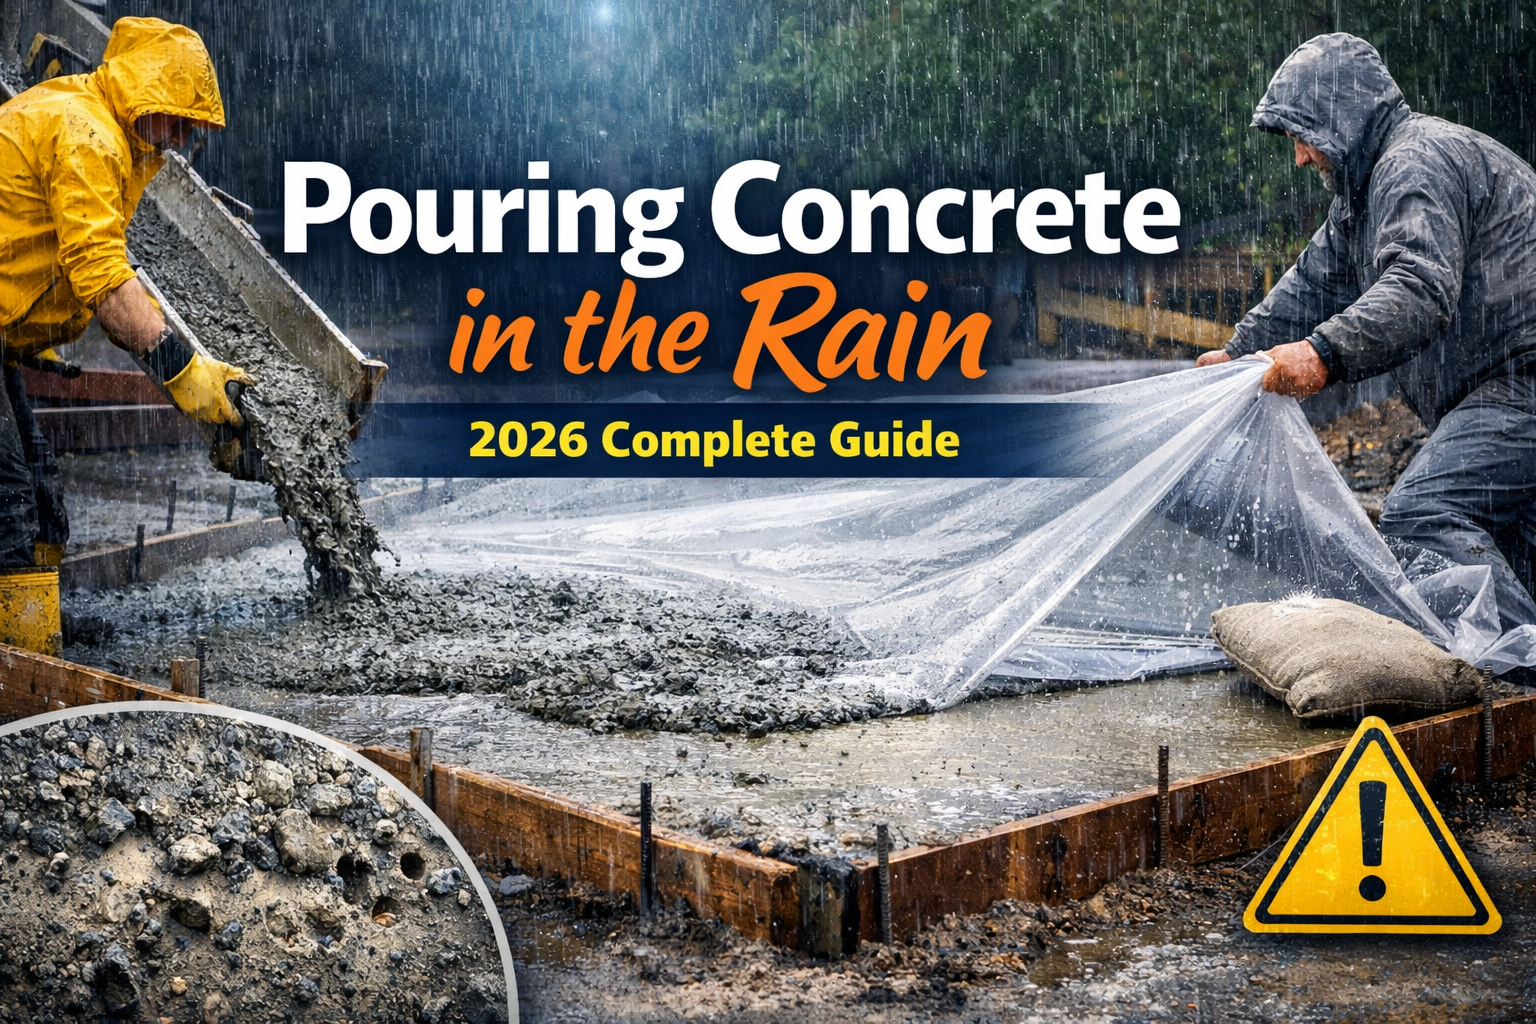
The short answer: don’t pour concrete in the rain. But the full answer is more nuanced than that. Pouring concrete in the rain during the first 4-6 hours after finishing can permanently damage your slab – washing out the surface cement paste, spiking the water-cement ratio, and causing pitting and surface scaling that no sealer can fix. Rain after the surface has set is a different story entirely. This guide tells you exactly when rain is dangerous, when it’s harmless, how to protect fresh concrete if rain catches you by surprise, and what your options are if your slab takes a hit before it was ready.
Why Rain Damages Fresh Concrete
Concrete strength comes from the water-cement ratio – the amount of water relative to cement in the mix. Your ready-mix supplier carefully batches this ratio to hit a specific design strength, typically 3,000-4,000 PSI for residential work. When rain falls on fresh concrete before it sets, that ratio gets thrown off. The surface layer absorbs uncontrolled rainwater, raising the local w/c ratio above what was designed.
The result: the surface layer ends up weaker than the rest of the slab. It scales and flakes in freeze-thaw cycles, absorbs water and de-icing salts more readily, and has a rough, pitted texture that makes it look worn before its time. None of these effects show up immediately – they develop over the first two or three winters and get worse every year.
The Washout Problem
Beyond diluting the surface, heavy rain physically erodes fresh concrete. Raindrops hitting an unset surface carry enough energy to splash the fine cement paste out of the mix matrix. The surface develops a sandy, aggregate-rich texture as the cement paste washes away – leaving behind a weak, porous layer that has lost the binding agent that gives concrete its strength.
A concrete surface goes through three distinct phases after placement: plastic (first 2-4 hours, highly vulnerable), setting (4-8 hours, increasingly resistant), and hardened (after initial set, rain-resistant). The risk window is almost entirely in the plastic phase. Concrete that has taken its initial set – even if it still feels slightly soft – is dramatically more resistant to rain damage than concrete in the plastic phase. Use the concrete set time calculator to know exactly when your mix transitions out of the vulnerable window.
Rain Timing – The Critical Windows Explained
Not all rain is the same threat. Whether rain damages fresh concrete depends almost entirely on when it falls relative to the finishing time – not how hard it rains. Here’s the complete breakdown of every timing window you need to understand.
Before the Pour – Wet Subgrade
Light rain in the hours before a pour is generally not a problem – a damp subgrade is actually preferred over a dry one. Dry soil and forms can absorb water from the fresh concrete mix, effectively raising the w/c ratio from the bottom instead of the top. A lightly dampened subgrade prevents this absorption without adding standing water.
The problem is standing water in the forms or on the subgrade at the time of placement. Concrete discharged into standing water will be diluted at the bottom of the slab immediately. Check your forms after any pre-pour rain and pump or sponge out any standing water before the truck arrives.
During the Pour – Active Rain on Wet Concrete
Rain falling directly on fresh concrete during placement is the worst-case scenario. The mix hasn’t been screeded or finished yet, the surface cement paste is fully exposed, and rain can quickly raise the surface w/c ratio well above the designed value. In heavy rain, the mix can become unworkable as the top layer becomes watery and refuses to consolidate properly.
Stop discharge immediately and cover all already-placed concrete with plastic sheeting. Do not attempt to finish a surface that has rain standing on it. If you have a partial pour down and rain shuts you down, you may face a cold joint issue when the weather clears – consult your ready-mix supplier about whether to complete the pour with a construction joint or attempt to re-work the existing concrete. Never add the next load on top of rain-diluted concrete without removing the compromised layer first.
First 4-6 Hours After Finishing – Maximum Risk
This is the highest-risk window. The surface cement paste is still unbound, the bleed water may or may not have fully cleared, and raindrops hitting the surface cause direct erosion and dilution. Even light rain during this window can cause surface pitting. Heavy rain can strip the surface paste entirely and leave an aggregate-exposed finish that performs like a much weaker mix.
6-24 Hours After Finishing – Decreasing Risk
As the concrete moves through initial set, it becomes progressively more resistant to rain. By 6-8 hours, the surface has usually taken enough of a set that light rain (drizzle, mist) causes little or no damage. Moderate rain can still cause some surface marking or slight texture change. Heavy rain with ponding is still a concern. The risk window effectively closes around the 8-12 hour mark for most standard 3,000-4,000 PSI mixes at 65-75°F.
After 24 Hours – Essentially Safe
Rain after 24 hours is a non-issue for surface integrity. At this point the surface has hardened sufficiently to resist rain erosion entirely. Rain after 24 hours may actually be beneficial – it provides additional moisture for hydration, especially in summer conditions where the surface might otherwise dry too quickly.
| Rain Timing | Risk Level | Likely Damage | Action Required |
|---|---|---|---|
| Before pour (standing water in forms) | High | Diluted bottom layer, weakened slab-subbase bond | Remove standing water before discharge |
| During active pour | Very High | Surface washout, unworkable mix, cold joints | Stop pour, cover immediately |
| 0-4 hours after finishing | Severe | Surface erosion, pitting, severe w/c ratio increase | Cover within minutes or postpone pour |
| 4-6 hours after finishing | High | Surface pitting, moderate strength loss in top layer | Cover if possible; light rain marginal risk |
| 6-12 hours after finishing | Moderate | Minor surface marking from heavy rain; light rain harmless | Cover if heavy rain forecast |
| 12-24 hours after finishing | Low | Minimal – surface mostly set | No action needed for normal rain |
| After 24 hours | None | No damage – potentially beneficial | No action needed |
The exact timing of your initial set depends on your mix design, temperature, and admixtures. Use the concrete set time calculator to estimate your specific window based on your pour conditions.
How to Read Your Forecast Before Scheduling
The best defense against rain damage is scheduling. A good weather check before booking your ready-mix truck costs nothing and can save you thousands in repairs or a re-pour. Here’s exactly what to look for.
The 24-Hour Forecast Rule
You need a clean 24-hour window after your expected finishing time – not just a dry pour day. If you finish a driveway at 10 AM, you need the forecast to be dry through 10 AM the next day to be in the safe zone. Many homeowners check the pour day only and get caught by overnight rain during the most vulnerable curing hours.
💡 Go / No-Go Rain Forecast Guide
- Rain probability below 20% in next 24 hours: Proceed normally. Have plastic sheeting staged as a precaution.
- Rain probability 20-40% within 6 hours of finish: Proceed with a firm plan. Stage plastic sheeting, have it pre-cut, and assign a crew member to cover immediately after finishing if rain starts.
- Rain probability above 40% within 6 hours of finish: Reschedule. The cancellation fee ($50-100 from most ready-mix plants in 2026) is far less than the repair cost.
- Thunderstorm forecast any time in the 24-hour window: Reschedule. Thunderstorm rain is typically heavy and unpredictable – not manageable with plastic sheeting alone.
What to Look at in the Forecast
- Hourly precipitation probability: Not just daily totals. A 30% daily average can hide a 70% probability window at 2 PM.
- Rainfall intensity: Light (under 0.1 in/hr) is dramatically less damaging than moderate (0.1-0.3 in/hr) or heavy (above 0.3 in/hr).
- Wind speed: Wind-driven rain hits concrete at an angle, increasing the erosion effect compared to vertical rainfall.
- Temperature forecast: Cold rain on a cool day slows initial set, extending the vulnerability window. Use the curing temperature calculator to see how cool rainy conditions shift your timeline.
🌧️ Know Your Set Time Before You Schedule Your Pour
The set time calculator tells you exactly how long your mix stays in the vulnerable rain-damage window based on your specific conditions. Know this number before you book.
Calculate My Set Time →Protection Materials – What to Have On-Site
You should have rain protection materials on-site before the truck arrives – not while you’re watching rain clouds build on the horizon. A trip to the hardware store while fresh concrete is getting rained on is one of the most expensive mistakes in DIY concrete work. Here’s exactly what you need and what it costs in 2026.
6-Mil Polyethylene Sheeting – Your Primary Tool
Heavy 6-mil polyethylene sheeting is the standard protection for fresh concrete against rain. It’s inexpensive, easy to store, and can be deployed in minutes by two people. For a typical 20×30-foot driveway, you need at least 700-800 sq ft of sheeting to cover the slab with edge overlap.
- Cost: $0.05-0.10 per square foot, or about $35-80 for a 20×100-foot roll in 2026
- How to use: Pre-cut to your slab dimensions before the pour. Roll it up loosely at the edge of the slab. After finishing and once bleed water clears the surface, unroll and lay over the slab. Weight all edges with 2×4 lumber, sandbags, or concrete blocks to prevent wind from lifting it.
- What NOT to do: Never lay plastic directly over bleed water. The trapped water causes surface delamination – the same damage you’re trying to prevent from rain. Wait for the surface sheen to disappear before covering.
Temporary Canopy or Pop-Up Shelter
For small pours (under 400 sq ft), a 10×20-foot commercial pop-up canopy provides overhead rain protection without any contact with the concrete surface. You can work under it during a light drizzle without stopping the pour. Cost: $150-350 to buy or $75-125/day to rent from a party supply or construction rental company in 2026.
Pump Enclosures for Large Commercial Pours
Large commercial pours in rainy climates use full enclosure tents stretched over scaffolding frames. These are rented from specialty concrete suppliers and can cover thousands of square feet. Not practical for residential work but worth knowing about if you’re managing a large commercial project in a rainy region.
Before the concrete truck arrives, pre-cut your plastic sheeting to the exact slab dimensions and fold it accordion-style along one edge of the pour area. If rain starts unexpectedly after finishing, two people can unfold and cover a 600 sq ft slab in under 3 minutes. Without pre-cutting, covering that same slab safely takes 10-15 minutes – longer than your damage window in heavy rain. This $40-60 of pre-staged plastic is the cheapest insurance you can buy for a $3,000-5,000 concrete project.
How to Cover Fresh Concrete the Right Way
Covering fresh concrete incorrectly can cause as much damage as the rain you’re trying to prevent. There’s a right sequence and a right technique – and skipping either one creates problems you won’t see until the first winter.
Step 1 – Wait for Bleed Water to Clear
After screeding and before final troweling, fresh concrete goes through a bleed water phase. Water inside the mix migrates toward the surface and forms a wet sheen. This is normal. Your covering sequence starts only after this surface sheen disappears – which signals that the surface cement paste is beginning to bind.
If you cover with plastic while bleed water is still present, the bleed water gets trapped between the plastic and the concrete surface. It can’t evaporate. This trapped water creates a zone of high w/c ratio right at the surface – the same damage as rain, caused by your own protection method. The result is surface delamination and scaling in the first winter.
Step 2 – Cover Without Touching the Surface
After bleed water clears and finishing is complete, you have a short window to apply your curing compound and then cover. The sequence:
- Apply liquid curing compound by sprayer immediately after final troweling (this is always the first step after finishing, rain or not)
- Once the curing compound tack-dries (about 20-30 minutes), lay polyethylene sheeting from one edge to the other in a single smooth motion
- Weight all edges with 2×4 lumber laid flat, sandbags every 4-6 feet, or concrete blocks at corners
- Check edges every hour if wind is present – an edge that flips back exposes the most vulnerable section of the slab (corners and perimeter set slower than the center)
Step 3 – Managing the Surface Under the Cover
Plastic sheeting traps both rain and moisture effectively – which is good for protection but creates a microclimate under the sheet that needs monitoring. In warm weather, covered concrete can build up heat. Check the surface temperature if ambient temps are above 85°F – if the plastic-covered slab feels hot to the touch through the plastic, vent it slightly by lifting one corner to allow air circulation.
🧮 Plan Your Pour Materials Before Scheduling
Get accurate cubic yard estimates and 2026 pricing for your driveway or slab project. Know your quantities before you call the ready-mix plant.
Calculate My Driveway →Assessing and Recovering Rain-Damaged Concrete
Rain hit your concrete before the surface set. Now what? The answer depends on when you caught it, how much damage was done, and whether the concrete is still in the plastic or setting phase. Here’s the decision tree.
Caught It During the Pour or Within 2 Hours
If rain started during placement or within the first 2 hours after finishing and the concrete is still plastic, you have a narrow window to act. Stop the rain from hitting the surface immediately – cover as best you can. Then assess:
- If surface is still plastic and damage is local (one area pitted): Re-screed the affected area with a bull float, removing the rain-diluted surface layer. Re-finish after rain stops and the area blends with the surrounding concrete.
- If surface is still plastic and rain was heavy across the whole slab: The entire top 1/4-inch layer may be compromised. Consult your ready-mix supplier or a structural engineer before proceeding – the decision to re-screed the full surface or remove and re-pour depends on how much water was absorbed.
- If standing water has pooled in low spots: Do not attempt to finish over it. Squeegee or sponge out standing water carefully – never broom it across the surface, which pushes diluted paste over undamaged areas.
Discovered After Final Set (12+ Hours)
If you discover rain damage after the concrete has hardened, your repair options are limited to surface treatments. The underlying damage – increased w/c ratio, weakened paste matrix – cannot be reversed. Here’s what you can realistically do:
- Minor surface pitting (small craters under 1/4-inch deep): A penetrating concrete sealer can fill minor surface porosity and slow future water infiltration. This doesn’t restore strength but slows deterioration. Typical sealer cost: $0.15-0.30/sq ft in 2026.
- Widespread surface pitting or erosion: A bonded concrete overlay (microtoping or self-leveling overlay) applied by a professional can restore surface appearance and improve surface durability. Cost: $3-8/sq ft depending on product and labor.
- Severe surface washout (aggregate exposed over large area): Full slab removal and re-pour is the only reliable fix. Cost: $6-12/sq ft for demo and re-pour on a residential driveway in 2026.
💼 Example: Rain Damage Scenario and Repair Cost
You poured a 20×25-foot (500 sq ft) driveway. Rain started 2 hours after finishing – moderate intensity for 20 minutes. You covered with plastic when the rain started but 200 sq ft of the slab was exposed before you could cover it.
Damage assessment (discovered at 48 hours):
Exposed 200 sq ft area: light to moderate surface pitting, surface texture slightly rough compared to covered section
Covered 300 sq ft area: normal surface, no damage
Repair options for the 200 sq ft damaged section:
Option 1 – Penetrating sealer ($0.25/sq ft): $50 – slows damage but doesn’t fix it
Option 2 – Bonded micro-overlay ($5/sq ft installed): $1,000 – restores surface appearance
Option 3 – Demolish and re-pour the affected section ($9/sq ft all-in): $1,800
Prevention cost if you had plastic pre-staged: $50 in 6-mil poly + 10 minutes of work = $0 in repairs
Calculate your full project cost with the driveway concrete calculator before you pour.
Water-Cement Ratio and Strength Loss Formula
Use the water-cement ratio calculator to understand how water addition affects your specific mix design strength
Light Rain vs. Heavy Rain – Different Risks
Rain isn’t a single threat – a light drizzle and a thunderstorm hit fresh concrete very differently. Understanding the distinction helps you make better go/no-go decisions and right-size your protection response.
Light Rain and Drizzle (Under 0.1 inch/hour)
Light rain or drizzle in the first 4-6 hours after finishing causes moderate surface pitting – small, shallow craters in the cement paste surface. The damage is real but usually cosmetic and limited to the top 1/16-inch. After initial set, light rain has minimal impact. After 8-12 hours, light rain is essentially harmless and may even help curing by adding surface moisture.
For light rain, pre-staged plastic sheeting provides complete protection. If you can cover within 5-10 minutes of light rain starting, damage is typically minimal. The bigger concern with light rain is that it often signals heavier rain is on the way – which is why checking hourly forecasts, not just the daily summary, is so important before scheduling.
Moderate to Heavy Rain (0.1-0.5+ inch/hour)
Heavy rain on fresh concrete within the first 6 hours is a serious problem. Raindrops hit the surface with enough kinetic energy to physically dislodge cement paste particles. Ponding water dissolves and washes away the surface binder. The resulting surface has a coarse, aggregate-heavy texture, low strength, high porosity, and will scale and pit through the first several freeze-thaw cycles.
Plastic sheeting is effective even in heavy rain – the concern is whether you can get it down before significant damage occurs. In a heavy downpour, 3-5 minutes of unprotected exposure can visibly mark a fresh surface. This is why pre-staging is not optional – it’s the whole strategy.
Thunderstorms – Postpone, Don’t Manage
Thunderstorm rain is heavy, unpredictable, and arrives fast. If thunderstorms are in the forecast for any point in the 24 hours after your scheduled finish time, postpone the pour. There’s no practical protection strategy for thunderstorm-intensity rainfall on a residential driveway pour. The cancellation fee from your ready-mix supplier ($50-100 in 2026 at most plants) is the right business decision every time a thunderstorm is on the radar.
Most ready-mix suppliers allow pour cancellation with 24 hours notice at no charge and cancellations within 24 hours for a nominal fee of $50-100 in 2026. Some suppliers charge a short-load fee if the truck has already loaded but hasn’t left the plant. Call your supplier as soon as you see a problematic forecast – the earlier you call, the lower the fee. Never let sunk-cost thinking push you into pouring in dangerous rain conditions. The pour cost is recoverable. A rain-damaged slab is not.
For the full seasonal picture of when to pour and when to wait, the best time to pour concrete guide covers every weather variable across all US regions and seasons.
Common Rain-Related Concrete Mistakes
Rain damage on residential concrete projects almost always comes down to one of five predictable mistakes. Knowing them in advance means you can avoid every one.
Mistake 1: Checking Only the Daily Forecast
What happens: The daily forecast shows 20% rain chance. The pour goes in at 9 AM. The daily average looks fine. But the hourly forecast shows a 60% rain window at 1-3 PM – right in the middle of the highest-risk window. Rain hits a 4-hour-old slab and causes moderate pitting across half the surface.
The fix: Always check the hourly precipitation probability for the 24 hours following your expected finish time – not just the daily summary. Weather apps like Weather.com, Weather Underground, and the National Weather Service hourly forecast tool all provide this data free.
Mistake 2: Covering While Bleed Water Is Present
What happens: Rain starts 90 minutes after finishing. The crew panics and throws plastic sheeting over the surface immediately. The surface still has active bleed water. The trapped bleed water creates a high w/c ratio zone right at the surface. By winter, the top 1/16-inch scales off in sheets across the covered area – damage caused not by the rain but by the protection method.
The fix: If rain starts before bleed water clears and you cannot cover without trapping bleed water, use a canopy or tent structure that provides overhead protection without surface contact. If neither option is available, light rain on a concrete surface with active bleed water is less damaging than trapping bleed water under plastic. Make the call based on rain intensity.
Mistake 3: Finishing Over Rain-Diluted Surface
What happens: Light rain hit the surface early, then stopped. The crew proceeds to trowel-finish the surface, working the rain-diluted paste layer into the finish. The result is a smooth-looking surface with a weak, high w/c ratio layer troweled to a hard tack. It looks perfect at 28 days. It starts scaling by winter 2.
The fix: If light rain hit the surface before finishing, let the affected areas bleed out fully again before troweling. In some cases, a light bull-float pass can help re-blend the diluted surface layer into the slab before final finishing. Never trowel directly over rain water standing on the surface. See how to finish concrete for the correct sequence of finishing steps after any surface disturbance.
Mistake 4: Not Protecting the Perimeter
What happens: Plastic sheeting is laid over the slab and weighted at the center. But the edges and corners are left exposed or only loosely covered. Wind-driven rain comes in from the sides and hits the most vulnerable areas – slab edges and corners, which are typically the last sections to set due to lower mass and heat generation. Perimeter cracking and edge scaling develop over the first two winters.
The fix: Use 2×4 lumber laid flat along every edge, not just at corners. Overlap the plastic at least 6 inches past the slab edge on all sides so wind can’t drive rain under the sheeting at the perimeter.
Mistake 5: Adding Water to Re-Work Rain-Diluted Areas
What happens: Rain softened a section of the surface. A crew member adds water to “re-temper” the stiff surrounding concrete so it blends in. This adds even more water to an already high w/c area. The result is a patch that sets weaker than the surrounding concrete and becomes the first section to scale and crack.
The fix: Never add water to re-temper concrete. If rain has partially set a section, the choice is re-screed with a bull float (removing the damaged layer) or leave it alone. Adding water is never the right answer. The concrete mixing instructions guide and the water-cement ratio calculator both explain exactly why field water addition is so damaging.
Calculators for Planning Your Pour
Smart pour scheduling starts with knowing your material quantities, set time window, and curing requirements before you call the supplier. These calculators cover every variable so you arrive on pour day fully prepared.
Timing and Weather Planning
- Concrete Set Time Calculator – Know your exact rain vulnerability window based on mix and temperature
- Curing Temperature Calculator – Adjusted timelines for rainy, cool conditions that slow set
- Concrete PSI Strength Calculator – Understand how rain-related w/c ratio changes affect design strength
- Water-Cement Ratio Calculator – See exactly what rain-added water does to your surface PSI
Material Quantities
- Driveway Concrete Calculator – Cubic yards and 2026 pricing for your exact driveway dimensions
- Concrete Patio Calculator – Material and cost estimates for patio pours
- Concrete Slab Calculator – Cubic yards for floors, walkways, and general flatwork
- Concrete Mix Calculator – Proportions and batch weights for your mix design
- Concrete Yardage Calculator – Quick volume conversion from your measurements
- Concrete Aggregate Calculator – Stone, sand, and gravel quantities for site-batched mixes
Cost and Delivery
- Concrete Cost Calculator – Full project cost with 2026 USA ready-mix pricing
- Ready-Mix Truck Calculator – Number of loads your project needs and minimum order planning
For the complete pour and finish process, see how to pour a concrete slab and how to pour a concrete driveway. For finishing steps including how to handle surface disturbances from light rain, see how to finish concrete. And for the complete seasonal scheduling guide covering rain, heat, and cold, see the concrete curing and drying time guide.
🎯 Key Takeaways
- Do not pour concrete in active rain or when rain is forecast above 40% probability within 6 hours of your expected finish time.
- The critical danger window is 0-6 hours after finishing – rain during this period can cause surface pitting, w/c ratio increase, and 20-40% surface strength loss.
- Rain after 24 hours is harmless and may even benefit curing by providing additional hydration moisture.
- Always pre-cut and stage 6-mil plastic sheeting before the truck arrives – not after rain starts. A 600 sq ft slab needs 700-800 sq ft of sheeting with edge overlap.
- Never cover concrete while bleed water is still visible – trapped bleed water causes the same delamination damage as the rain you’re trying to prevent.
- Thunderstorm in the 24-hour forecast = postpone the pour. Ready-mix cancellation fees ($50-100 in 2026) are far less than repair costs.
- Never add water to re-temper rain-softened concrete – this increases w/c ratio further and weakens the affected section permanently.
- Minor surface pitting from light rain can be partially addressed with penetrating sealer ($0.15-0.30/sq ft) or bonded overlays ($3-8/sq ft).
- Severe surface washout requires full removal and re-pour at $6-12/sq ft – proof that a $50 plastic sheet is one of the highest-ROI investments on any pour day.
- Check hourly forecasts, not just daily totals – a 20% daily probability can hide a 70% window during your critical curing hours.
Frequently Asked Questions
No – you should not pour concrete in active rain. Rain falling on fresh concrete before it sets increases the surface water-cement ratio, causes pitting and surface erosion, and can permanently weaken the top layer by 20-40%. The safest threshold is no rain forecast above 20% probability for the 24 hours following your finish time. If rain is possible but not likely, stage plastic sheeting before the truck arrives and have a crew member ready to cover the moment rain starts. If thunderstorms are forecast anywhere in the 24-hour window, postpone the pour – cancellation fees are far cheaper than repair costs.
Rain on fresh concrete before it sets adds uncontrolled water to the surface, raising the local water-cement ratio above its designed value. Every 0.10 increase in w/c ratio costs approximately 1,000 PSI of surface strength. Beyond dilution, heavy rain physically erodes the surface cement paste, leaving behind an aggregate-rich surface that is weak, porous, and prone to scaling in freeze-thaw cycles. The damage is permanent once the concrete hardens – it cannot be reversed by sealing or surface treatment. Minor pitting can be addressed with bonded overlays at $3-8/sq ft in 2026; severe washout requires full removal and re-pour.
Rain is a serious threat for the first 4-6 hours after finishing. During this window, the surface cement paste is still unbound and fully vulnerable to washout and dilution. Light rain after 6-8 hours causes minimal damage as the surface approaches initial set. Any rain after 24 hours is essentially harmless – the hardened surface resists rain erosion completely and late-stage rain can even benefit curing by adding moisture. Use the concrete set time calculator to find your specific window based on your mix design and temperature.
The most effective protection is pre-staged 6-mil polyethylene sheeting pre-cut to your slab dimensions and positioned at the slab edge before the truck arrives. After finishing and once bleed water clears the surface, roll the plastic over the slab and weight all edges. For small pours, a commercial pop-up canopy provides overhead coverage without surface contact. Never cover while bleed water is still present on the surface – trapped bleed water causes the same delamination damage as rain. Have the plastic staged and ready before discharge begins, not after rain starts.
Light rain (drizzle under 0.1 inch/hour) in the first 4-6 hours after finishing causes minor surface pitting – shallow craters in the cement paste surface. The damage is real but usually limited to the top 1/16-inch. After initial set (6-8 hours), light rain is minimally damaging. After 12-24 hours, light rain is harmless. The key distinction is that even light rain during the plastic phase disrupts the surface cement paste matrix, creating a zone of elevated w/c ratio and reduced durability even if the surface looks acceptable after it dries.
Minor surface pitting from light rain can be slowed – but not fully reversed – by a penetrating concrete sealer at $0.15-0.30/sq ft in 2026. Moderate surface pitting or erosion can be addressed with a bonded micro-overlay or self-leveling concrete overlay at $3-8/sq ft professionally installed. Severe surface washout where the cement paste has been eroded over a large area cannot be repaired by surface treatment – the weakened layer must be removed by grinding (at $1-3/sq ft) and replaced with an overlay. In the most severe cases, full slab demolition and re-pour at $6-12/sq ft all-in is the only reliable solution.
Yes, if rain probability exceeds 40% within 6 hours of your expected finish time, or if thunderstorms are forecast anywhere in the 24-hour window after finishing. Most ready-mix suppliers allow cancellation with 24+ hours notice for free or for a nominal $50-100 fee within 24 hours in 2026. That fee is always the correct financial decision compared to repairing or replacing a rain-damaged slab. If rain probability is 20-40%, proceed with pre-staged protection materials and a firm plan to cover immediately after finishing.
It depends entirely on timing. Rain before initial set (first 6-8 hours after finishing) hurts concrete by diluting the surface and causing erosion. Rain after initial set – especially after 24 hours – can help curing by providing additional moisture for hydration. Concrete needs water for the chemical reaction that builds strength, and moisture loss during the 7-day curing window is one of the most common causes of reduced long-term strength. A light rain at day 3 or 4 is genuinely beneficial. It’s only the timing relative to initial set that determines whether rain helps or hurts. For the full curing timeline, see the concrete curing and drying time guide.
🧮 Plan Your Pour Day the Right Way
Get accurate material quantities, set time windows, and 2026 ready-mix pricing before you schedule. Our free calculators cover every concrete project type.
View All Free Calculators →🔗 Related Calculators and Guides
- → Concrete Set Time Calculator – Know your exact rain vulnerability window for your mix and conditions
- → Water-Cement Ratio Calculator – See how rain-added water affects your surface strength
- → Concrete PSI Strength Calculator – Calculate strength at any stage of curing including after rain exposure
- → Curing Temperature Calculator – Adjusted set and strength timelines for cool, rainy conditions
- → Driveway Concrete Calculator – Cubic yards and 2026 pricing for your exact driveway dimensions
- → Concrete Patio Calculator – Material quantities and cost for patio pours
- → Concrete Slab Calculator – Cubic yards for general flatwork, floors, and walkways
- → Concrete Cost Calculator – Full project cost with 2026 USA ready-mix pricing
- → Concrete Curing and Drying Time Guide – Complete seasonal curing methods and timelines
- → How to Pour a Concrete Driveway – Step-by-step driveway pour guide including weather considerations