How to Pour a Concrete Slab Like a Pro (2026 Complete Guide)
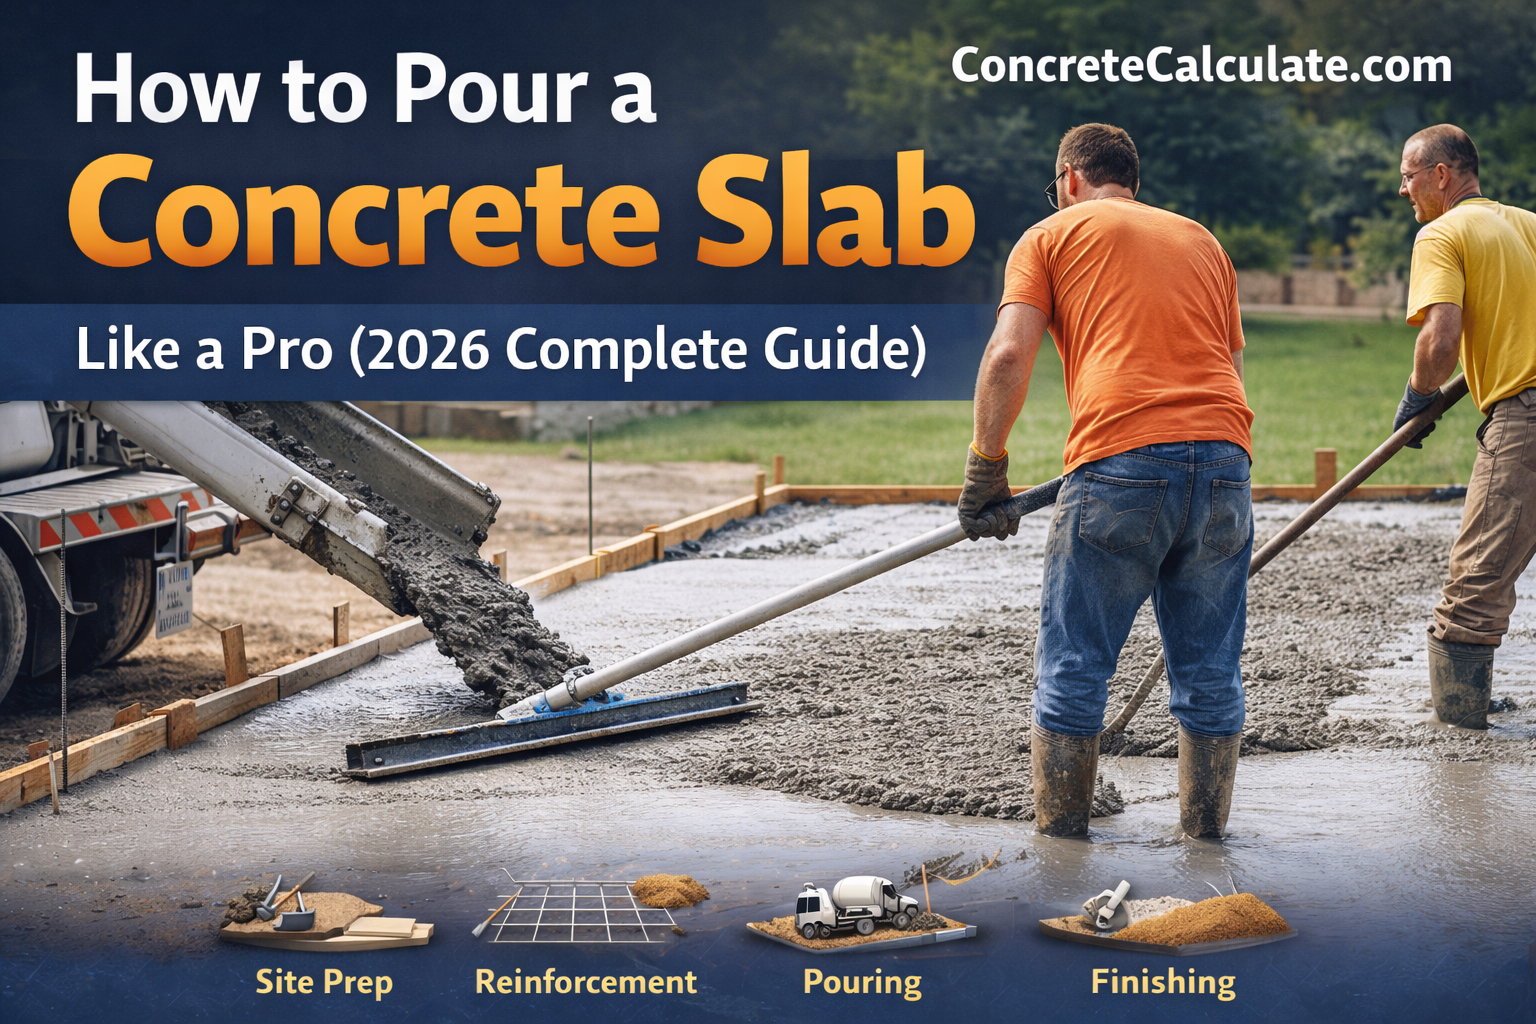
Ready to pour your first concrete slab? Pouring a concrete slab is one of the most valuable DIY skills you can master, potentially saving $2,500 to $5,000 in labor costs on a typical two-car driveway. Whether you’re building a patio, garage floor, or shed foundation, this guide walks you through every step from site preparation to final finishing. With 2026 pricing, USA building code requirements, and proven techniques used by professional contractors, you’ll learn exactly how to pour a concrete slab that lasts 30+ years.
Planning and Site Preparation
Success with concrete starts long before the truck arrives. Proper planning prevents expensive mistakes and ensures your slab performs as designed for decades.
Determine Your Slab Requirements
First, establish the thickness needed for your project. Standard residential concrete slabs in the USA follow these guidelines:
| Project Type | Minimum Thickness | Recommended Thickness |
|---|---|---|
| Sidewalks and patios | 3.5 inches | 4 inches |
| Residential driveways | 4 inches | 6 inches |
| Garage floors | 4 inches | 6 inches |
| Commercial driveways | 6 inches | 8 inches |
| Shed foundations | 3.5 inches | 4 inches |
If you’re in a freeze-thaw climate (most of the northern USA), add 1-2 inches to these recommendations. Cold weather expansion and contraction requires extra thickness to prevent concrete cracking.
Before starting any concrete project, verify requirements with your local building department. Many municipalities require permits for slabs over 100-200 square feet, and inspectors must approve your forms before pouring. Thickness requirements, reinforcement specifications, and frost depth regulations vary by county.
Gather Required Tools and Materials
Having everything on-site before you start prevents delays once concrete is flowing. Here’s your complete checklist:
Excavation and base tools:
- Square-point shovel
- Wheelbarrow
- Hand tamper or plate compactor
- 100-foot tape measure
- String line and stakes
- 4-foot level
Form building materials:
- 2×4 or 2×6 lumber (depending on slab thickness)
- 1×4 or 2×4 stakes every 3-4 feet
- 3-inch deck screws
- Cordless drill
Concrete finishing tools:
- Magnesium or aluminum screed board
- Bull float (8-foot recommended)
- Magnesium hand float
- Steel finishing trowel
- Edger tool
- Groover tool (for control joints)
- Push broom for texture
- Come-along rake
If you’re only pouring one slab, consider renting tools like bull floats, plate compactors, and power screeds. A full toolkit rental runs $75-150 for a weekend. For multiple projects, investing $300-500 in quality hand tools pays for itself quickly.
Excavation and Ground Work
Proper excavation creates a stable foundation that prevents settling, cracking, and water problems. This step takes the most physical labor but determines how well your slab performs long-term.
Layout Your Project Area
Use stakes and string line to mark the exact perimeter of your slab. For rectangular slabs, use the 3-4-5 triangle method to ensure perfect 90-degree corners.
Measure 3 feet along one side from a corner, mark it. Measure 4 feet along the adjacent side, mark it. The diagonal between these marks should be exactly 5 feet if you have a square corner. Adjust until it’s perfect.
Calculate Excavation Depth
Your total excavation depth includes the gravel base plus concrete thickness. Standard formula:
Total Excavation Depth
For a 4-inch concrete patio with 4 inches of gravel base, excavate 8 inches deep. For a 6-inch driveway with 4 inches of gravel, dig 10 inches total.
Begin Digging
Remove all grass, roots, rocks, and organic material within your marked area. Dig to your calculated depth, keeping the bottom as level as possible.
For projects larger than 200 square feet, consider renting a skid steer or hiring an excavator. Manual digging for a 400-square-foot patio (10×40 feet at 8 inches deep) means removing roughly 10 cubic yards of material, which takes 15-20 hours of hard labor.
💼 Example: Small Patio Excavation
You’re pouring a 12-foot x 16-foot patio (192 square feet).
Plan:
Concrete thickness: 4 inches
Gravel base: 4 inches
Total excavation: 8 inches
Material removal:
192 sq ft × 0.67 feet (8 inches) = 128.6 cubic feet = 4.76 cubic yards
Time estimate: 6-8 hours for one person with a shovel and wheelbarrow
Slope your excavation slightly away from buildings (1/8 inch drop per foot). This built-in drainage prevents water from pooling against foundations. A 10-foot-wide patio should slope 1.25 inches from house to outer edge.
Installing the Gravel Base
The gravel base (also called sub-base) prevents settling, improves drainage, and provides a stable platform for concrete. Skipping this step is the number one cause of slab failure.
Choose the Right Base Material
In the USA, contractors typically use one of these materials:
- Crushed stone (3/4 inch): Best choice for most applications, excellent drainage
- Gravel (pea gravel): Good drainage but doesn’t compact as firmly
- Road base (ABC): Mix of stone sizes, compacts extremely well
- Class 5 gravel: Regional name for crushed limestone mix
Use our gravel calculator or crushed stone calculator to determine how much you need.
Install and Compact the Base
Pour your gravel into the excavated area and spread it evenly using a rake. Aim for consistent depth across the entire surface.
Compact in layers. If you need 4 inches of base material, pour 2 inches, compact it, then add the final 2 inches and compact again. This prevents voids and soft spots.
For hand tamping (projects under 100 square feet), use a hand tamper and compact with overlapping strikes. For larger projects, rent a plate compactor ($50-75 per day) and make 3-4 passes over the entire area.
Walk across your compacted base. If you sink more than 1/4 inch, it needs more compaction. Properly compacted base should feel rock-solid underfoot with almost no movement.
Install Vapor Barrier (Optional but Recommended)
For garage floors and basement slabs, lay 6-mil polyethylene sheeting over your compacted base. Overlap seams by 12 inches and tape them. This prevents ground moisture from wicking up through concrete.
For outdoor slabs like patios and driveways, vapor barriers are optional. Many contractors skip them to allow better drainage beneath the slab.
Building and Setting Forms
Forms contain the wet concrete and establish the finished height and shape of your slab. Poorly built forms lead to blowouts, uneven surfaces, and wasted concrete.
Select Form Material
Use dimensional lumber that matches your slab thickness:
- 2×4 lumber: For 3.5 to 4-inch slabs
- 2×6 lumber: For 5.5 to 6-inch slabs
- 2×8 lumber: For 7.5 to 8-inch slabs
Buy straight boards without warps or twists. Warped lumber creates wavy edges that are difficult to fix after concrete sets.
Install Form Boards
Set your form boards on top of the compacted gravel base, aligned with your string lines. The top edge of the forms represents your finished concrete surface.
Drive stakes every 3-4 feet on the outside of forms. For 2×4 forms, use 2×4 stakes cut to 18-24 inches. Drive stakes until the top sits 1/2 inch below the form top (this prevents interference with your screed board).
Screw stakes to forms using 3-inch deck screws. Drive screws from the stake into the form board, not the other way around. This prevents screw heads from catching your finishing tools.
💡 Critical Leveling Step
Use a 4-foot level to check forms in multiple directions. Forms must be level side-to-side unless you’re intentionally creating a slope for drainage. For drainage slopes, drop 1/8 to 1/4 inch per foot of run.
Crooked forms create uneven slab thickness, which means some areas will be weaker and more prone to cracking. Take your time with this step.
Brace and Strengthen Forms
For slabs larger than 10×10 feet, add horizontal bracing. Screw 2×4 braces across the outside of forms to prevent bowing when thousands of pounds of wet concrete push outward.
Backfill soil against the outside of forms to help hold them in place. Tamp this soil firmly.
A form blowout (when forms break and concrete spills out) ruins your pour and wastes hundreds of dollars. Prevent blowouts by using strong stakes every 3 feet maximum, screwing forms securely, and bracing long runs. If pouring a 6-inch driveway, double-stake corners where pressure is greatest.
Adding Reinforcement
Reinforcement doesn’t prevent cracks but it holds concrete together at cracks, preventing separation and major structural failure. For residential slabs, you have three options.
Wire Mesh (Welded Wire Fabric)
The most common reinforcement for residential slabs. Standard 6×6-inch 10-gauge wire mesh costs $50-75 per 150-square-foot roll.
Lay mesh on top of your gravel base, overlapping sheets by one full square. Use wire ties to connect overlapping sections. Support mesh on plastic or metal chairs (small stands) so it sits in the middle third of your slab thickness when concrete is poured.
Never lay mesh directly on the base. It must be suspended in the concrete to provide reinforcement. Mesh sitting on the bottom does nothing structural.
Rebar Grid
Stronger than wire mesh but more expensive and time-consuming. Used for driveways, garage floors, and any slab supporting heavy loads.
For a 4-inch slab, use #3 rebar (3/8 inch diameter) in a 24-inch grid pattern. For 6-inch slabs, use #4 rebar (1/2 inch diameter) on 18-inch centers.
Support rebar on chairs and tie intersections with wire ties. Calculate quantities with our concrete rebar calculator.
Fiber Reinforcement
Synthetic or steel fibers mixed into the concrete. Costs $3-8 extra per cubic yard. Provides crack control but not structural reinforcement like rebar does.
Fibers work well for basement floors, garage slabs, and sidewalks. Not suitable as the sole reinforcement for driveways or high-traffic areas.
| Reinforcement Type | Cost (per 100 sq ft) | Best Applications |
|---|---|---|
| Wire mesh | $35-50 | Patios, sidewalks, light-duty slabs |
| Rebar grid | $75-150 | Driveways, garage floors, heavy loads |
| Fiber reinforcement | $8-15 | Indoor slabs, crack control only |
Calculating and Ordering Concrete
Accurate concrete calculations prevent costly short-loads or expensive waste. Use the basic formula or online calculators to get precise quantities.
Calculate Cubic Yards Needed
Concrete is sold by the cubic yard in the USA. Here’s the formula:
Concrete Volume Formula
Convert inches to feet by dividing by 12
💼 Example: 20×24 Garage Floor
Dimensions:
Length: 24 feet
Width: 20 feet
Thickness: 6 inches (0.5 feet)
Calculation:
24 × 20 × 0.5 = 240 cubic feet
240 ÷ 27 = 8.89 cubic yards
Add 10% waste: 8.89 × 1.10 = 9.78 cubic yards
Order: 10 cubic yards
For complex shapes or if you want to verify your math, use our specialized calculators:
- Concrete cost calculator – includes 2026 pricing
- Slab cost calculator – full project estimates
- How to calculate concrete – detailed guide
Order the Right Concrete Mix
Specify your concrete requirements when ordering:
PSI strength:
- 3,000 PSI: Sidewalks, patios (light duty)
- 3,500 PSI: Driveways (standard)
- 4,000 PSI: Driveways with heavy vehicles, garage floors
- 4,500+ PSI: Commercial applications
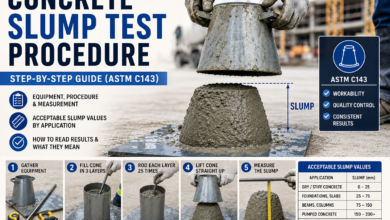
Slump: Ask for 5-6 inch slump for most residential pours. This consistency spreads easily but isn’t too wet. Lower slump (3-4 inches) is stiffer and harder to work but stronger. Higher slump (7+ inches) flows easily but can segregate and weaken.
Air entrainment: Required in freeze-thaw climates. Adds microscopic air bubbles that allow concrete to expand and contract without damage. Specify 5-7% air entrainment for outdoor slabs in northern states.
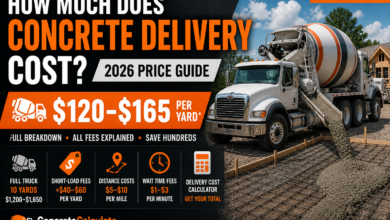
Ready-mix concrete averages $150-180 per cubic yard nationally, with regional variations. Add $60-100 delivery fee and potential short-load charges for orders under 4 yards. A typical 10-yard order costs $1,600-1,900 delivered. Check current pricing in your area.
Coordinate Delivery Logistics
Concrete trucks need clear access. Standard trucks are 35-40 feet long and weigh up to 66,000 pounds fully loaded. Verify your driveway, street, or access route can handle this.
Concrete chutes reach 10-12 feet from the truck. If your pour location is farther, arrange for a concrete pump ($300-600 additional) or plan to use wheelbarrows.
Have at least 2-3 helpers ready. You typically have 90 minutes from when mixing starts to finish screeding. Large pours (8+ cubic yards) need 4-6 people to complete on time.
Pouring the Concrete
Pour day requires speed, coordination, and proper technique. Here’s your step-by-step process to execute a perfect pour.
Weather and Timing Considerations
Pour concrete when temperatures will stay between 50-85°F for at least 7 days. Ideal conditions are 60-70°F with moderate humidity and no rain in the forecast.
Avoid pouring when:
- Temperatures will drop below 40°F within 7 days (concrete won’t cure properly)
- Temps will exceed 90°F (concrete dries too fast and cracks)
- Rain is forecast within 6-8 hours (damages surface before finishing)
- Ground is frozen or has frost
Schedule morning deliveries in summer (before midday heat) and midday deliveries in spring/fall (warmest part of day).
Final Pre-Pour Checklist
Before the truck arrives:
- Wet down gravel base (prevents it from absorbing water from concrete)
- Set all tools within arm’s reach
- Assign tasks to helpers (one person screeding, others raking and spreading)
- Have wheelbarrows ready if needed
- Verify forms are secure and level
- Check that reinforcement is properly positioned
Begin the Pour
Start at the furthest corner from the truck and work backward. This prevents walking through wet concrete and lets you fill from back to front.
Pour concrete in even layers, filling the forms to about 1 inch above the top. The extra concrete gets screeded off to create a level surface.
Use a come-along rake or shovel to distribute concrete into corners and against forms. Push and pull to eliminate voids and ensure concrete reaches every space.
Screed the Surface
Screeding levels the concrete to the height of your forms. Use a straight 2×4 or magnesium screed board longer than your slab width.
Place the screed on top of your forms. Pull it toward you using a sawing motion, moving side to side as you pull. This cuts off excess concrete and fills low spots.
Make multiple passes until the surface is uniformly level with the form tops. Low spots will fill as you work the screed back and forth.
Keep your screed board tilted slightly forward (leading edge up about 1/4 inch). This creates a cutting action that slices excess concrete rather than pushing it. Two people on large slabs makes screeding easier and more accurate.
Consolidate the Concrete
After screeding, use your rake or a concrete vibrator to eliminate air pockets. Push the rake into the concrete along forms and corners where voids tend to form.
Tap the outside of forms with a hammer to settle concrete and release trapped air. You’ll see air bubbles rise to the surface.
For thick slabs (6 inches or more), consider renting a concrete vibrator ($40-60 per day). Insert it vertically every 18-24 inches for 5-10 seconds until surface goes glassy.
Finishing Techniques
Finishing transforms rough screeded concrete into a smooth, durable surface. Timing is critical. Start finishing too early and you’ll weaken the surface. Wait too long and concrete becomes too hard to work.
Bull Floating
The first finishing step after screeding. Bull floating levels ridges, fills voids, and embeds large aggregate below the surface.
Wait until surface water disappears (typically 10-30 minutes after screeding, depending on weather). If you start while water sits on top, you’ll weaken the surface by working excess water into the concrete.
Push the bull float away from you with the leading edge tilted slightly up. Pull it back with the trailing edge up. Overlap passes by 6 inches.
Make 2-4 passes over the entire slab. The surface should look smooth and uniform when done, though it won’t yet have the final finish.
Never finish concrete while bleed water (the shiny surface moisture) remains. Working wet concrete weakens the surface and causes dusting, scaling, and premature wear. Wait for all water to evaporate before troweling or edging.
Edge the Perimeter
After bull floating, run an edger tool along all exposed edges. This creates rounded corners that resist chipping.
Hold the edger flat against the concrete with the curved part tight against the form. Push it along the edge in smooth strokes.
For professional results, follow up with a hand float to smooth any marks the edger leaves behind.
Cut Control Joints
Control joints manage where concrete cracks. Cuts should be made at these intervals:
- Sidewalks: Every 4-5 feet (roughly equal to slab width)
- Driveways: Every 8-10 feet in both directions
- Patios: Create a grid pattern with joints 10 feet apart
Joints should cut 1/4 to 1/3 of the slab depth. For a 4-inch slab, cut 1 to 1.5 inches deep.
Use a groover tool while concrete is still workable (typically 1-2 hours after pouring). Run the groover along a straight board guide for neat, straight lines.
Concrete will crack as it shrinks during curing – this is guaranteed. Control joints create intentional weak spots where cracks form in straight lines you control, rather than random zigzag patterns. Learn more about preventing problems in our guide on why concrete cracks.
Steel Troweling (Optional)
For smooth, dense surfaces on garage floors or basement slabs, steel troweling creates a hard, polished finish.
Wait until concrete is firm enough to support your weight on kneeling boards (usually 2-4 hours after pouring, depending on temperature and mix).
Hold a steel trowel nearly flat and make sweeping arcs across the surface. Apply moderate pressure. As concrete hardens, increase trowel angle and pressure.
Make 3-4 passes, waiting 15-30 minutes between each pass. The surface becomes progressively smoother and denser with each pass.
Broom Finish for Traction
Most outdoor slabs (patios, driveways, sidewalks) get a broom finish for slip resistance. After steel troweling or hand floating, drag a concrete broom across the surface.
Use steady pressure and pull in straight lines perpendicular to traffic flow. For driveways, broom side-to-side so grooves run across the direction vehicles travel.
Light broom strokes create fine texture. Heavy pressure creates deep grooves. Match texture to your needs – deeper grooves for steeper driveways, lighter texture for patios.
💡 Timing is Everything
The window for finishing concrete is limited. In 70°F weather, you have roughly 3-4 hours from pouring to final finishing. In 85°F+ heat, that window shrinks to 2 hours or less. This is why helper crew size matters. Plan to have enough people to finish your entire pour within the working time.
Curing and Protection
Curing is the most overlooked step in concrete work. Proper curing increases strength by 50% or more and dramatically improves durability and crack resistance.
What Curing Does
Concrete doesn’t dry, it cures through a chemical reaction (hydration) that requires water. If concrete dries too fast, this reaction stops and you end up with weak, brittle concrete that dusts, scales, and cracks.
Proper curing maintains moisture and temperature for at least 7 days, allowing concrete to reach target strength. Learn more about optimal conditions with our curing temperature calculator.
Curing Methods
Water curing (best method):
Keep concrete continuously wet for 7 days. Use a sprinkler, soaker hose, or hand spray multiple times daily. Start water curing as soon as surface is hard enough not to be damaged by water (usually 4-8 hours after finishing).
Plastic sheeting:
Cover the entire slab with 6-mil polyethylene plastic sheeting after finishing. Overlap edges by 12 inches and weigh down edges with lumber or blocks. This traps moisture and maintains consistent curing conditions.
Curing compound:
Spray liquid curing compound on the surface after finishing. It forms a moisture-retaining film. Costs $30-50 per gallon, covering 200-300 square feet. This method works well when daily watering isn’t practical. Calculate quantities with our curing compound calculator.
Wet burlap or blankets:
Cover concrete with burlap fabric and keep it wet. This traditional method works excellently but requires daily watering.
| Curing Method | Effectiveness | Cost | Effort Required |
|---|---|---|---|
| Water curing | Excellent | Low ($5-15) | High (daily watering) |
| Plastic sheeting | Excellent | Low ($15-30) | Low (one-time setup) |
| Curing compound | Good | Medium ($30-80) | Very low (spray once) |
| Wet burlap | Excellent | Medium ($25-60) | High (daily watering) |
Temperature Protection
Hot weather (above 85°F):
- Start water curing as soon as possible
- Keep concrete continuously damp
- Use sunshades or tarps to block direct sunlight
- Cure for minimum 7 days, 10 days is better
Cold weather (below 50°F):
- Cover with insulating blankets or straw
- Keep concrete above 40°F for at least 3-7 days
- Extend curing period to 14 days in cold weather
- Never pour if temperatures will drop below 25°F within 24 hours
Use our concrete set time calculator to estimate curing timelines for your specific weather conditions.
When Can You Walk on It?
Concrete reaches different strength levels at various times:
- 24 hours: Safe to walk on, remove forms
- 3 days: Light foot traffic, setting fence posts
- 7 days: 70% of final strength, light vehicle traffic on driveways
- 14 days: 90% strength, normal vehicle use
- 28 days: Full design strength, heavy loads OK
Driving on a driveway before 7 days risks surface damage, cracking, and permanent marks. The few days of inconvenience are worth 30+ years of trouble-free concrete. Park on the street and be patient.
Common Mistakes to Avoid
These mistakes ruin concrete pours and cost thousands in repairs or replacement. Learn from others’ errors instead of making them yourself.
1. Skipping the Gravel Base
The mistake: Pouring concrete directly on dirt to save time and money.
The result: Concrete settles unevenly, cracks badly, and fails within 5-10 years instead of lasting 30+ years.
The fix: Always install 3-4 inches of compacted gravel base. The $150-300 spent on base material prevents $3,000-8,000 replacement costs later.
2. Using Weak or Inconsistent Mix
The mistake: Ordering 2,500 PSI concrete to save $8 per yard, or adding too much water to make concrete flow easier.
The result: Weak concrete that cracks, crumbles, and dusts. Surface deteriorates within 5 years.
The fix: Order proper strength for your application (3,500 PSI minimum for driveways). Never add water beyond specified slump. Check strength requirements with our PSI strength calculator.
3. No Reinforcement
The mistake: Skipping wire mesh or rebar to save $75-150.
The result: Cracks separate and slabs sink at crack locations. Movement creates tripping hazards and water infiltration.
The fix: Always reinforce driveways, garage floors, and high-traffic slabs. Wire mesh costs are negligible compared to replacement.
4. Wrong Slab Thickness
The mistake: Pouring a 4-inch driveway instead of 6 inches to save concrete costs.
The result: Cracks appear within first year. Heavy vehicles cause permanent damage. Slab fails prematurely.
The fix: Follow thickness guidelines strictly. A 2-inch increase costs $200-400 extra but adds 15-20 years to slab life.
5. Poor Drainage Planning
The mistake: Creating a perfectly level slab with no drainage slope.
The result: Water pools on surface, accelerating freeze-thaw damage and creating ice hazards in winter.
The fix: Build in 1/8 to 1/4 inch per foot slope away from buildings. This small slope is barely visible but prevents major problems.
6. Finishing Too Early
The mistake: Troweling or edging while bleed water still sits on the surface.
The result: Weak surface that dusts, scales, and wears quickly. Finish may look good initially but deteriorates within 2-3 years.
The fix: Wait for all surface water to evaporate before floating or troweling. Patience during finishing is critical.
7. Inadequate Curing
The mistake: Pouring Friday afternoon and doing nothing all weekend while concrete bakes in the sun.
The result: Surface cracks, concrete achieves only 60-70% of design strength, premature failure.
The fix: Cover with plastic immediately after finishing or start water curing by evening. Maintain for 7 days minimum. Don’t skip this step.
8. No Control Joints
The mistake: Pouring a 20-foot patio with no control joints.
The result: Random cracks appear in ugly patterns across the slab.
The fix: Cut control joints at proper spacing. Concrete will crack somewhere – control joints ensure cracks form where you want them. Use our control joint calculator for proper spacing.
Hiring a concrete professional for a 2-hour consultation before your pour ($100-200) can save thousands in mistakes. They’ll review your site, verify forms are correct, and provide finishing guidance. This small expense pays for itself many times over.
🎯 Key Takeaways
- Site preparation is 50% of success: Proper excavation, 4 inches of compacted gravel, and level forms prevent most concrete failures
- Use correct thickness: 4 inches for patios, 6 inches for driveways, with reinforcement in all high-traffic areas
- Order 10% extra concrete: Running short mid-pour is a disaster. Slight overages are easy to use up
- Timing matters: Pour when temps will be 50-85°F for 7 days. Avoid rain within 24 hours
- Wait for bleed water: Never finish while surface moisture remains. This weakens the top layer
- Cut control joints: Every 8-10 feet on slabs to control where cracks form
- Cure properly: Cover with plastic or water-cure for 7 days minimum. This step determines final strength
- Get help: Large pours need 3-4 people. Concrete waits for no one once the truck arrives
Frequently Asked Questions
The actual pouring takes 15-45 minutes depending on size, but screeding and finishing require 2-4 hours afterward. Total time from truck arrival to final finishing ranges from 3-6 hours. Site prep (excavation, base, forms) typically takes 1-3 days before the pour.
Small slabs under 200 square feet (10×20 patio) are manageable DIY projects with 2-3 helpers. Larger driveways (400+ square feet) and projects requiring precise leveling benefit from professional contractors. Consider DIY for simple slabs where appearance isn’t critical, hire pros for driveways, garage floors, and decorative work. You can save 50-60% on labor by doing it yourself.
Sidewalks and patios need 4 inches minimum. Residential driveways require 6 inches for cars and light trucks. If you park RVs, boats, or commercial vehicles, use 8 inches. Garage floors typically get 6 inches with rebar reinforcement. Shed foundations can be 4 inches. Always check local building codes as they may require greater thickness.
Light rain after 2-3 hours (after initial set) typically won’t damage concrete. Heavy rain before finishing is complete will pit and mar the surface. If rain is imminent, have tarps ready to cover the slab. After 24 hours, rain actually helps with curing. Before 2 hours, heavy rain can wash cement out and weaken concrete.
Most jurisdictions require permits for slabs over 100-200 square feet, any slab attached to a structure, and all driveways. Small detached patio slabs often don’t need permits, but rules vary by county. Call your local building department before starting. Permit fees typically run $50-200 and include inspections to verify proper construction.
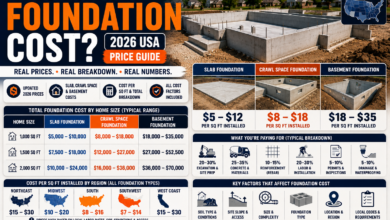
Materials (concrete, rebar, base material) cost $8-12 per square foot nationally for a 4-6 inch slab. Professional labor adds $3-6 per square foot. A typical 400-square-foot driveway costs $4,400-7,200 professionally installed, or $3,200-4,800 as a DIY project buying only materials. Prices vary by region, with California and Northeast states 20-30% higher than national average. Check 2026 pricing in your state.
Wait 7 days minimum before driving cars on a new driveway. Concrete reaches 70% of full strength at 7 days, which is adequate for normal passenger vehicles. For heavy trucks or moving vans, wait 14 days. Full design strength occurs at 28 days. Walking is safe after 24 hours. Driving too early causes permanent surface damage and cracking.
Use wire mesh (6×6 W1.4xW1.4) for sidewalks, patios, and light-duty slabs. Use rebar (#3 or #4 in grid pattern) for driveways, garage floors, and slabs supporting structures. Rebar is stronger and more expensive but necessary for high-traffic areas. Both must be suspended mid-slab on chairs to be effective. Calculate requirements with our rebar calculator.
🧮 Calculate Your Concrete Project Now
Get instant concrete calculations including cubic yards, costs, and material quantities. Our 2026 calculators provide state-specific pricing and detailed material lists for perfect planning.
Use Free Calculator →📚 Related Concrete Guides
- → How to Measure Concrete Properly – Accurate measurement techniques
- → Concrete Formula Calculation – Master the math behind concrete orders
- → Concrete Mixing Instructions – Perfect mix ratios every time
- → How to Finish Concrete – Professional finishing techniques
- → Concrete vs Asphalt Driveways – Compare your options
- → Driveway Cost Calculator – Estimate your driveway project